
You don’t need a pressure-mapping mat or a bike-fit studio to fix bike saddle comfort. With a ruler, a piece of cardboard, and an honest look at your posture, you can choose the right shape and padding, then confirm the fit with a three-ride experiment that takes a week—not a season. This guide explains sit-bone width, pelvic tilt, and handlebar drop in plain language, then walks you through a repeatable test so your next ride ends with legs that are pleasantly tired and a seat that you barely notice.
Why Saddles Hurt (and Why it’s Fixable)
Discomfort almost always comes from two things: pressure on soft tissue where there should be none, or vibration concentrated on a spot your body can’t tolerate for long. The first is about support—getting your sit bones to carry the load. The second is about posture and padding—aligning your pelvis and bars so weight rests on bone, then using the right degree of firmness to spread road buzz without creating mush. When you get those two right, chafing and numbness melt away, and saddle “feel” becomes background noise.
Sit-Bone Width: The One Number That Guides Shape
Your sit bones (ischial tuberosities) are the hard points designed to bear weight. Measure the distance between them and you’ll know the saddle width that can support you without squeezing soft tissue. You can do this at home in five minutes.
Quick at-Home Sit-Bone Measurement
Put a piece of corrugated cardboard or a thin foam kneeling pad on a hard chair. Sit as you do when you ride—upright for cruisers or city bikes, slightly forward for endurance road, more rotated for an aggressive position. Press down, then stand and find the two deepest impressions. Mark their centers and measure the distance. Add roughly 20–30 mm to get your saddle width. If your marks are 110 mm apart, look for a saddle around 130–140 mm. If they’re 130 mm, try 150–160 mm. This isn’t a law, but it’s the best starting point you can get without lab gear.
Pelvic Tilt: How Rotation Changes Everything
A pelvis that tips forward rotates your sit bones out of the main load path and brings more soft tissue toward the nose of the saddle. A neutral or slightly backward tilt brings those bones down onto the saddle’s rear platform, which is where you want the pressure. Your core strength, flexibility, and handlebar position all influence tilt, so “copy that pro’s setup” rarely ends well.
Pelvic Tilt, Explained
Stand tall, place a hand on your low back and one on your lower belly, then gently rock your pelvis forward and back. On the bike, a forward tilt is common in aggressive positions and time-trial setups. It pairs best with a saddle that has a supportive mid-section and a relieved or split nose to protect soft tissue. A more neutral tilt—typical of endurance road and gravel—likes a distinct rear platform with modest central relief. Upright riders need broad rear support and a gentle transition forward, not a sharp, narrow nose.
Bar Drop: Your Angle to the World
“Bar drop” is the height difference between your saddle and the tops of your handlebar. More drop means more forward rotation at the hips and more weight on your hands and the saddle nose. Less drop shifts weight back onto your sit bones. If you struggle with perineal pressure or numbness, a first-aid fix can be as simple as reducing bar drop by 10–20 mm with spacers or a slightly shorter, higher-rise stem. Small changes make big differences in comfort, especially over an hour or more.
Bar Drop Reality Check
From the side, have a friend snap a photo while you’re riding lightly on the trainer or rollers. Draw an imaginary line through your hip joint. If your torso angle is extremely low but you mostly ride social paces, consider bringing the bars up a touch. If your torso is very upright yet you feel tailbone soreness, your saddle might be too soft or tilted up; flatten it slightly and reassess.
Padding and Shell: Firm Isn’t Unkind, Soft Isn’t Gentle
A firm saddle with a supportive shell spreads pressure across bone and avoids pinching soft tissue. A very soft saddle can feel wonderful for ten minutes, then “swell” into pressure points as foam compresses. Match firmness to posture. Upright riders who load the rear platform can use a bit more cushion. Aggressive riders who rotate forward usually prefer firmer, shaped support with a central channel or cutout. The goal is shape first, then padding. If the shape props up your bones, minimal foam can feel miraculous; if the shape is wrong, extra foam just delays the ache.
The Three-Ride Experiment: Confirm Fit Without Guesswork
You’ve estimated width, thought about tilt, and checked bar drop. Now prove it with a simple, controlled plan. Keep every other variable stable—clothing, tires, and route—so the saddle’s behavior is the only thing changing.
Ride One: Baseline and Tilt
Do 45–60 minutes at easy-to-moderate effort on familiar roads or a trainer. Start with the saddle level using a simple bubble level or a smartphone app. After 15 minutes, note where you feel pressure. If it’s on soft tissue, tilt the nose down by 1 degree—about a millimeter or two at the nose—and ride another 15 minutes. If you feel like you’re sliding forward and bracing with your hands, tilt the nose up by 1 degree and repeat. End the ride on the best of those micro-angles and record it.
Ride Two: Width and Fore-Aft
Keeping the new tilt, do 60–75 minutes. If the rear platform feels too narrow—pinch on the outer edges of your sit bones—your measured width may be undersized; go up one size. If you feel chafing at the inner thighs, you may be too wide or the saddle may sit too far forward. Slide the saddle back 5 mm and test again. Fore-aft also controls how your knee tracks over the pedal spindle; you’re looking for a natural, round pedal stroke without reaching or tucking.
Ride Three: Intensity and Real World
Now put mild intensity into the mix. Add a few short, steady efforts in the tempo range and a handful of seated climbs. If numbness appears only during harder work, open the hip angle by lifting the bars slightly or by sliding the saddle back a few millimeters to reduce nose pressure. If tailbone pressure appears on climbs, bring the saddle forward a few millimeters so you’re not perching on the very back edge.
By the end of the third ride, most riders have a clear winner: the angle that disappears beneath them and the position that keeps pressure on bone during steady efforts and punchy moments.
Fine-Tuning Without Gadgets

Chamois cream can reduce friction while you dial things in, but it shouldn’t be a permanent crutch. Shorts matter; a high-quality chamois with consistent density prevents seams and wrinkles from becoming hot spots. If you rotate between multiple bikes, measure from the bottom bracket to the saddle top, and from the saddle nose to the handlebar center, so your contact points stay consistent across the fleet. Consistency beats chasing comfort from ride to ride.
When It’s Time to Change the Saddle
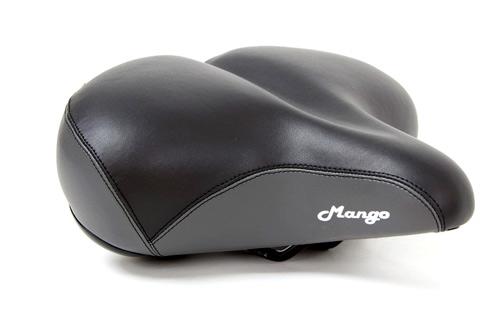
Some shapes simply don’t match your anatomy, no matter how carefully you measure. If, after the three-ride test, you still have persistent soft-tissue pressure, swelling, or numbness, move on. For upright city, comfort, or cruiser posture, consider a wide, gently contoured option with real rear support and soft-tissue relief, such as the Mango Cruiser Bike Seat Saddle. If your rides are longer or your posture is more forward, look for a firmer, performance-oriented platform with a defined channel; the same sit-bone width rules apply.
Care and Setup That Keep Comfort Consistent
Re-check torque on the seatpost clamp after your first few rides; micro-slips change angle and ruin good work. Mark your post and rails with a thin paint pen so you can always return to the setting that works. Wash shorts gently and avoid fabric softeners that leave residue in the chamois. If you ride in the rain, let your saddle dry naturally; excess heat can distort foam and cover.
The Takeaway: Comfort is a System, Not a Mystery

Saddle comfort isn’t luck. It’s alignment—of your bones with the saddle’s platform, your pelvis with your bars, and your expectations with how you actually ride. Measure sit-bones, respect pelvic tilt, sanity-check bar drop, and then run the three-ride experiment. The result is a saddle that vanishes under you so your rides are about scenery, friends, and speed—not counting miles to the next stoplight.
We ride and fit every day, and we’re happy to help you translate numbers and posture into real comfort. If you want a second opinion on width, shape, or bar drop—or you’re choosing a supportive option for upright cruising like the Mango Cruiser Bike Seat Saddle—tell us about your routes, ride time, and current setup. At Bikes Direct, we treat bike saddle comfort as solvable with simple tools and clear steps. When you’re ready, contact our team and we’ll help you get the fit right so every mile feels like the best seat in the house.