Explore how electric Fat bike riding transforms winter adventures. This infographic highlights why fat bikes excel on snow, sand, and slush, the benefits of electric assist, the importance of wide tires, and battery tips for cold weather. Discover how riders enjoy safer, smoother, and more confident winter rides in challenging conditions.
Most riders remember the exact moment they realized a bicycle could take them farther than expected. For me, it happened on a quiet dirt road at sunset, when a short afternoon ride stretched into an unplanned overnight adventure. With nothing more than a packed lunch, a basic sleeping bag, and my everyday bike, I discovered the simple joy of carrying everything I needed on two wheels.
That experience is what makes bikepacking so powerful—and so accessible. You don’t need a high-end touring setup or a suitcase full of exotic gear. With the right budget bikepacking tips, even a modest bicycle and a few smart packing choices can open the door to multi-day rides through forests, deserts, parks, and backroads.
Bikepacking is for anyone curious enough to roll down a gravel path and see where it leads. And when you approach it with creativity instead of overspending, it becomes one of the most affordable outdoor hobbies you can start.
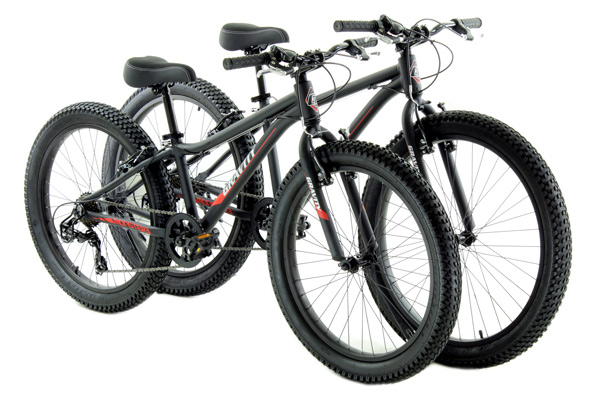
Starting With the Bike You Already Have
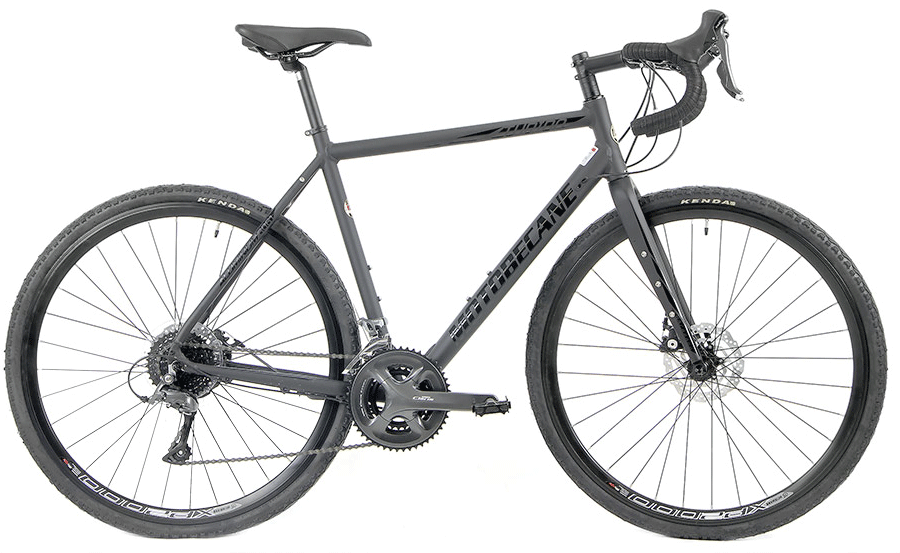
Many new riders assume bikepacking requires a purpose-built adventure machine, but that’s simply not true. Whether you ride a hybrid bike, a rugged mountain bike, or a capable gravel bike, the bike you already own can likely handle your first overnight trip.
What matters most isn’t having the perfect machine—it’s getting your bike into reliable condition. Before heading out, check your tires, brakes, drivetrain health, and fit. Even small adjustments, like fine-tuning your saddle height or replacing worn brake pads, can make long hours in the saddle far more comfortable.
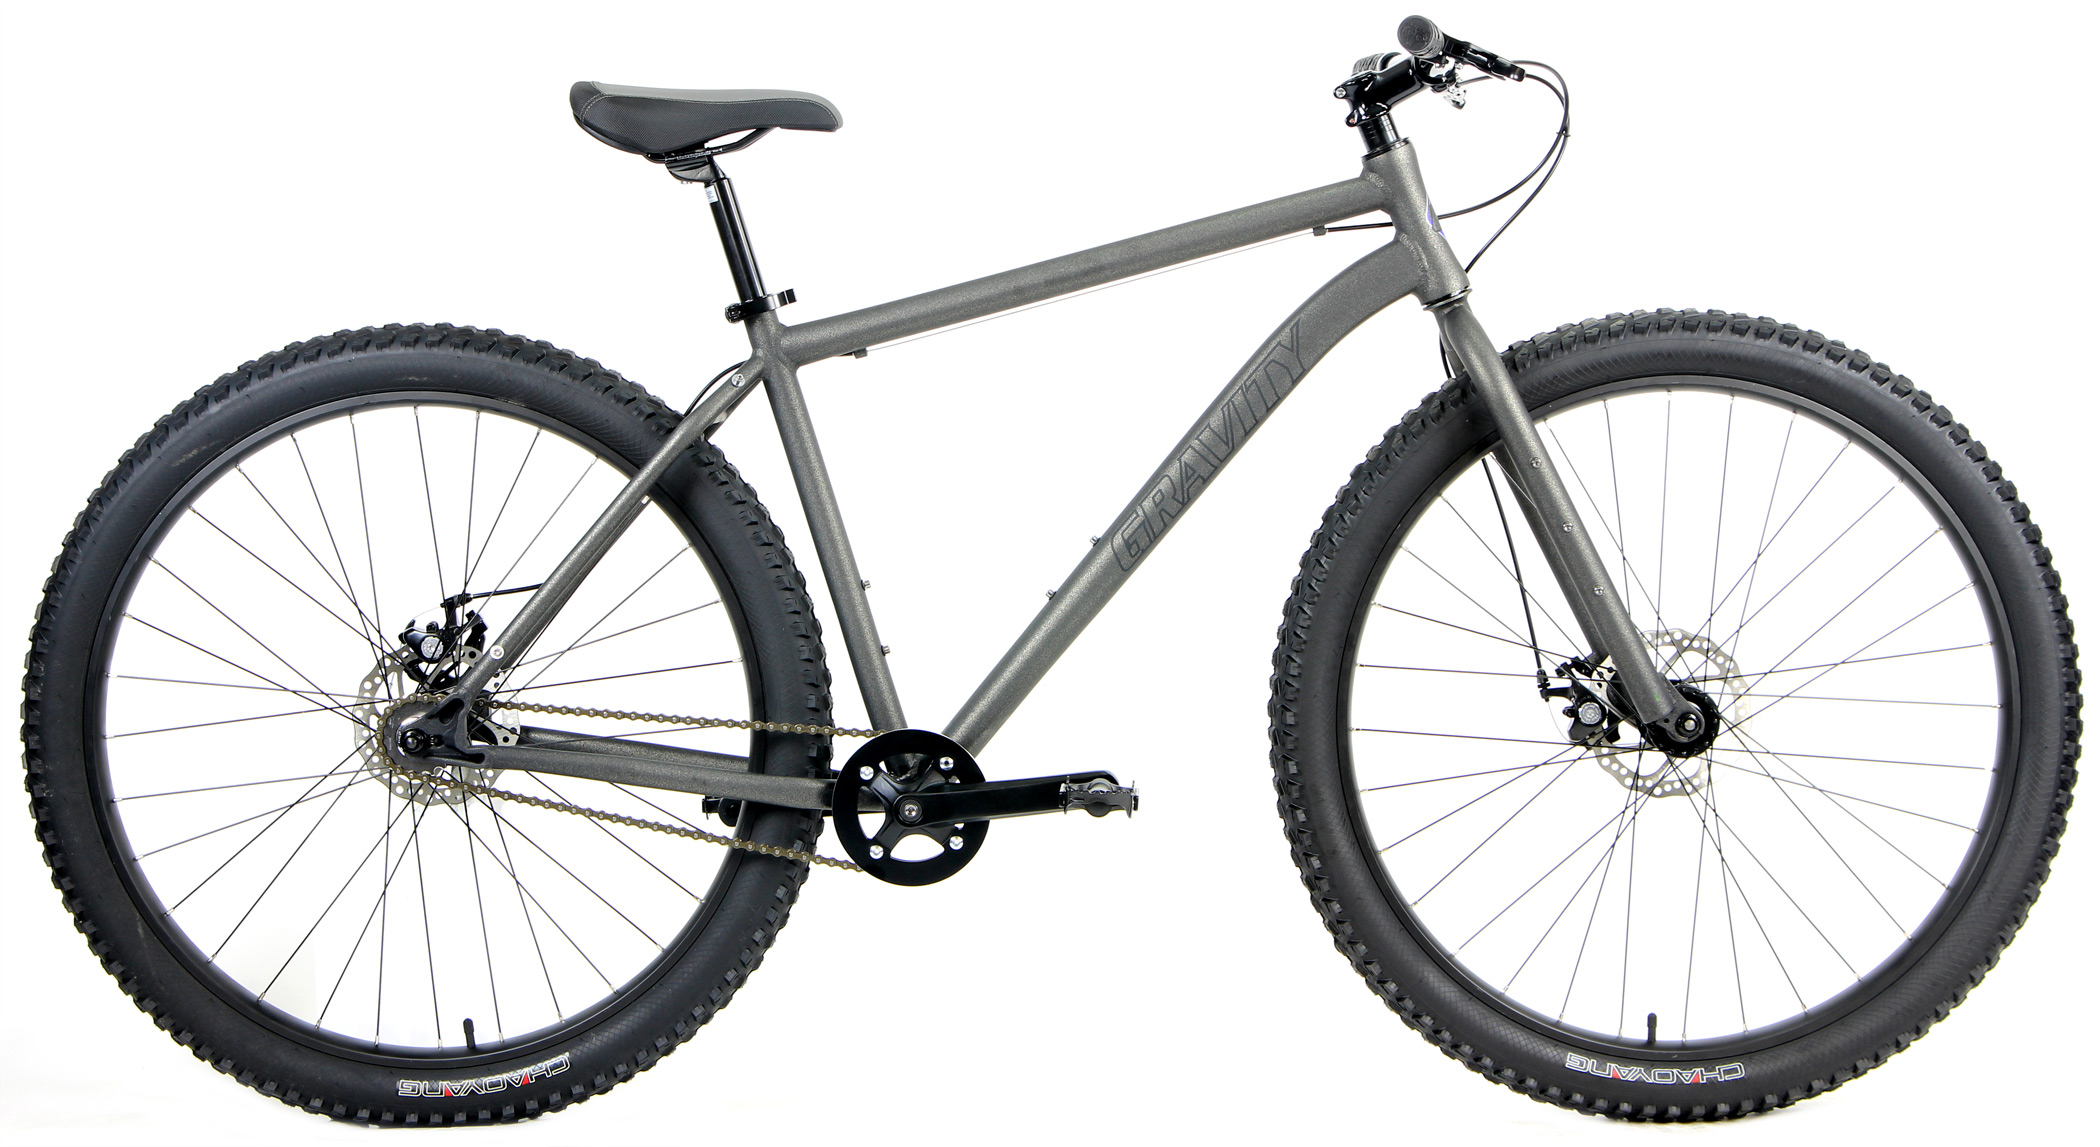
And yes, even a standard road bike can be adapted for light touring when paired with wider tires and a thoughtful route choice. As for softer or sandy terrain, a fat bike can transform loose surfaces into a smooth, confidence-building ride. And if you prefer laid-back coastal routes with overnight stops, a beach cruiser can offer a surprisingly enjoyable bikepacking experience, especially on beachfront campgrounds and boardwalk-accessible paths.
Your bike is your companion, but it doesn’t need to be expensive to be capable.
Budget-Friendly Gear That Works for Real Adventures
One of the biggest misconceptions about bikepacking is that you need sleek, premium bikepacking bags to get started. In reality, riders have been creatively carrying supplies long before those products existed.
Dry bags, small duffel bags, and even repurposed backpacks can be strapped securely to a rear rack or handlebars using simple Voile-style straps. These low-cost solutions are waterproof, lightweight, and extremely durable. The key is balancing your load so the bike feels stable—front-heavy setups may feel twitchy, while rear-heavy loads can affect climbing efficiency.
Sleeping gear doesn’t need to be expensive either. Foam sleeping pads weigh almost nothing and provide invaluable insulation. Affordable synthetic sleeping bags work well in unpredictable conditions. And if you’re camping during warm-season trips, even a lightweight blanket or emergency bivy can get you through the night comfortably.
Navigation also doesn’t require pricey GPS devices. Free route-planning apps and downloadable offline maps work perfectly for most beginner routes. The most important part is knowing your path, understanding bailout options, and planning realistic distances for each day.
With these budget bikepacking tips, beginners save money while learning their preferences before investing in premium gear later on.
Preparing Your Bike for Multi-Day Riding
Before heading out, take time to understand how your bike behaves under load. A few short test rides with packed gear can tell you a lot—how the bike balances, how your steering feels, and whether adjustments are needed.
Tire choice makes a massive difference in comfort and control. A gravel bike with 40mm rubber soaks up bumps better than narrow tires. A mountain bike makes technical terrain easier. And even a hybrid bike with semi-slick tires can carry you smoothly along mixed paths.
Lower gearing is helpful when climbing with a loaded bike. If your bike has a wide-range cassette, you’ll appreciate those easier gears on long fire roads or steep stretches. Ensure your brakes are responsive, especially if your route includes descents while carrying gear weight.
A comfortable fit is essential. No amount of gear can make up for numb hands, back soreness, or knee pain. Small changes—tilting the saddle slightly, adjusting bar height, or changing grips—can improve comfort dramatically.
The goal is to feel confident and relaxed on your bike before the trip begins.
Planning a Route Without Overcomplicating It
When starting out, keep your routes simple and enjoyable. Bikepacking is not about speed or performance—it’s about exploration. Forest service roads, state parks, gravel paths, canal trails, and low-traffic rural roads make ideal beginner terrain.
Always consider daily mileage carefully. Carrying gear will slow your pace, especially on climbs or rough surfaces. Your first overnight trip may only be 15–25 miles each way, and that’s more than enough to create an unforgettable experience.
Campsites are abundant and affordable, from public lands to established campgrounds. Reserving sites in advance is wise, but spontaneous riders can often rely on primitive campsites or dispersed camping areas.
Route planning is where budget bikepacking tips matter most—free campsites, public water sources, and easy access points reduce costs while providing a safe, manageable adventure.
Why Bikepacking Is More Accessible Than Ever
Today’s cycling culture embraces creativity, inclusiveness, and adventure over perfection. Riders are redefining what bikepacking looks like—some carry ultralight setups and cover huge distances, while others pack casual gear and wander through local parks.
The barrier to entry has never been lower, and riders are beginning to realize that the experience—not the equipment—creates the memories that last.
When you approach bikepacking with an open mind rather than an open wallet, even the simplest overnight journey feels meaningful.
Ready to Start Your First Adventure?
If you’ve been dreaming about taking your bike farther, bikepacking is your invitation to explore in a new way. Whether you’re riding forest trails, backroads, or sunrise-lit coastal paths, Bikesdirect.com offers the affordable bikes and gear that make your first adventure possible. We encourage you to browse our selection of hybrids, gravel bikes, mountain bikes, and more, so you can begin planning your next overnight escape with confidence and excitement.
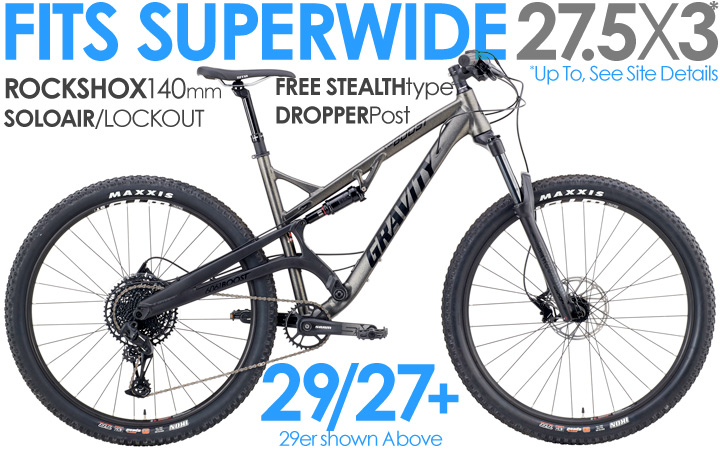
The first snowfall of the season always changes the way a city or trail feels. Roads quiet down, forest paths soften, and familiar routes transform into bright, rolling blankets of white. For many cyclists, this signals the end of riding season — the moment bikes head into storage. But for a growing number of riders, the season is just beginning. With the rise of the electric fat bike for winter, snow-packed commutes, frosty adventures, and off-season training sessions have become not only possible but surprisingly fun.
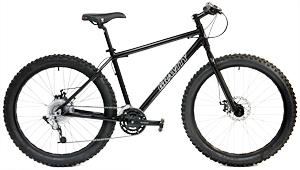
Fat bikes have always excelled in conditions that stop traditional bikes in their tracks. Those oversized tires grip surfaces that would overwhelm a typical road bike or narrow-tread commuter. Add electric assist into the equation, and winter riding becomes smoother, safer, and significantly more accessible. The experience is part snow machine, part trail cruiser, and entirely addictive.
As winter cycling gains momentum, electric fat bikes are stepping into the spotlight as the most capable year-round machines on two wheels.
Why Electric Fat Bikes Thrive in Winter Conditions
Fat bikes earned their reputation in snowy regions because of their unique ability to ride over surfaces that feel impossible on standard tires. Their wide footprint creates flotation, allowing riders to glide over snow, slush, and even icy patches with more control than any other bike category.
Electric assist transforms this capability into something more powerful. Riders no longer struggle through heavy snow or slow, energy-draining slush. Instead, they move with confidence — supported by consistent pedal assistance that keeps traction steady and momentum strong.
A traditional mountain bike might handle mild winter routes, but deep snow quickly bogs it down. A gravel bike slices through light mixed terrain, but its narrower tires limit winter versatility. Fat bikes solve this limitation with sheer surface contact, and electric power enhances that advantage by smoothing out resistance.
This combination is why so many winter commuters and adventure riders now consider e-fat bikes the most reliable machines for unpredictable seasonal conditions.
How Electric Assist Changes the Winter Riding Experience
Winter riding often means pushing against resistance — cold temperatures, heavy clothing, slower rolling surfaces, and unpredictable terrain. Electric assist changes the equation entirely. It allows riders to maintain steady speed through snow drifts, accelerate out of slippery corners, and climb frosty hills without exhausting themselves.
This consistency matters for safety as much as comfort. Sudden stops or hard efforts in icy conditions increase the risk of sliding. Electric support helps maintain smooth, predictable pedaling, which keeps the rear wheel planted. Commuters especially appreciate this because it reduces effort on days when they simply need to get to work without fighting the elements.
Even riders who enjoy the challenge of winter training benefit from electric assist. Using an electric fat bike for winter does not replace fitness — it enhances mileage and lets riders explore more terrain safely.
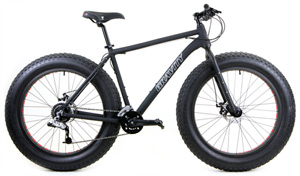
Tire Choice: The Heart of Fat Bike Performance
The defining feature of any fat bike is its tires. While they are naturally suited for winter, choosing the right tread pattern makes a noticeable difference. Open, aggressive tread works best for fresh snow and loose conditions. Semi-slick tires roll faster on packed snow and shoulder-season slush.
Lower tire pressure is another benefit that sets fat bikes apart. Riders can reduce pressure significantly for added flotation, allowing the bike to “float” across snow rather than sink into it. Electric assist compensates for the softer rolling resistance, making the ride feel incredibly smooth.
For areas with frequent ice, some riders even opt for studded fat tires for additional grip. While not always necessary, they create unmatched confidence during freeze-thaw cycles.
Compared to a hybrid bike or beach cruiser, fat tires deliver an entirely different level of traction and stability — a difference that becomes clear the moment you roll into snowy terrain.
Battery Considerations for Cold-Weather Riding
Cold temperatures affect all batteries, including those found in electric bikes. Understanding how to care for an e-fat bike battery in winter ensures strong performance throughout the season.
Lithium-ion batteries lose efficiency as temperatures drop, meaning riders may notice reduced range. To manage this, it helps to store the battery indoors and attach it just before riding. Keeping it warm until departure significantly improves cold-weather performance.
Riders should also consider realistic range expectations. Deep snow requires more power, as does climbing with heavy layers or pushing through slushy terrain. Planning routes with shorter segments or known charging points ensures smooth riding even in extreme conditions.
Modern e-fat bikes are designed to perform well in winter, but a little seasonal awareness keeps the experience stress-free.
Safety Tips That Elevate Winter Riding Confidence
Winter riding rewards preparation. Bright clothing improves visibility during shorter daylight hours. Wider lights — both front and rear — help cut through snowfall. Layering keeps riders warm without overheating, and waterproof outerwear blocks wind effectively.
Riding technique matters too. Smooth pedaling and gradual braking maintain traction. Riders accustomed to the sharper handling of a road bike or gravel bike often find fat bikes remarkably stable because of their wide stance and forgiving ride feel.
Body position should stay relaxed, with weight distributed evenly between wheels. Fat bikes provide stability, but winter surfaces still require sensitivity and awareness.
The most important safety rule: ride at a pace that reflects conditions, not habits. Electric assist helps maintain flow, but mindful control ensures every winter ride feels confident and enjoyable.
Electric Fat Bikes Aren’t Just for Winter — They Shine Year-Round
While many riders buy an electric fat bike for winter, they soon discover just how versatile these machines are beyond snowy months. Sand becomes an entirely new playground, whether cruising along lakesides or carving seaside paths. Soft dirt, loose gravel, and muddy spring trails also become far more manageable with wider tires and electric power.
Some riders even switch between multiple bikes depending on conditions — using a fat bike in winter, a faster road bike in summer, or a versatile hybrid bike for everyday commuting. But e-fat bikes increasingly serve as a do-everything platform for riders who value adventure more than speed.
Whether you want to ride all year, explore new terrain, or develop winter cycling confidence, electric fat bikes offer a sense of freedom that most bikes simply cannot match.
Why Riders Are Making the Switch This Year
Demand for electric fat bikes has grown quickly as more cyclists discover how capable they are in challenging environments. Riders who once packed away bikes for months now stay active without major seasonal interruptions. Commuters enjoy a reliable alternative to winter driving. Adventurers expand their playground from gravel paths to snowy forests. And fitness riders take advantage of steady effort levels regardless of temperature or terrain.
The rising popularity mirrors a broader shift toward more robust, versatile cycling gear — equipment built for real-world conditions rather than perfect riding days.
An electric fat bike for winter reflects this practical, adventure-ready mindset perfectly.
Discover the Joy of Winter Riding
If you have ever wondered what winter cycling feels like — the crunch of fresh snow under wide tires, the quiet of cold morning trails, the satisfaction of staying active all year — now is the perfect time to explore electric fat bikes. These machines make winter not just bearable, but memorable.
Head to Bikesdirect.com to find the electric fat bike that matches your riding style, terrain, and year-round goals.
Winter is calling — and with the right bike, you can answer it in style.
Two riders rolled into a frozen trailhead last January. The parking lot was quiet, snow piled high, and every usual weekend cyclist had disappeared indoors. One of the riders was on a traditional suspension mountain bike. The other had wheels almost twice as wide: a fat bike.
They dropped into the woods together. Minutes later, the mountain bike wobbled, lost traction, and slowed to a crawl. Meanwhile, the fat bike floated across the surface like a snowshoe.
When they reached the clearing, both were smiling — but one had worked much harder. The experience sparked a conversation that has been growing for years:
Which bike performs better year-round: a fat bike or a mountain bike?
This question is bigger than winter. It affects summer singletrack, beach access, gravel epics, and shoulder-season mud. To answer it clearly, we must look beyond marketing and examine how both bikes behave in real conditions—across twelve months of riding.
Why This Comparison Matters in 2025
Cycling has changed. A decade ago, mountain bikes dominated trails, and fat bikes were still a niche winter tool. Today, the situation is different. Riders now want:
Comfort Confidence Versatility Four-season access
People are choosing bikes not only for performance but for lifestyle. For many, the bike is a way to stay outside all year, avoid gym treadmills, and explore more terrain locally.
That is why the fat bike vs mountain bike discussion has become important. Each bike represents a philosophy.
A mountain bike says: Ride fast, flow hard, and carve the trail.
A fat bike says: Ride always — no seasons, no limits.
Understanding how those philosophies translate to actual riding helps cyclists choose wisely.
Defining the Bikes: What Really Makes Them Different
Before comparing performance, we must define what separates the two machines.
A mountain bike uses narrower tires, usually 2.0–2.6 inches. They feature:
• Front suspension, sometimes full suspension • Faster rolling speed • Lower rotational mass • Sharper handling
Mountain bikes excel in:
• Dry singletrack • Technical climbs • Fast descents • Forest loops • Rocks and roots
Both bikes handle rough terrain — but they do so differently.
Winter: Where the Fat Bike Becomes the King
When the first snow falls, riders split into two groups:
Group one puts their bikes away. Group two keeps riding — and they are usually on fat bikes.
Fat bikes were originally designed for Alaskan snow races. Their width distributes weight so tires float on the surface instead of sinking. Even slush, powder, and refrozen tracks remain rideable.
Traction is almost supernatural.
Climbs that would be impossible on narrow tires become accessible. Corners that would cause sliding on a mountain bike feel controlled.
In winter:
Fat bike wins clearly.
Mountain bikes can ride with studded tires, but the narrower footprint will still sink when the snow deepens. No suspension, brake upgrade, or frame geometry can overcome physics when surface conditions are soft.
Summer: Where the Mountain Bike Returns to the Throne
When snow melts and trails dry, mountain bikes reclaim dominance. Their lighter wheels and faster tire profiles are designed for momentum, acceleration, and directional precision.
On summer singletrack:
• Cornering is sharper • Climbing efficiency is higher • Descending feels more dynamic
A mountain bike rewards technique. Riders can carve lines, pump rollers, and launch small features. The sensation is playful and fast.
Fat bikes still work in summer, and many riders enjoy them, but they feel different. Steering is slower. Acceleration requires more effort. On long climbs, the rider feels the extra mass in the wheels.
In summer:
Mountain bike wins decisively.
Spring and Fall: Two Seasons, Shared Advantages
What surprises many riders is how well fat bikes handle spring and fall. These are messy seasons:
Wet leaves Mud Roots Freeze–thaw cycles
Fat tires maintain traction when debris masks the trail or when moisture makes surfaces unpredictable. Meanwhile, mountain bikes excel when conditions dry out even briefly.
Across both seasons:
It depends on the day.
Some weekends are muddy and slick — perfect fat bike territory. Others are tacky and fast — ideal mountain bike weather.
This shared strength is why many riders eventually want both.
Climbing: Efficiency vs Grip
Climbing highlights one of the clearest differences.
A mountain bike uses:
• Light wheels • Fast tires • Narrow footprint
Momentum is preserved, and the bike rewards steady cadence.
Meanwhile, fat bikes climb extremely well when traction is poor. On snow or wet clay, they grip where nothing else would. But when the slope gets steep and dry, heavier wheels become noticeable.
To summarize:
Mountain bike climbs faster on dry terrain. Fat bike climbs better on low-traction surfaces.
This is not a tie — it is specialization.
Descending: Precision or Plow?
Descending exposes another difference in riding feel.
A mountain bike descends like a scalpel:
Sharp Reactive Linked to rider technique
Suspension smooths rough sections while geometry keeps the wheelbase stable at speed.
A fat bike descends like a bulldozer:
Stable Comfortable Unbothered by roots and ruts
Large tires act as suspension, muting trail chatter. The bike feels calmer, but less precise. Cornering is slower, and riders rely on body movement instead of razor steering.
Neither is objectively better. It depends on preference.
If a rider values speed and agility, mountain wins. If comfort and traction matter most, fat wins.
Rider Comfort and Daily Enjoyment
One of the most overlooked benefits of fat bikes is comfort. The high-volume tires absorb vibration, especially on gravel paths, boardwalks, and multi-use trails.
This makes fat bikes appealing to:
New riders Families Riders with joint sensitivity Beach or snow communities
Mountain bikes can be comfortable, especially with suspension, but fat bikes often feel like floating.
This explains a trend: many riders who do not race choose fat bikes simply because they enjoy riding them more.
All-Season Use: The Real Decision Point
Most riders do not buy a bike for racing or peak performance. They buy it to stay active, go outside, and integrate movement into everyday life. When viewed this way, seasonality matters.
If winter riding is part of your lifestyle, a fat bike opens months that otherwise disappear. Trails that are closed to cars or unridable by narrow tires suddenly become adventure routes.
If summers are long and dry where you live, a mountain bike keeps energy high and speed addictive.
Both bikes serve a full year — just differently.
Considering Other Categories: Hybrid, Gravel, Road, and Cruiser
Before choosing between fat and mountain, some riders benefit from understanding related categories.
A Hybrid Bike combines comfort and efficiency for commuting, paved paths, and fitness riding. It is not a replacement for a trail bike, but it complements one.
A Gravel Bike fills the gap between pavement and dirt roads. Many riders use them for exploration, bikepacking, and adventure loops that include pavement and trails.
A Road Bike offers pure speed and cardio training on asphalt.
A Beach Cruiser provides relaxed coastal riding with an upright posture.
These categories are not competing — they are tools. Many riders eventually own two or three because each delivers joy in different conditions.
Real-World Scenarios: Which Bike Wins?
Let’s look at practical situations.
Scenario 1: Snowy Suburb With Plowed Roads
If winter is long, icy, and snowy, a fat bike is transformational. Even bike paths become rideable. Winter no longer means inactivity.
Winner: Fat bike
Scenario 2: Rocky, Rooted, Dry Forest Singletrack
Mountain bikes dominate here. Line choice, suspension, and geometry matter.
Winner: Mountain bike
Scenario 3: Beach Town or Sand Dunes
Fat tires float. Narrow tires sink.
Winner: Fat bike
Scenario 4: Summer Trail System
Speed, cornering, and agility define summer riding.
Winner: Mountain bike
Scenario 5: Year-Round Fitness Rider Who Wants Only One Bike
It depends on the climate.
If winter is intense → fat bike If winter is mild → mountain bike
There is no universal answer — only local truth.
Long-Term Ownership: Cost and Maintenance
A surprising detail: fat bikes often have lower mechanical wear because tires absorb impact. Components experience less shock. Maintenance tends to be:
This is not a disadvantage — it reflects their performance engineering. Riders who enjoy tuning, upgrading, and optimizing love it.
Fat bikes can be rugged, low-maintenance machines that feel reliable through the seasons.
What Experienced Riders Say
At trailheads across North America, the pattern repeats:
Many seasoned riders own both.
The mountain bike comes out when conditions are perfect. The fat bike comes out when conditions are impossible.
Ask them which bike they would give up, and many choose to keep the fat bike. Why? Because without it, winter disappears.
The Best Year-Round Strategy
If choosing only one:
• If weather is harsh → choose fat • If trails are mostly dry → choose mountain
If choosing the best lifestyle solution:
Own both over time.
It is not extravagance. It is optimizing joy.
Why Bikesdirect Makes This Easier
At traditional retail shops, pricing often reflects overhead. Bikesdirect uses a direct-to-consumer model that removes middle layers. Riders get more bike per dollar.
Whether you want a year-round fat bike, a trail-focused mountain bike, or something in between, you can compare components, specifications, and geometry without pressure.
You will find:
• Hydraulic brakes at lower prices • Suspension choices • Alloy and carbon frames • Name-brand drivetrains • Bikes for every season
This makes the fat bike vs mountain bike question a lifestyle decision, not a financial limitation.
Conclusion: The True Winner Is the Rider Who Keeps Riding
The comparison is not about superiority. It is about access. The rider who stays outdoors more months of the year gains:
Better fitness More sunlight More nature More joy
If snow, sand, and slush are part of your world, a fat bike unlocks seasons.
If speed, flow, and summer trails define your riding, a mountain bike delivers endless fun.
If you want both? The paths are waiting.
If the idea of choosing between a fat bike and a mountain bike has you rethinking the trails you could ride this year, the next step is simple: explore the options that match your terrain and your lifestyle. Bikesdirect makes it easy to compare components, pricing, and ride characteristics across both categories without retail markup.
Riders who want winter traction, summer speed, and all-season freedom will find models ready to perform year-round. Whether you ride snow, sand, singletrack, or park paths, there is a bike built to make every season rideable. Visit Bikesdirect, browse the latest fat bikes and mountain bikes, and keep riding every month of the year.
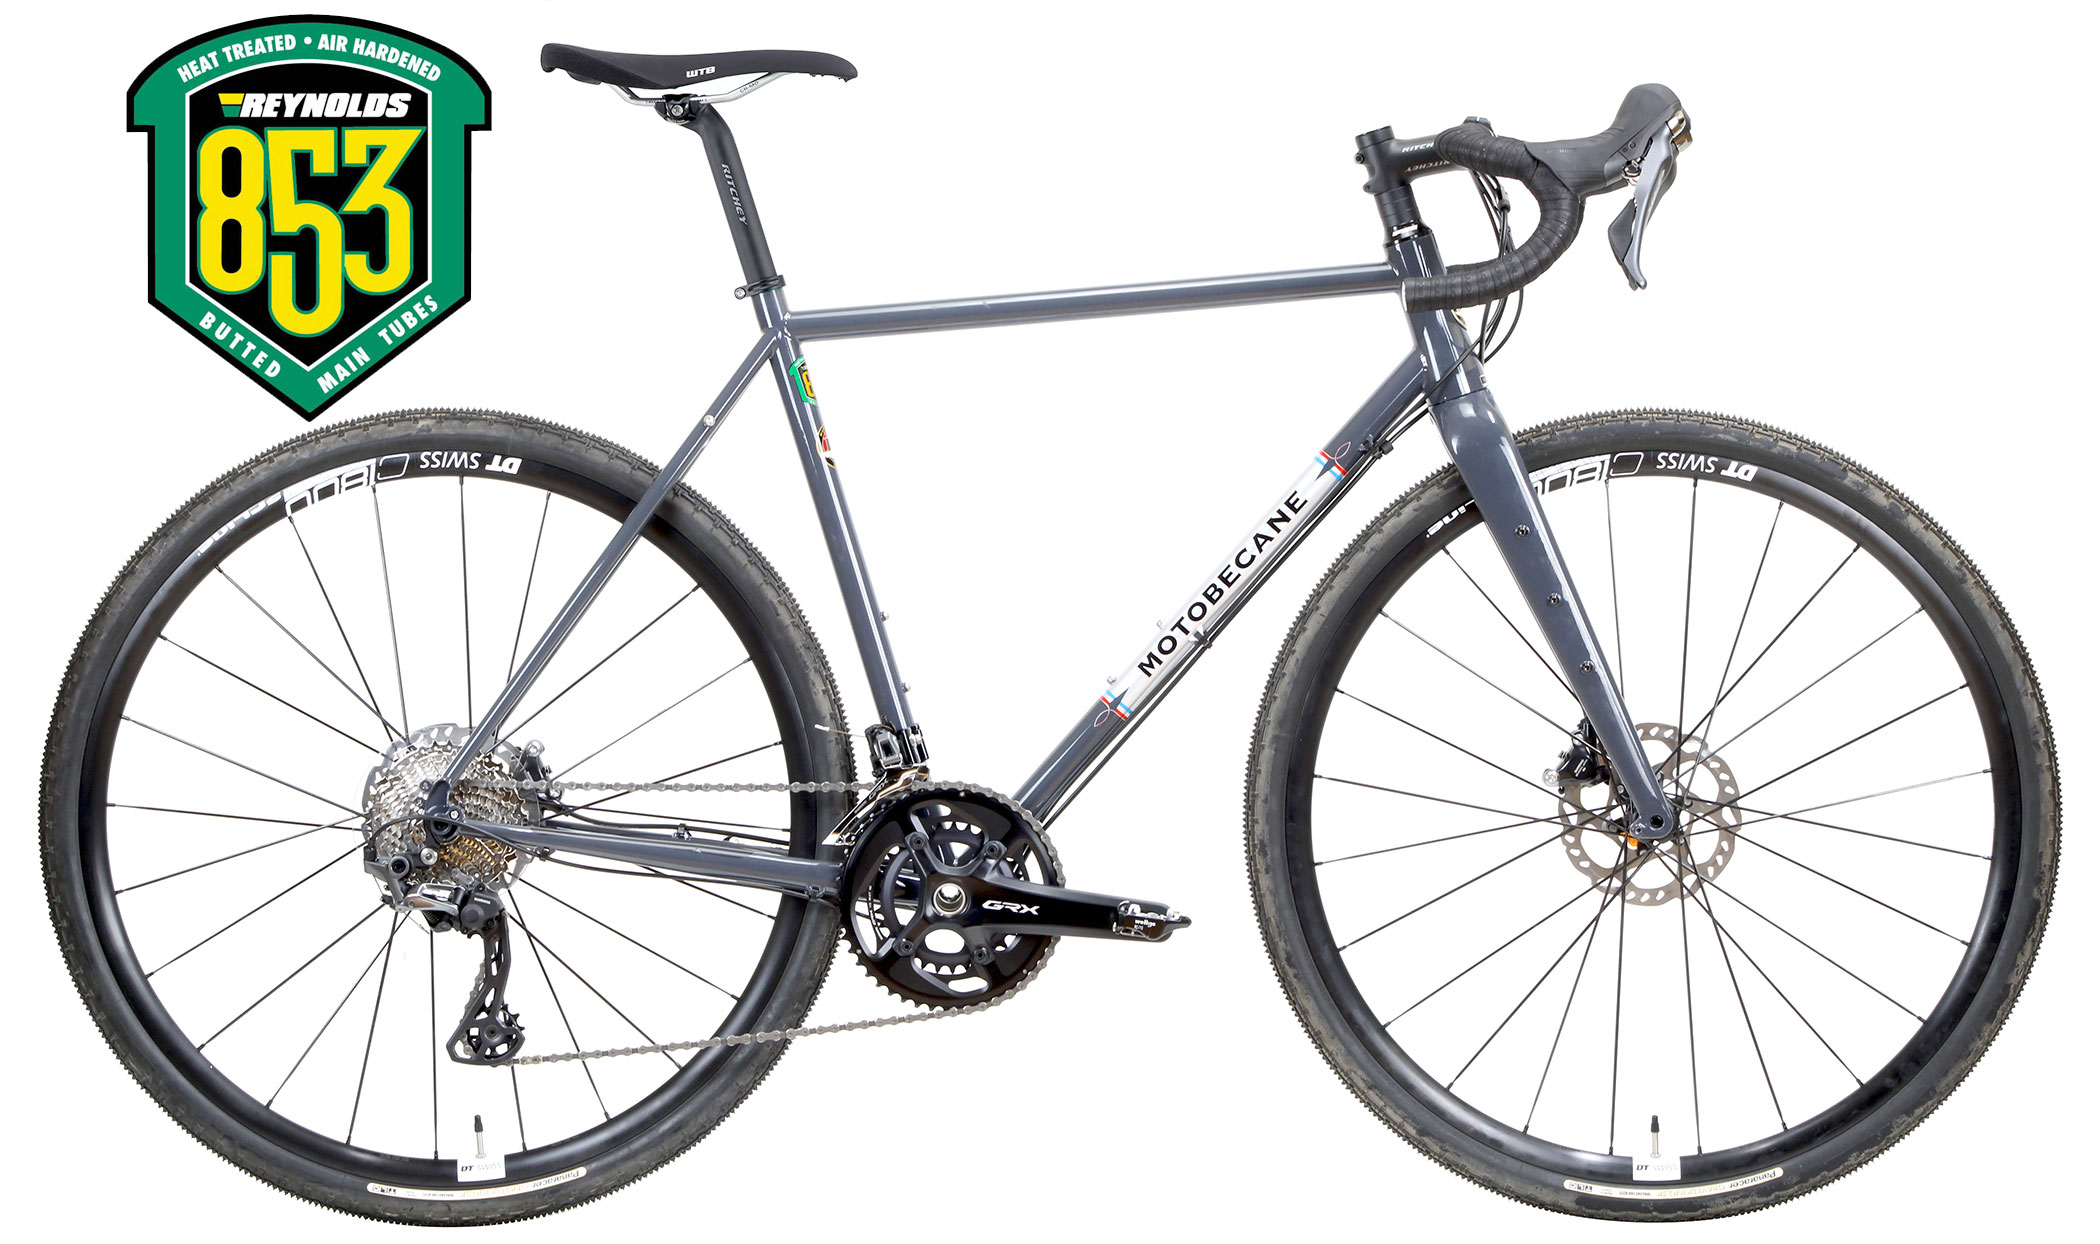
A few years ago, the idea of choosing a steel-frame bike sounded almost nostalgic, like rediscovering vinyl records or mechanical watches. Many cyclists were chasing the lightest carbon build or the stiffest aluminum race machine. But as trends cycle — both culturally and in cycling — something interesting happened. Riders began craving durability, comfort, longevity, and a certain soulful riding experience that modern materials could not fully replicate. Suddenly, steel was no longer “old school”; it was the newest rediscovery.
Today, the steel frame bike revival is impossible to ignore. Whether you browse group rides, gravel events, or bikepacking forums, you will find passionate riders swapping carbon for chromoly and Reynolds tubing. Steel bikes are capturing attention for their resilience, repairability, sustainability, and unmistakable ride feel — a combination that appeals to newer cyclists and seasoned riders alike.
Why Steel Is Resurfacing in a Carbon-Dominated World
Modern cyclists face more choices than ever before. With options like an aerodynamic road bike, a rugged mountain bike, an adaptable gravel bike, or a casual beach cruiser, riders often expect advanced materials and high-tech designs. Yet steel persists — and grows — because it fills gaps that lighter materials struggle to address.
Unlike carbon, which can fail suddenly under stress or impact, steel bends rather than breaks. It has a natural resilience that inspires confidence, especially for riders who tackle long distances or unpredictable terrain. Aluminum, while affordable and lightweight, has a harsher ride feel that transfers more vibration into the body. Steel smooths those same vibrations with an elegant, spring-like quality that many cyclists describe as “alive.”
Riders who once overlooked steel now come back to it for a more organic, forgiving ride — something increasingly valuable as cycling shifts toward adventure riding, all-surface exploration, and everyday practicality.
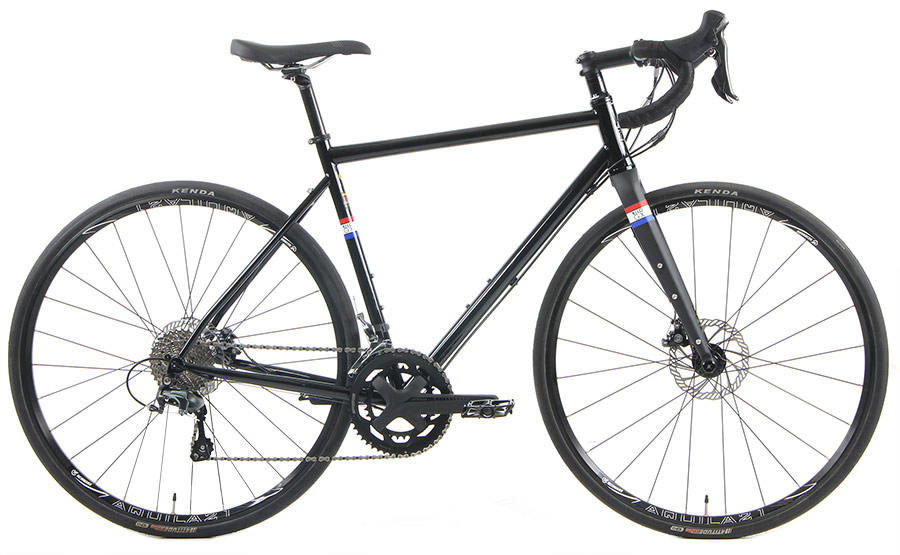
Filename: motobecane-steel-urban-fitness-bike.png Alt-text: Steel-frame Motobecane fitness and urban bike featuring a simple drivetrain and disc brakes for everyday reliability and comfort. Caption: Urban riders drawn to steel appreciate its strength and forgiving ride feel, making bikes like this ideal for daily commutes, fitness loops, and long-lasting value.
Comfort: One of Steel’s Most Valuable Advantages
If you ask riders why they joined the steel frame bike revival, comfort is usually the first reason they mention. Steel’s unique ability to absorb road buzz without feeling dull creates a ride quality that stands apart from carbon or aluminum frames. Over long distances, especially on mixed terrain, the difference becomes especially noticeable.
This is one reason steel thrives in the gravel scene. Cyclists who choose a gravel bike built with steel appreciate how it softens washboard roads, allows stable cornering, and maintains predictable handling when the terrain gets rough. Unlike carbon, which often focuses on stiffness and weight, steel prioritizes feel — the kind of smooth, harmonized ride that encourages exploration instead of exhaustion.
The same comfort benefits appear in other categories. A steel commuter or hybrid bike transforms uneven pavement into a manageable path. Touring riders rely on steel for all-day support, while bikepackers appreciate its ability to maintain composure under heavy gear loads.
Comfort may not be visible on a spec sheet, but riders feel it instantly.
Durability That Outlasts Trends and Terrain
Steel has always been known for its longevity, and that reputation is only strengthening in 2025. When properly cared for, steel frames can last decades. Many riders still cherish steel bikes from the 1980s and ’90s, using them for commuting, training, or restoration projects. Steel’s ability to age gracefully is part of its charm.
For the adventurous cyclist, durability means freedom. A steel mountain bike can withstand impacts, vibrations, and long-term stress that might compromise other materials. A steel adventure or gravel frame can handle demanding multi-day trips, heavy cargo, and unpredictable weather without worry.
In a cycling market that sometimes feels obsessed with the latest model or material, steel provides something refreshing: confidence in the long term.
Repairability: The Practical Rider’s Secret Weapon
One of the most practical advantages steel offers — and a key reason behind the steel frame bike revival — is ease of repair. If a steel frame sustains damage, skilled welders can repair it, often restoring the bike to perfect condition. This level of longevity is something carbon cannot match. Carbon requires specialized treatments, and repairs may never fully regain original strength.
This matters especially for riders who travel or adventure far from home. Touring cyclists, bikepackers, and long-distance commuters know that unexpected mishaps happen. Whether from an accident, transportation damage, or even a dropped bike, steel gives riders peace of mind. Help is often available locally.
Flexibility and repairability make steel not just a nostalgic choice, but a practical and sustainable one.
Modern riders increasingly value sustainability, and steel naturally aligns with that mindset. Steel is one of the most recyclable materials on earth. It can be repurposed and reused without losing structural integrity, making it far more environmentally friendly than carbon composites or aluminum alloys.
Cyclists committed to reducing their environmental footprint — including those who ride fat-tire adventure rigs, mixed-surface explorers, or simple fat bike commuters — appreciate knowing their frame choice supports longevity rather than disposability.
Steel’s long lifespan further contributes to sustainability. A bike that lasts decades requires fewer replacements, fewer resources, and less manufacturing waste. As the world pushes for greener transportation solutions, steel stands as a material that naturally supports those goals.
Aesthetics: The Retro Look Riders Love
Steel frames exude character. Their slim tubes, elegant welds, and classic silhouettes evoke earlier eras of cycling — an era many riders find appealing, even comforting. While carbon frames look futuristic and aluminum bikes often appear industrial, steel blends timeless craftsmanship with modern performance.
This aesthetic charm has helped fuel interest in steel-framed commuters and cruisers. Riders choosing a stylish beach cruiser or a classic touring design often gravitate toward steel for its visual warmth and nostalgic appeal. In a world full of ultra-modern bikes, steel stands out by standing still — and that authenticity resonates.
Filename: gravity-carbon-gravel-bike-apex1x11-contrast.png Alt-text: Carbon gravel bike with SRAM Apex 1×11 drivetrain and wide tire clearance, designed for speed and mixed-terrain versatility. Caption: While carbon bikes excel in lightweight performance, comparing them to steel highlights why many cyclists are rediscovering steel’s comfort, durability, and repairability in the modern era.
Modern Steel Is Better Than Ever
Today’s steel bikes are not the heavy, clunky machines some might remember. With refined tubing like Reynolds 520 or 853, steel offers surprising lightness alongside unmatched resilience. These modern steels provide strength-to-weight ratios that rival many aluminum frames while still maintaining steel’s signature ride feel.
Manufacturers now combine steel with advanced components such as hydraulic disc brakes, wide tire clearance, modern drivetrains, and performance geometries. Whether you are looking for a fast steel road bike, a rugged gravel machine, or a versatile urban hybrid, the options are far more advanced than vintage models.
The revival is not about going back — it is about rediscovering a material that still belongs in the future.
Ready to Experience the Ride That Started It All
If the idea of durability, comfort, sustainability, and timeless style speaks to you, exploring a steel-frame bike might be the perfect next step. You can find exceptional value, proven performance, and modern designs built from high-quality steel at Bikesdirect.com.
Rediscover the feeling that made cycling special in the first place — and see why steel is making a powerful comeback. Your next favorite ride may be made of the material that never truly left.
This infographic explores how gravel bikes are evolving with wider tires and modern geometry. It highlights improved stability, comfort, and control on unpredictable terrain, explains how new frame designs enhance handling at speed, and shows why terrain-specific setups are redefining long-distance gravel adventures for today’s riders.
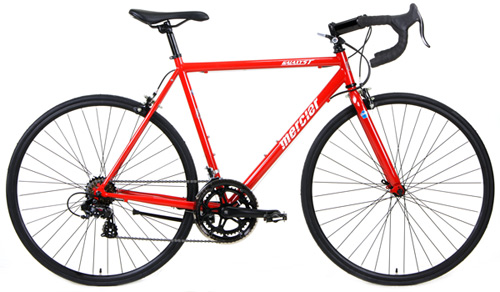
It often starts the same way. Someone tries a friend’s fast, lightweight bike on a weekend ride, and suddenly a switch flips. The speed feels addictive. The freedom feels bigger than any gym workout. They go home ready to buy… but the price of road bikes in most bike shops hits like a bucket of ice water.
Entry-level models that used to cost $799 now sit closer to $1400. Add in accessories, shop fees, and assembly, and the total often climbs past $2000. That shock is a major barrier for new riders, even though the desire to ride is real.
That is where a real, data-driven road bike price comparison becomes helpful. Because when you compare similarly equipped models from traditional retail to the direct-to-consumer pricing at Bikesdirect.com, the difference is not subtle. It can be hundreds — sometimes over a thousand dollars — saved on the exact same level of parts, gearing, and braking.
This blog breaks down what to look for when shopping under $1000, why online value is rising, and which models deliver the most performance for the price.
What Matters Most on a Sub-1000 Road Bike
When you are browsing, it is tempting to focus on flashy paint or brand names. But performance comes from the parts, not the decals.
Three features deserve the most attention:
Frame material influences weight and efficiency. Aluminum is standard. Carbon frames at this price are rare — unless you buy direct.
Drivetrain determines how smoothly you shift. Shimano Claris, Sora, Tiagra, or 105 are typical ranges. When a bike offers higher-level drivetrain under 1000, that is worth noticing.
Brakes are for safety. Disc brakes are increasingly popular, especially for mixed conditions or hilly routes.
Paying attention to those three features will tell you more about value than any marketing slogan.
To give context, a rider choosing between a gravel bike and a road bike should think about surface. Gravel adds versatility for dirt paths. Road adds efficiency for paved speed. Both are good, but priced differently depending on features.
The Challenge With Retail Markup
Local bike shops have undeniable strengths. They offer fitting services, local advice, and maintenance. What they cannot bypass is overhead. Rent, staffing, shipping, assembly, and showroom costs all roll into price tags.
This is why many entry-level bikes in retail stores arrive dressed in budget parts while still carrying premium prices. Direct-to-consumer avoids most of that. You get the same parts, same frames, same drivetrains, but without paying store markup. It is like buying your own “shop-quality” build without the store’s operating costs attached.
That is where Bikesdirect.com has built its reputation — strong performance for far less money.
A Real-World Price Comparison Using Four Models
To make this real, let us look at four bikes currently offered online, each meeting the sub-1000 category and offering excellent value.
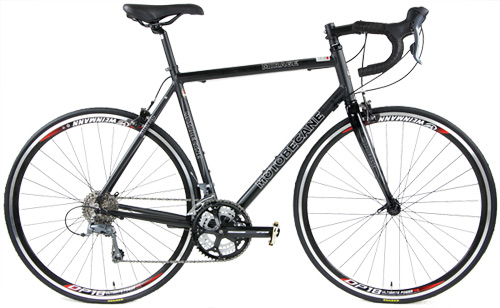
Motobecane Mirage SLX – Classic Lightweight Speed
The Mirage SLX shows how far value has come. Lightweight aluminum frame, modern geometry, and smooth shifting make it ideal for anyone wanting fitness rides or weekend group cycling without overspending.
Similar spec bikes in retail? Commonly 1199–1499.
Mirage SLX? Under 1000.
That price difference could cover riding shorts, pedals, a helmet, and still save money.
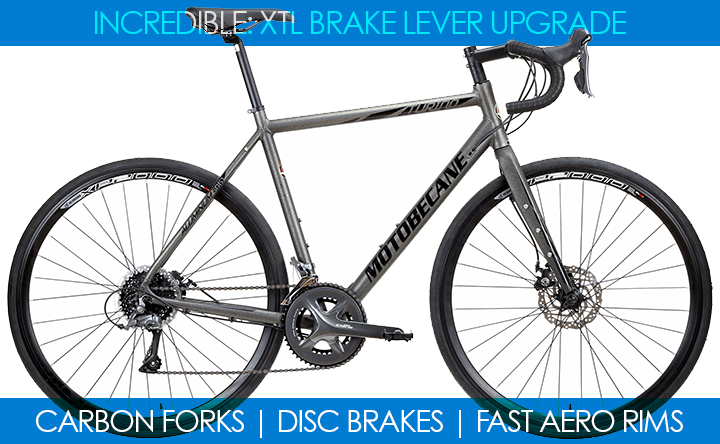
Turino Expert – Disc Brakes for Modern Conditions
Disc brakes offer better control on climbs, wet pavement, or fast descents. This is the style of braking most new riders want, and the Turino Expert brings it into affordable territory.
Disc brake models in shops usually start near 1400. Direct pricing lands far lower, but with the same control and stability you would expect from more expensive builds.
Turino Elite – A Higher-Spec Option Still Under Budget
The Elite adds upgraded drivetrain precision. Shifts are smoother, the ride feels more responsive, and the overall build pushes performance without pushing budget. You would rarely see this drivetrain and disc brakes together under 1000 in a retail environment.
This is the power of direct sale.
Carbon Aero Speed That Should Cost More
The R600 is a bike that surprises anyone used to retail shopping. Carbon fork and aero shaping at well under traditional pricing. Most carbon bikes in shops start closer to 2000, so finding one below 1000 is eye-opening.
Carbon at this price is the definition of value.
A Gravel Option for Riders Who Want Versatility
Not everyone rides perfect pavement. Some want adventure. The Gravel X3 brings disc brakes, wider tires, and stable geometry for dirt paths, side roads, or weekend wandering.
This gravel bike expands what a sub-1000 purchase can do. When compared to retail, the savings stay consistent: similar spec for hundreds less.
What Riders Gain Per Dollar
Price is only part of the story. What matters most is ride experience.
Buying direct often means better parts for the same money. A road bike at this price can include features normally associated with higher tiers:
For many new cyclists, this is their first real performance bike. They are transitioning from a hybrid bike, a mountain bike, or even a beach cruiser, chasing speed and efficiency.
Direct pricing makes that transition easier.
Final Thoughts: The Best Budget Is the One That Lets You Ride More
Cyclists who spend less often end up riding more — not because the bike is cheaper, but because the savings give them freedom. They can buy accessories, clothing, upgraded tires, or even save toward a second bike later.
A fat bike for winter? A gravel bike for adventures? A mountain bike for trails? Options grow when the budget is not blown on the first purchase.
That is what value means.
Riders looking for true performance under 1000 can explore an entire range of bikes at Bikesdirect.com. Our company highlights real value through direct pricing, offering components and features normally priced much higher at traditional retail. Whether someone wants a fast road machine, a versatile gravel build, or something built for fitness and weekend enjoyment, Bikesdirect.com makes cycling more accessible without cutting quality.
The first time you roll onto gravel with a bike built for today’s standards, the difference feels almost unbelievable. The bike floats over loose stones you once tiptoed across, stays planted on washboard sections that used to rattle your teeth, and corners with a confidence you never knew gravel could offer. For many riders, that moment is the spark that turns curiosity into obsession. In 2026, gravel cycling is not just growing — it is evolving faster than any other category in the cycling world.
What began as an experimental blend of road efficiency and off-road capability has now matured into a discipline with purpose-built design. The rise of modern gravel bike trends reflects a new era defined by wider tires, progressive geometry, increased stability, and comfort engineered for hours of adventure. Whether you come from a road bike background or have spent years riding singletrack on a mountain bike, gravel is becoming the space where all styles meet — and expand.
This is the story of how gravel riding is being reshaped, and how these innovations can redefine your next adventure.
Why Gravel Bikes Are Getting Wider, Softer, and More Capable
A decade ago, the idea of putting 47mm or 50mm tires on a gravel frame would have raised eyebrows. Today, it is quickly becoming the norm. Wider tires are at the center of modern gravel bike trends because they dramatically improve ride quality, stability, and versatility across unpredictable terrain.
On rough gravel, the added width increases traction and absorbs bumps before they reach your hands or lower back. Riders who once swapped between a road bike and a mountain bike for different surfaces now find that a single well-equipped gravel setup can replace both. When the trail gets loose, rocky, or steep, the confidence boost from larger volume tires is unmistakable.
Yet the magic of wider tires goes beyond comfort. With lower pressure and improved surface contact, riders gain control during fast descents and tight corners. Technical gravel feels less intimidating, long rides feel smoother, and the overall experience becomes far more predictable.
For riders transitioning from a hybrid bike or beach cruiser, the cushioned ride helps bridge the gap between casual comfort and performance-oriented cycling. And for cyclists who enjoy the rugged feel of a fat bike, the concept of using tire width as a comfort and stability tool feels familiar.
How Modern Geometry Changes the Way Gravel Bikes Handle
If wider tires are the heart of gravel’s evolution, updated geometry is the backbone. Designers are reshaping gravel frames to improve stability at speed, increase comfort on long rides, and help riders maintain control when terrain becomes unpredictable.
One of the biggest updates is the movement toward longer wheelbases and slacker head angles. These changes stabilize handling, especially on fast descents where traditional gravel bikes once felt twitchy. The new geometry takes a cue from progressive mountain designs, giving riders a more grounded and centered feel.
Lower bottom brackets provide even more stability when navigating sand, loose gravel, or technical paths. Meanwhile, shorter stems paired with wider bars improve steering precision, making it easier to correct your line or push through rough sections without hesitation.
The result is a gravel bike that feels planted and assured, whether you are rolling smooth dirt roads or exploring deep forest routes. These updates reflect a key theme behind modern gravel bike trends: versatility with a focus on confidence.
Riders coming from a road bike experience make an interesting observation. The new geometry feels more relaxed and forgiving, yet does not sacrifice efficiency on long distances. Meanwhile, off-road cyclists see familiar stability cues from the world of mountain bike-inspired design.
Longer Adventures Are Redefining What Riders Expect from Comfort
Gravel riding is not just about speed or technical ability — it’s about endurance and adventure. With rides often stretching into multi-hour or multi-day territory, comfort has moved from a bonus to a requirement.
Wider tires naturally reduce fatigue, but modern gravel bikes take comfort even further. With vibration-damping carbon layups, flexible seatstays, dropped chainstays, and ergonomic cockpit designs, the newest frames absorb chatter more efficiently than ever. Riders stay fresher, maintain control longer, and recover more easily after demanding rides.
Comfort also influences how riders choose between different categories. For some, a more upright stance reminiscent of a hybrid bike feels ideal for long tours. Others prefer a stretched-out position closer to a performance road bike. With today’s diversity in gravel geometry, both riding styles have a place.
These innovations reflect the deeper purpose behind gravel cycling: freedom. Whether your adventure is a two-hour sunset ride or a weekend expedition, the bike should support you from start to finish.
Terrain-Specific Setups Are Becoming More Popular
As gravel becomes more diverse, riders are tailoring setups to match their specific goals. Smooth crushed limestone paths feel fast and efficient with 38–45mm tires, while chunky desert routes demand the added volume of 50mm or more. The shift toward personalized setups is one of the most exciting aspects of modern gravel bike trends.
Some riders even treat their gravel machine as a multi-purpose transformer. With two wheelsets — one optimized for speed, the other for rugged adventure — a single gravel bike becomes a versatile tool for nearly any situation. Swapping wheels can make the difference between a fast-paced training ride and a fun-soaked weekend exploration.
As adventure cycling grows, the line between gravel and other categories blurs. Cyclists once loyal to a sturdy mountain bike now experiment with lightweight gravel frames. Riders who enjoy coastal paths may discover that gravel offers a level of engagement beyond their comfortable beach cruiser. And fans of the ultra-wide feel of a fat bike find that modern gravel setups provide a middle ground with surprising versatility.
Gravel Is Becoming a Gateway to Every Kind of Ride
Gravel’s biggest strength has always been its openness. No rules. No pressure. Just exploration. The latest designs expand this identity by welcoming more riders into the category.
Cyclists who feel intimidated by traffic on paved roads discover freedom on gravel paths. Riders looking for more challenge than a basic hybrid bike provides find excitement without the intensity of full mountain courses. And lifelong road cyclists discover comfort and stability they never expected.
These innovations help gravel bikes become the do-everything machines of 2026 — fast enough for pavement, capable enough for trails, and comfortable enough for big adventures. The evolution of gravel is not making other categories obsolete; it is simply giving riders more ways to enjoy the sport.
Ready to Explore New Gravel Horizons
If you are excited about where gravel cycling is heading, now is the perfect time to explore new setups, new geometry, and new possibilities. Bikesdirect.com offers a wide range of gravel-ready options that match your comfort, performance, and adventure goals.
Your next journey starts with the right gravel bike — and the freedom to ride wherever curiosity takes you.
On a cool fall morning, before traffic builds and engines hum across the city, something remarkable happens. Cyclists glide past stalled intersections, roll through quiet neighborhoods, and arrive downtown calm, energized, and ahead of schedule. That sense of freedom is powerful, but in 2026 and beyond, it is becoming more than a personal benefit — it is a climate solution. As cities worldwide push toward ambitious 2030 environmental targets, bicycles are no longer viewed as recreational tools; they are now essential pillars in sustainable transportation planning.
The rise of sustainable bicycle commuting reflects a cultural and environmental shift. People are recognizing that the simplest machine — two wheels powered by human energy — can dramatically reduce emissions, congestion, and dependence on fossil fuels. With cleaner mobility topping urban agendas, bikes of every kind, from a versatile hybrid bike to a dedicated commuter e-bike, are helping riders rewrite their daily routines and redefine what sustainable living looks like.
Why Bikes Are at the Heart of Urban Climate Strategies
Cities face a pressing challenge: transportation emissions continue to climb, and traffic congestion is eroding both time and air quality. Many municipalities have identified cycling as one of the fastest, most cost-effective solutions to reduce carbon output while improving public health and mobility. Unlike large transit systems, bicycles require no fuel, minimal infrastructure, and virtually no maintenance cost from the city — and yet the impact is enormous.
Every mile traveled by bike instead of a car significantly cuts emissions. Multiply that by thousands of commuters, and entire cities shift toward cleaner air and reduced carbon footprints. This is why many climate action plans center on converting daily short car trips, especially those under five miles, into cycling trips.
A rider who chooses a road bike for weekday commutes or a gravel bike for mixed urban terrain contributes directly to emission reduction without sacrificing mobility. Cycling is not just an alternative; it is a scalable solution that cities can support quickly and affordably.
How Modern Bikes Make Sustainable Commuting More Accessible
Commuting by bike once felt practical only for the dedicated few. Now, thanks to advancements in bicycle design, many riders find themselves genuinely excited to ditch the car. The new generation of commuter-focused models is smoother, easier to ride, and far more adaptable.
A hybrid bike strikes an ideal balance for many commuters, offering upright comfort, efficient rolling, and stability across pavement and light gravel. Riders navigating sections of unpaved greenway paths or shortcut trails appreciate how a gravel bike handles unpredictable surfaces without sacrificing speed. Even a nimble mountain bike becomes an excellent commuter for those riding through hilly terrain or storm-damaged routes where wider tires offer added security.
On the other end of the spectrum, some riders prefer the ease of a beach cruiser for short, relaxed urban travel, proving that sustainable commuting is not limited to performance-minded cyclists. And with the expansion of e-bikes, commuters across age, ability, and fitness levels have more options than ever.
Each category brings something unique to the commuting landscape, making it easier for riders to match their environment, comfort preference, and climate-conscious goals.
The Environmental Impact Riders Create Every Day
Choosing to commute by bike is one of the most effective personal actions an individual can take to reduce their carbon footprint. Studies repeatedly show that replacing even a few car trips per week with cycling slashes emissions significantly. These reductions compound over time and across entire populations.
Car-dependent cities face a challenge: many daily trips are short but still made by vehicle. These short trips often generate the highest per-mile emissions because cars produce more pollution during the first few minutes of operation. Switching these trips to a bicycle delivers immediate environmental benefits.
Even riders using electric-assist bikes contribute meaningfully, since e-bikes operate at a fraction of the energy consumption of cars. When many riders choose options like a hybrid commuter or an all-weather-capable fat bike, the reduction in fuel use, noise pollution, and roadway wear becomes substantial.
Cycling is often described as a small act with a big impact — and that is true. But when thousands participate, it becomes transformative.
Reducing Congestion and Reclaiming Urban Space
Sustainable mobility is not just about emissions; it is also about creating livable, breathable cities. Cars require enormous space — for roads, parking, idling queues, and storage. Bikes require a fraction of that footprint.
When a commuter chooses a road bike instead of a sedan, they instantly reduce congestion on already-strained roads. Multiply that action across thousands of rush-hour riders, and cities can reclaim road lanes, repurpose parking lots, and invest more thoughtfully in green infrastructure.
The ripple effects are profound. Neighborhoods become quieter. Pedestrian safety improves. Small businesses see increased walk-up and bike-up traffic. Urban planners gain flexibility to create more parks, greenways, and cycling corridors.
This is why bikes are considered essential to achieving 2030 climate goals — they reshape urban life in ways that benefit everyone, not just cyclists.
The Human Side of Sustainable Commuting
Beyond environmental metrics and emissions charts, there is a human story unfolding. People who shift to cycling often experience something unexpected: a boost in daily well-being.
Cycling lowers stress, increases cardiovascular health, and turns routine commutes into active moments of clarity and movement. Riders often say they arrive at work more focused, energized, and optimistic compared to sitting in traffic. The ride home becomes a decompression zone — a moving reset button.
Whether you ride a comfortable beach cruiser along waterfront paths or a sturdy mountain bike through uneven shortcuts, the journey becomes a purposeful part of your day.
Sustainable commuting is not only about meeting climate goals. It is also about creating healthier, happier communities. When cities invest in cycling infrastructure, they invest in people.
How to Shift from Car Commuting to Bike Commuting
Making the transition from driving to biking is easier than most people expect. Success begins with choosing the right bike for your terrain and comfort level. For example, a hybrid bike works beautifully for mixed-surface urban routes, while a gravel bike thrives on unpaved shortcuts or park connectors. If your commute has steep climbs, a wider-tire setup like a mountain bike or fat bike adds traction and confidence.
Consistency matters more than speed. Start with one or two bike days per week, gradually building comfort and familiarity. Many riders discover they actually prefer cycling once they experience the reduced stress, predictable travel time, and sense of accomplishment.
Before long, the car begins to feel like the inconvenient option.
Why Bikes Are Key to Reaching 2030 Climate Targets
Cities cannot rely on one solution to solve the climate crisis. They need a combination of improved transit, electric mobility, renewable energy, and meaningful individual action. Cycling ties these efforts together, offering an immediate, scalable, and affordable tool for change.
When commuters embrace sustainable bicycle commuting, they move cities closer to their 2030 climate goals one ride at a time. And as infrastructure grows, encouragement rises, and more people begin riding, the movement strengthens.
Cycling is more than transportation — it is a commitment to the future.
Start Riding Toward a Cleaner Tomorrow
If you are ready to make your commute more sustainable, healthier, and more enjoyable, now is a perfect time to choose the bike that matches your goals. Explore the options at Bikesdirect.com and take the first step toward a cleaner, greener way of moving through your city.
Your ride can be part of the solution — and your journey toward sustainability starts today.
Carbon wheels used to be pro-only, an exotic upgrade reserved for WorldTour budgets and wind tunnel daydreams. In 2025, prices and technology have moved the goalposts. What used to be a rarefied leap is now an achievable, high-impact upgrade for many riders, if you understand what carbon actually changes on the road, path, or gravel loop. We’ll translate lab concepts into felt improvements, address the biggest myths around durability and braking, explain how tire width and pressure tie the whole system together, and give clear scenarios where the value adds up, or doesn’t.
Along the way, we’ll point to complete bikes in our range that show how carbon rims, wide tubeless tires, and modern frames amplify one another: the quick, all-day smoothLe Champion CF LTD, the push-button precision of theImmortal Disc Team Di2, the speed-holdingFast Aero Road Elite Disc, and the classically versatileGravel X3 Disc. We’ll also flag a simple toolkit that makes owning nicer wheels painless, the compact, do-it-rightEssential Tool Kit.
What Carbon Wheels Change, In Plain Language
On the bike, you feel four main things when you swap from basic alloy to well-designed carbon: how easily the wheel holds speed, how calm it feels over rough surfaces, how predictably it behaves in crosswinds, and how precisely it corners and tracks under load. The physics behind each sensation has a jargon term, aerodynamics, vertical compliance, side-force stability, lateral stiffness, but your body translates them as steadier speed at lower effort, fewer “buzz” fatigue signals from your hands and shoulders, less twitchiness when wind hits, and sharper lines through turns.
Holding speed. Deep-section carbon rims, even in moderate depths, reduce the energy you lose to disturbed air. The effect is most obvious in the 18–25 mph range on open roads, but commuters and fitness riders feel it, too, because real-world riding strings together hundreds of short accelerations from 12 to 20 mph. Better aero doesn’t just make a fast section faster, it makes the whole ride quieter in your legs. That means you start the last miles with more charge in the battery, whether your finish line is a café, office, or town-line sprint.
Calming rough surfaces. Carbon’s internal layup lets designers tune how the rim flexes vertically. Paired with modern 28–32 mm road tires or 38–45 mm gravel tires at sensible pressures, a good carbon wheel takes the harsh edges off chipseal, seams, and washboard. You don’t float like on a suspension fork, but your nervous system stops bracing for chatter. You feel fresh longer and corner with less white-knuckle grip because the tire stays planted.
Crosswind manners. Old deep wheels shoved you around. Modern rim shapes aim to turn gusts into gentle nudges instead of yanks by controlling how air reattaches around the rim. You still feel wind, physics hasn’t retired, but the steering inputs are smaller and slower. Riders who once swore off deep rims for windy corridors often discover they can run a moderate depth daily with zero drama.
Tracking and cornering. Lateral stiffness keeps the bike feeling laser-guided when you load the front through a sweeping bend or stand to punch over a rise. The front wheel, especially, steers where your eyes go. With carbon, that connection tightens without turning harsh. Confidence goes up, micro-corrections go down, and speed sneaks higher with no extra risk.
Weight and Inertia: Why “Lighter” Isn’t the Whole Story
Everyone knows carbon can be lighter, but the bigger everyday gain comes from where you save weight: the rotating mass at the rim and tire. Reducing mass far from the hub lowers rotational inertia, so the wheel spins up with less effort and changes speed more willingly. The effect is clear in stop-start riding, short hills, and rolling terrain. Paradoxically, a slightly heavier but more aerodynamic carbon wheel can still beat a lighter shallow alloy wheel on most real routes, because air drag dominates once you’re moving. It’s not a binary; the best modern carbon sets find a sweet spot of low inertia and useful aero with strong side-wind manners.
Tires, Pressure, and Tubeless: The System That Makes Carbon Sing
Wheels don’t roll in isolation. The rim profile, internal width, and tire choice form a system. Mount a too-narrow, overinflated tire on a deep rim and you’ll lose much of the comfort and traction you paid for; mount a good-volume tire at realistic pressure and everything clicks.
Road and endurance. On the road, 28–32 mm tires at lower pressures than you’d have run five years ago provide lower rolling resistance on imperfect pavement and far better comfort. A bike like ourLe Champion CF LTD is built around that reality: carbon frame calmness, disc braking for wet-weather control, and room for modern tire sizes that turn carbon wheels from “race day only” to “every ride.” If you prefer a more race-adjacent posture and tempo-friendly geometry, theFast Aero Road Elite Disc shows how an aero-leaning platform pairs with deep carbon to hold speed between turns.
Gravel and mixed surfaces. For gravel, internal rim widths that let a 38–45 mm tire take a round, supported shape at 30–45 PSI transform washboard and marbles from “hang on” into “choose your line.” That’s why a capable all-road like theGravel X3 Disc is such a natural stepping stone; even with alloy wheels out of the box, its geometry and clearance make it carbon-upgrade ready when you want to add snap without sacrificing comfort.
Tubeless. Going tubeless is the single best complement to carbon wheels. You can run safer, lower pressures without pinch flats, and sealant quietly saves your ride by closing micro punctures you’d never even notice. The “speed + calm” combination is addictive in the best way.
Braking and Heat: Disc Brakes Changed the Conversation
Rim-brake carbon once had a real weakness: heat build-up under prolonged braking on long descents. Modern resins improved things, but disc brakes largely solve the problem by moving braking away from the rim entirely. Heat goes into a rotor designed to shed it, pad compounds are consistent in wet and dry, and carbon rims are free to focus on aero, stiffness, and compliance rather than brake heat. For riders in rainy cities, this is a quiet revolution; you get predictable stops and a much bigger wheel design envelope. That’s part of why bikes like theImmortal Disc Team Di2 feel so composed in foul weather: carbon frame smoothness, disc brake control, and the option to pair with deep, well-mannered carbon rims without brake-track compromises.
Durability Myths vs. Reality
Two myths dominate: that carbon shatters easily, and that one pothole will write off an expensive wheel. The reality is more nuanced. Quality carbon rims are engineered to survive substantial impacts and loads. They fail differently than alloy, often either fine or clearly damaged rather than “bent but rideable”, but day-to-day robustness is excellent when pressures are appropriate and spokes are correctly tensioned. The common real-world “wheel killer” isn’t material; it’s under-inflation for the hit you took, or slamming square-edge obstacles with locked elbows and no unweighting. Good riding habits and realistic tire pressures protect any wheel, and carbon is no exception.
Hookless vs. hooked rim beds enter the durability conversation, too. Hookless road/gravel rims can be safe and fast when paired with compatible tires at the right pressures. The benefit is manufacturing precision and weight savings; the requirement is reading the tire label and not inflating well beyond recommended limits. If you prefer maximal tire compatibility and the option to run higher pressures on narrower tires, a hooked carbon rim remains an excellent choice.
Crosswinds and Handling Confidence
Deep rims are no longer a binary choice between speed and terror in gusts. Rounded, blunted leading edges and careful sidewall curvature broaden the “stable yaw” window, the angles at which the wheel feels neutral or gently self-correcting. For everyday riders, that means you can pick a depth for your terrain instead of your nerves. On exposed flats and rolling roads, 40–50 mm can be a set-and-forget daily depth. In mountainous areas with gusty canyons, 35–45 mm front with 45–55 mm rear balances calm steering and strong speed retention. On gravel, mid-depth rims with generous internal width keep handling neutral without the sail effect of very deep sections.
The Commuter’s Case: Are Carbon Wheels Worth It for City Miles?
If your commute is flat, short, and full of stops, the gains are subtler, but still real. Reduced rotational inertia helps you leave every light with less effort. Better compliance at realistic tire pressures reduces fatigue from broken pavement. Aero benefits are smaller at commuter speeds, but holding 16–18 mph into a headwind with a fairing-like rim shape feels kinder than muscling shallow, boxy rims. The value hinges on how often you ride and the surfaces you face. If you’re daily year-round, carbon can be a quality-of-life upgrade: fewer rattles, calmer steering, easier pace. If you roll twice a week for three miles each way, you might prioritize lights, fenders, and puncture protection before chasing carbon.
The Weekend Warrior’s Case: Fitness, Group Rides, and “Fast Feels”
Weekend group rides reveal the best of carbon wheels. You get lower effort to stay glued in the draft, faster recovery between pulls, and extra free speed on rolling terrain. If you love the sensation of speed and smoothness, a mid-deep set turns any spirited loop into a highlight reel. This is where an aero-honest bike like theFast Aero Road Elite Disc pairs beautifully with a 40–50 mm wheel: good manners in varied wind, solid momentum between corners, and a cockpit that stays composed under braking.
The Long-Distance Rider’s Case: Comfort Is Speed
Century riders and randonneurs know the truth: comfort compounding over hours becomes speed. Carbon’s tuned compliance plus wide tubeless tires at lower pressures keeps micro-trauma away from hands, shoulders, and low back. You eat better, drink more regularly, and end fresher because your nervous system isn’t fried. The upgrade pays you back in the last hour, when many rides are decided by who has “just enough” left. On a carbon endurance platform like theLe Champion CF LTD, mid-depth rims with 30–32 mm tires hit a sweet spot: meaningful aero, confident grip, and a velvety feel over patchy pavement.
Gravel Reality: Carbon Wheels Beyond the Pavement
Some riders worry carbon wheels on gravel are fragile. The lived experience with the right setup says otherwise. Generous internal widths support 40–45 mm tires so you can run pressures that absorb square-edge hits. Compliance tuned into the rim shelves off high-frequency buzz that makes washboard so taxing. The main caution is pressure discipline: don’t chase ultra-low pressures without testing for rim strikes. Start conservatively, drop a few PSI at a time, and learn where your combo feels plush but protected. When you’re ready, a bike like ourGravel X3 Disc is built around these principles, so a carbon wheelset later feels like a natural extension rather than a splurge that fights the frame.
Cost, Value, and “Where Will I Feel It First?”
Every upgrade decision is a budget equation. The honest way to judge value is to ask: how often will I feel this, and for how long? Carbon wheels answer with “on every acceleration and across most of the ride.” Contrast that with a boutique cockpit you notice when you look down, or superlight tires you notice until the first flat. If you ride three to five days a week for fitness or commute year-round, carbon wheels often return more joy-per-dollar than chasing marginal frame weight savings. If you’re fitting out your first serious road bike, it can make sense to buy a great complete bike first, something like theImmortal Disc Team Di2, and schedule wheels as your year-two gift to yourself. You’ll get the baseline sorted (fit, gearing, braking), then amplify it with a wheelset that matches your riding personality.
How to Choose Depth, Width, and Spokes, Without a PhD
Pick depth for wind and speed, width for tire choice, and spoke count for your use case. In windy, rolling regions or for lighter riders, a ~40 mm front / 45–50 mm rear balances stability and speed. For flatter, steadier routes or bigger riders comfortable in gusts, 50–60 mm can be a satisfying daily choice. For road tires at 28–32 mm, look for internal widths in the ~19–23 mm range; for gravel 38–45 mm, 23–25+ mm internal widths shape the tire well. Spoke counts around 24 front / 24–28 rear cover most road and all-road needs; heavier cargo or rough gravel may push you to 28 rear for extra margin.
Installation, Care, and the “New Wheel” Checklist
Great wheels deserve a deliberate setup. Measure your frame and brake caliper clearances with your actual tires. Tape tubeless rims carefully; valve seating matters. Use a torque wrench on rotor bolts and through-axles to avoid over-tightening and creaks. Align calipers anew, carbon rims may change rotor position by a fraction. Set tire pressures with a reliable gauge; don’t guess. Then ride a short shakedown before your big day, listening for spoke ping (normal first rides), checking rotor rub, and confirming sealant did its job. The little things you do in the first ten minutes produce months of silence. Our compactEssential Tool Kit is designed for exactly this: the right hexes, a torque tool, and the small stuff that turns “hope” into “done right.”
Common Mistakes, And the Fastest Fixes
Overinflation is the number one performance killer. If your bike chatters and skips on tiny bumps, your pressure is too high for your volume and weight. Drop 5–8 PSI, ride the same section, then add back 1–2 PSI if turn-in feels vague. Mismatched tire and rim widths create lightbulb shapes that corner weirdly; choose a tire that fills the rim without bulging. Neglecting rotor realignment after a wheel swap causes “mystery rub”, loosen caliper bolts, squeeze the brake to center, and re-torque. Skipping a post-install re-check after 50–100 miles lets early spoke stretch turn into long-term ping; a quick stress-relief and tension balance by a shop or skilled home mechanic keeps the set silent and true.
Who Should Upgrade Now, and Who Can Wait
If you ride group rides and care about sustainable speed, carbon wheels are the most noticeable upgrade you can make after proper fit. If you’re an endurance rider who values feeling strong in hour four, the comfort-at-speed dividend is real. If you’re a commuter on broken tarmac who wants fewer rattles and easier launches from lights, the “everyday calm” may be worth it. If you’re new to drop bars and still sorting fit, shoes, and tire pressure, lock those in first. The best wheel in the world can’t outrun a too-long cockpit or under-padded hands. Think sequence: fit and tires first, then wheels, then marginal flourishes.
Putting It All Together on Real Bikes
Our lineup reflects the system reality. TheLe Champion CF LTD is a carbon endurance platform that turns mid-depth wheels and 30–32 mm tubeless tires into a magic-carpet feel over imperfect roads. TheFast Aero Road Elite Disc is the speed-keeper, translating aero rims into relaxed, high-tempo cruising between corners. TheImmortal Disc Team Di2 layers in electronic shifting, press, shift, done, so you can stay in the wind for longer without cognitive load. And theGravel X3 Disc is a reminder that all-road frames with real tire clearance and stable geometry are carbon-wheel naturals when you want comfort and snap in one package. Keep a tidy setup with theEssential Tool Kit, and your “upgrade” becomes your new normal.
A Simple Decision Framework
Picture your three most common rides. If at least two of them would benefit from steadier speed at moderate effort, calmer feel over rough surfaces, and more decisive turn-in, carbon wheels make sense. If your rides are short, flat, and gear-heavy, lots of stops, heavy cargo, you might invest first in lights, fenders, and puncture-proof tires, then revisit wheels. If you’re on a great alloy set already, consider where the bottleneck is. If wind pushes you around, choose a moderate depth with modern crosswind stability. If you’re beat up by chipseal, choose a rim that supports wider tires at lower pressures. If you love the idea of gliding, choose both.
The Bottom Line
Carbon wheels in 2025 aren’t just about looking fast; they’re about feeling fast in a sustainable, repeatable way. They hold momentum with less effort, smooth the ride so you arrive fresher, behave politely in wind, and turn where you look without fuss. They shine for weekend warriors and endurance riders and still make sense for committed commuters who want daily calm. They’re not a Band-Aid for poor fit or rock-hard tires, but when you pair them with realistic pressures and a frame that supports modern rubber, they become the upgrade you notice on every ride.
If you want help matching rim depth to your wind and terrain, pairing tire sizes to rim widths, or simply deciding whether now is the moment to leap on your road bike, we’re happy to talk through the options. Tell us about your routes, your speeds, and what you want to feel different in the first ten minutes and the last ten miles. We’ll point you to the right setup, and the right bike to make the most of it.
When you’re ready to tailor wheels to your ride,contact our team and we’ll turn “are carbon wheels worth it?” on your gravel bike into a confident yes or an informed “not yet”, based on your roads, your goals, and your budget.