
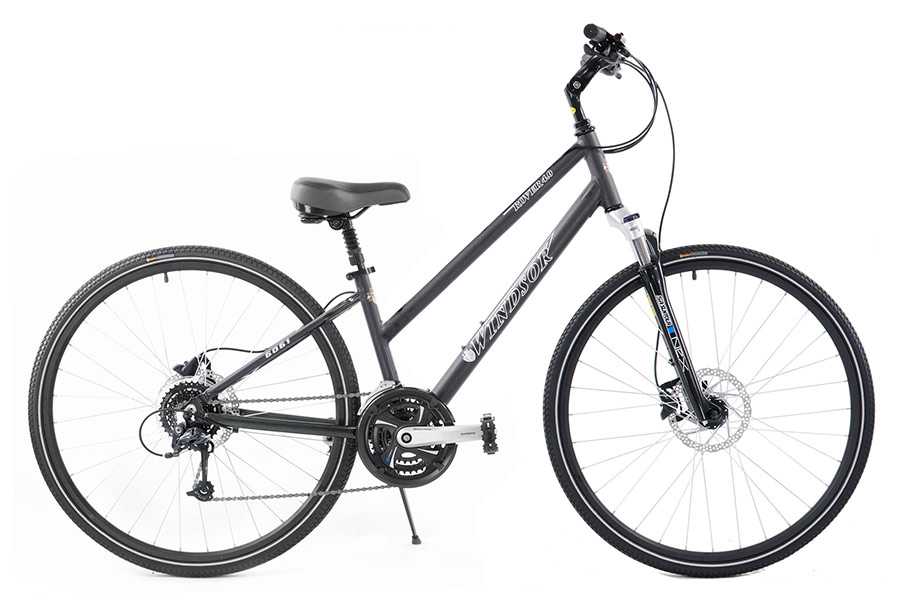
Sustainable Commuting: How Bikes Are Helping Cities Meet 2030 Climate Goals

On a cool fall morning, before traffic builds and engines hum across the city, something remarkable happens. Cyclists glide past stalled intersections, roll through quiet neighborhoods, and arrive downtown calm, energized, and ahead of schedule. That sense of freedom is powerful, but in 2026 and beyond, it is becoming more than a personal benefit — it is a climate solution. As cities worldwide push toward ambitious 2030 environmental targets, bicycles are no longer viewed as recreational tools; they are now essential pillars in sustainable transportation planning.

The rise of sustainable bicycle commuting reflects a cultural and environmental shift. People are recognizing that the simplest machine — two wheels powered by human energy — can dramatically reduce emissions, congestion, and dependence on fossil fuels. With cleaner mobility topping urban agendas, bikes of every kind, from a versatile hybrid bike to a dedicated commuter e-bike, are helping riders rewrite their daily routines and redefine what sustainable living looks like.

Why Bikes Are at the Heart of Urban Climate Strategies

Cities face a pressing challenge: transportation emissions continue to climb, and traffic congestion is eroding both time and air quality. Many municipalities have identified cycling as one of the fastest, most cost-effective solutions to reduce carbon output while improving public health and mobility. Unlike large transit systems, bicycles require no fuel, minimal infrastructure, and virtually no maintenance cost from the city — and yet the impact is enormous.

Every mile traveled by bike instead of a car significantly cuts emissions. Multiply that by thousands of commuters, and entire cities shift toward cleaner air and reduced carbon footprints. This is why many climate action plans center on converting daily short car trips, especially those under five miles, into cycling trips.

A rider who chooses a road bike for weekday commutes or a gravel bike for mixed urban terrain contributes directly to emission reduction without sacrificing mobility. Cycling is not just an alternative; it is a scalable solution that cities can support quickly and affordably.
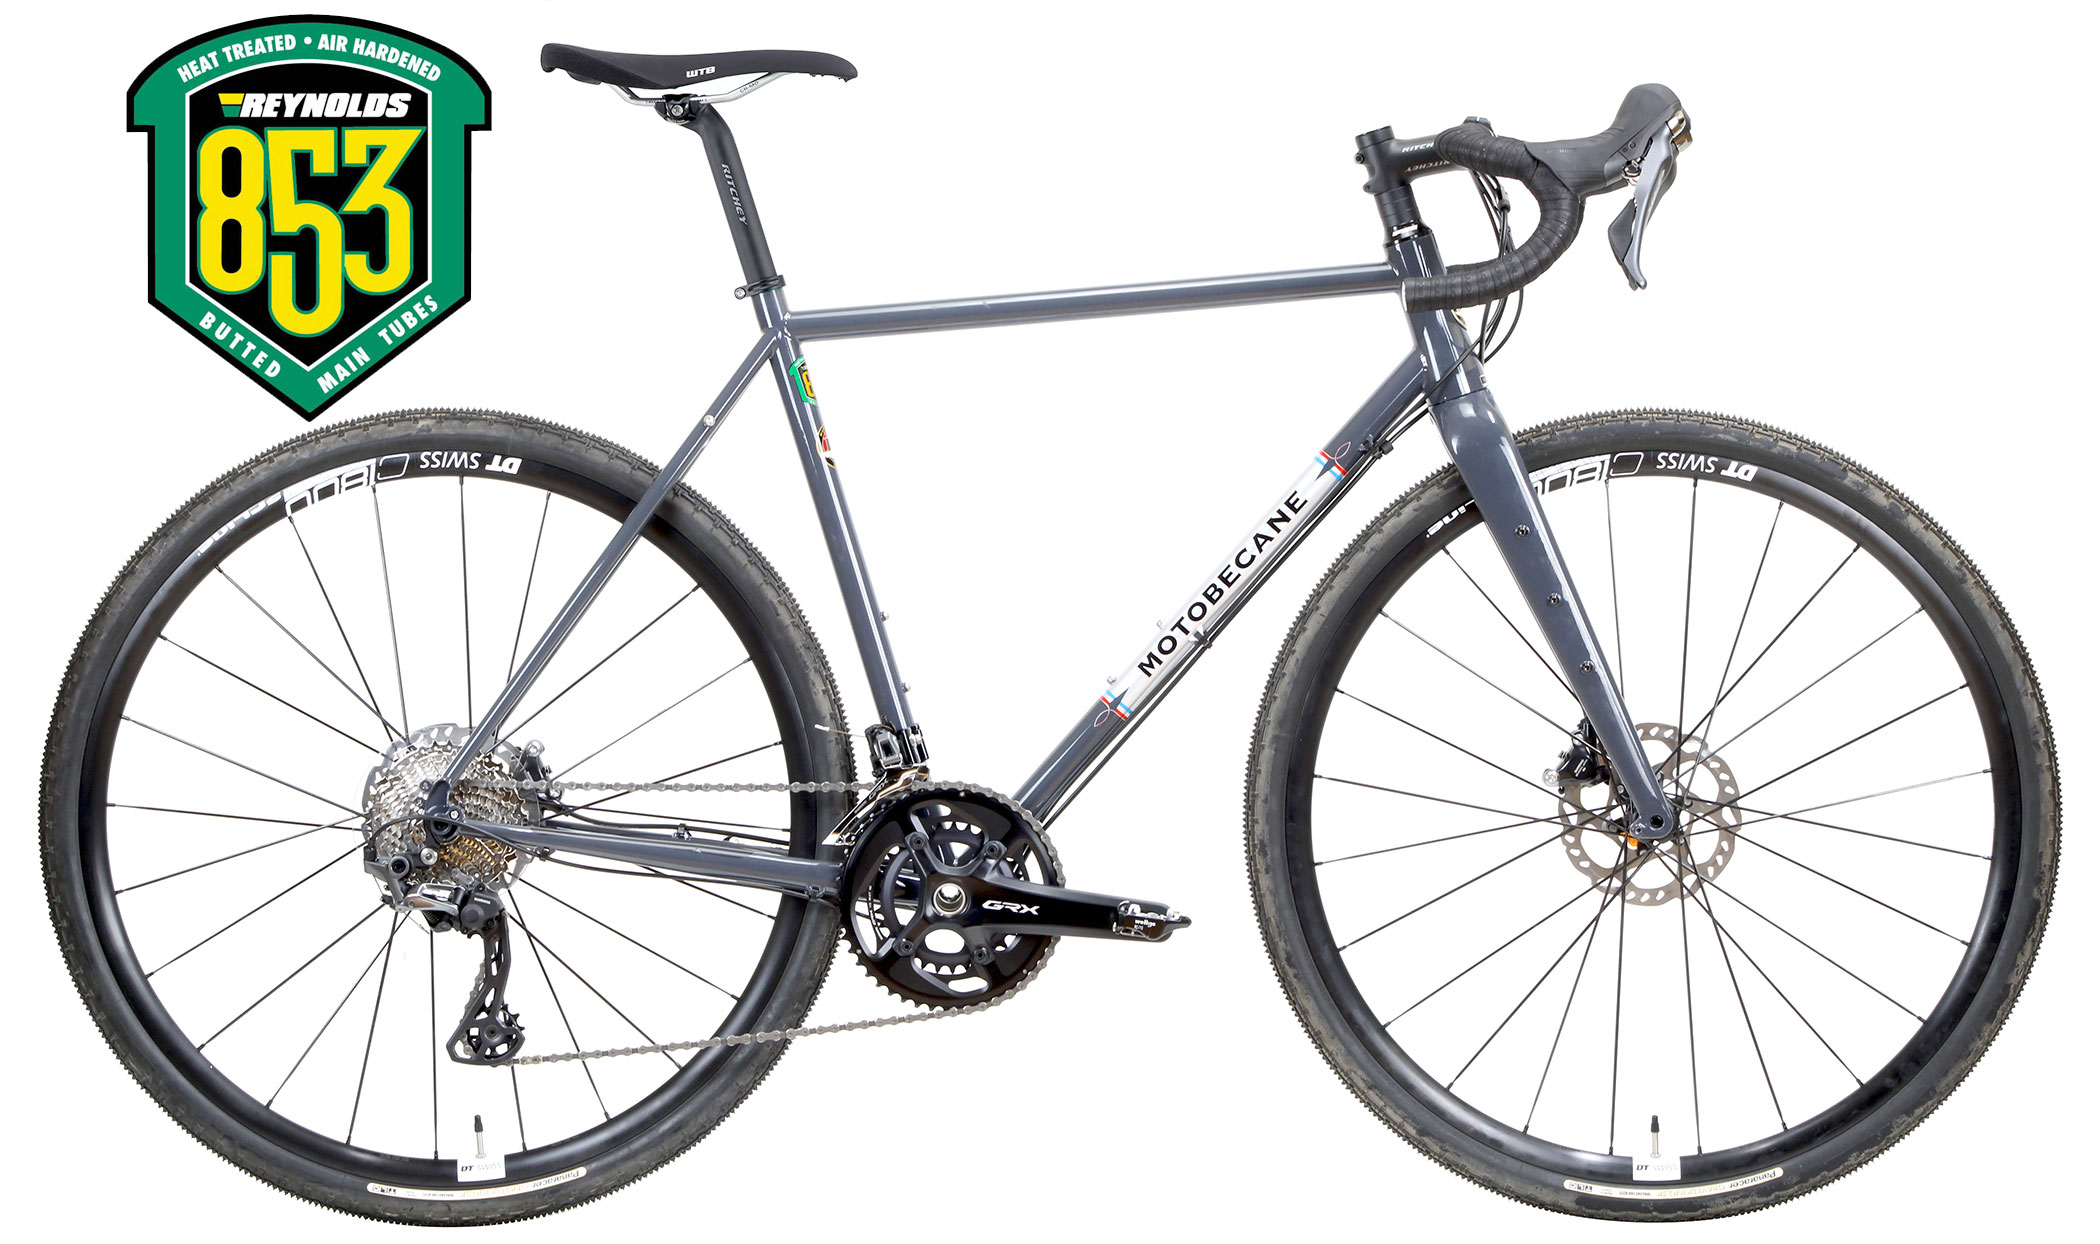
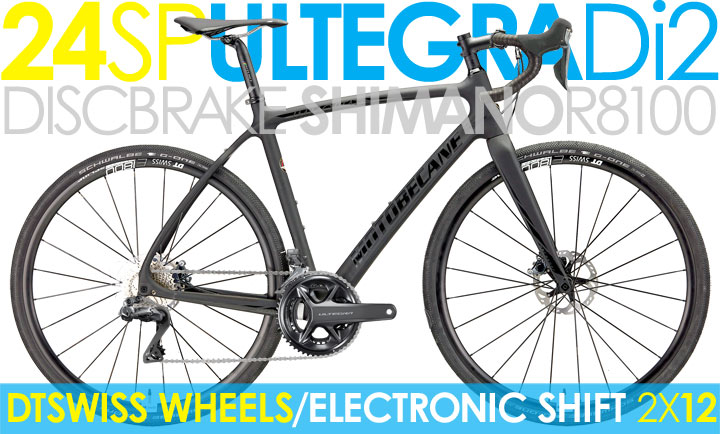
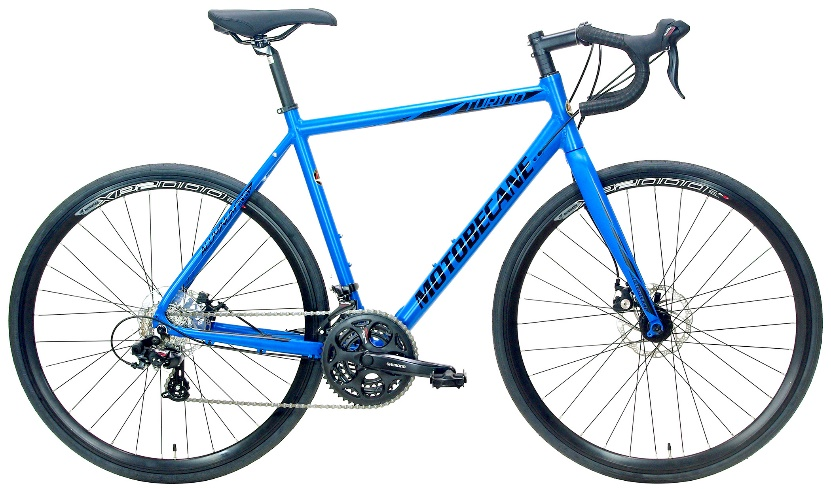
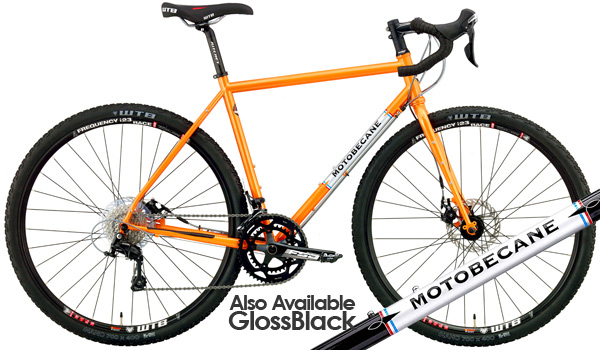
Motobecane gravel bike with Shimano GRX800 drivetrain, hydraulic disc brakes, and endurance geometry suited for mixed urban and off-road commuting.

How Modern Bikes Make Sustainable Commuting More Accessible

Commuting by bike once felt practical only for the dedicated few. Now, thanks to advancements in bicycle design, many riders find themselves genuinely excited to ditch the car. The new generation of commuter-focused models is smoother, easier to ride, and far more adaptable.

A hybrid bike strikes an ideal balance for many commuters, offering upright comfort, efficient rolling, and stability across pavement and light gravel. Riders navigating sections of unpaved greenway paths or shortcut trails appreciate how a gravel bike handles unpredictable surfaces without sacrificing speed. Even a nimble mountain bike becomes an excellent commuter for those riding through hilly terrain or storm-damaged routes where wider tires offer added security.

On the other end of the spectrum, some riders prefer the ease of a beach cruiser for short, relaxed urban travel, proving that sustainable commuting is not limited to performance-minded cyclists. And with the expansion of e-bikes, commuters across age, ability, and fitness levels have more options than ever.

Each category brings something unique to the commuting landscape, making it easier for riders to match their environment, comfort preference, and climate-conscious goals.
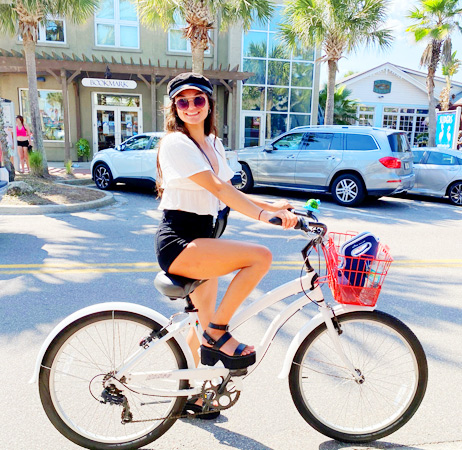
Woman enjoying a relaxed ride on a white beach cruiser bike in a sunny urban shopping district.

The Environmental Impact Riders Create Every Day

Choosing to commute by bike is one of the most effective personal actions an individual can take to reduce their carbon footprint. Studies repeatedly show that replacing even a few car trips per week with cycling slashes emissions significantly. These reductions compound over time and across entire populations.

Car-dependent cities face a challenge: many daily trips are short but still made by vehicle. These short trips often generate the highest per-mile emissions because cars produce more pollution during the first few minutes of operation. Switching these trips to a bicycle delivers immediate environmental benefits.

Even riders using electric-assist bikes contribute meaningfully, since e-bikes operate at a fraction of the energy consumption of cars. When many riders choose options like a hybrid commuter or an all-weather-capable fat bike, the reduction in fuel use, noise pollution, and roadway wear becomes substantial.

Cycling is often described as a small act with a big impact — and that is true. But when thousands participate, it becomes transformative.
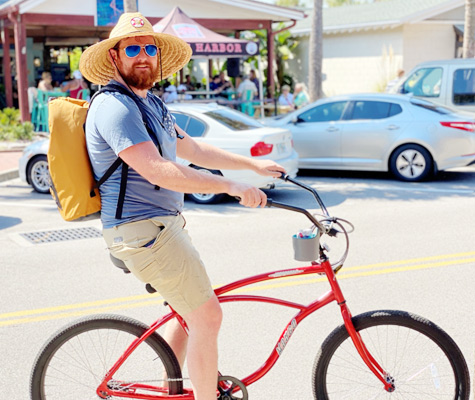
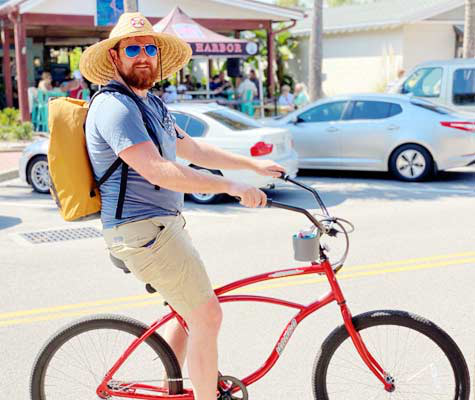
Man commuting casually on a red beach cruiser bike with a backpack and sun hat in a lively downtown area.

Reducing Congestion and Reclaiming Urban Space

Sustainable mobility is not just about emissions; it is also about creating livable, breathable cities. Cars require enormous space — for roads, parking, idling queues, and storage. Bikes require a fraction of that footprint.

When a commuter chooses a road bike instead of a sedan, they instantly reduce congestion on already-strained roads. Multiply that action across thousands of rush-hour riders, and cities can reclaim road lanes, repurpose parking lots, and invest more thoughtfully in green infrastructure.

The ripple effects are profound. Neighborhoods become quieter. Pedestrian safety improves. Small businesses see increased walk-up and bike-up traffic. Urban planners gain flexibility to create more parks, greenways, and cycling corridors.

This is why bikes are considered essential to achieving 2030 climate goals — they reshape urban life in ways that benefit everyone, not just cyclists.

The Human Side of Sustainable Commuting

Beyond environmental metrics and emissions charts, there is a human story unfolding. People who shift to cycling often experience something unexpected: a boost in daily well-being.

Cycling lowers stress, increases cardiovascular health, and turns routine commutes into active moments of clarity and movement. Riders often say they arrive at work more focused, energized, and optimistic compared to sitting in traffic. The ride home becomes a decompression zone — a moving reset button.

Whether you ride a comfortable beach cruiser along waterfront paths or a sturdy mountain bike through uneven shortcuts, the journey becomes a purposeful part of your day.

Sustainable commuting is not only about meeting climate goals. It is also about creating healthier, happier communities. When cities invest in cycling infrastructure, they invest in people.

How to Shift from Car Commuting to Bike Commuting

Making the transition from driving to biking is easier than most people expect. Success begins with choosing the right bike for your terrain and comfort level. For example, a hybrid bike works beautifully for mixed-surface urban routes, while a gravel bike thrives on unpaved shortcuts or park connectors. If your commute has steep climbs, a wider-tire setup like a mountain bike or fat bike adds traction and confidence.

Consistency matters more than speed. Start with one or two bike days per week, gradually building comfort and familiarity. Many riders discover they actually prefer cycling once they experience the reduced stress, predictable travel time, and sense of accomplishment.

Before long, the car begins to feel like the inconvenient option.

Why Bikes Are Key to Reaching 2030 Climate Targets

Cities cannot rely on one solution to solve the climate crisis. They need a combination of improved transit, electric mobility, renewable energy, and meaningful individual action. Cycling ties these efforts together, offering an immediate, scalable, and affordable tool for change.

When commuters embrace sustainable bicycle commuting, they move cities closer to their 2030 climate goals one ride at a time. And as infrastructure grows, encouragement rises, and more people begin riding, the movement strengthens.

Cycling is more than transportation — it is a commitment to the future.

Start Riding Toward a Cleaner Tomorrow

If you are ready to make your commute more sustainable, healthier, and more enjoyable, now is a perfect time to choose the bike that matches your goals. Explore the options at Bikesdirect.com and take the first step toward a cleaner, greener way of moving through your city.

Your ride can be part of the solution — and your journey toward sustainability starts today.
Rain-Ready Riding: Traction, Visibility, and Drivetrain Protection

Riding through showers shouldn’t feel like survival mode. With a few smart tweaks to tires, layers, and maintenance, cycling in the rain becomes calm, predictable, and even fun. This guide shows how to choose tread and pressure for wet pavement and dirt, how to stay visible without overheating, and how to keep chains clean and brakes powerful so every stop and start feels confident.

Traction Starts at the Tires

Rain reshapes the road. Oils lift to the surface during the first minutes of a storm, painted lines and metal plates become treacherous, and grit collects along the gutter. On dirt, the top layer turns slick while the bed beneath may stay supportive. The fix begins with the right tread and pressure for the conditions you actually face.

Wet Pavement: Tread and Pressure That Work

For road rides, prioritize a supple tire with a smooth or lightly textured tread and a proven wet-grip compound. You’re not trying to channel water like a car tire; bicycles rely on rubber chemistry and contact patch, not deep channels. The goal is maximizing consistent contact while avoiding hydroplaning—which essentially doesn’t occur at cycling speeds with properly inflated tires.

Run lower pressure than you would on a dry, hot day. Dropping roughly 10–15% below your dry setup increases the footprint and lets the casing conform to microtexture in the asphalt. If you usually ride 85 PSI on a 28 mm tire, try the mid-70s; if you’re on wider 32–35 mm rubber, you can experiment with the 50s–60s depending on rider weight and rim width. Check pressure before the ride; a few PSI make a noticeable difference in the wet.

Wet Dirt and Gravel: Bite Without Bogging

On mixed surfaces, choose an intermediate tread that presents plentiful edges without tall, draggy knobs. Think closely spaced center blocks for rolling, with more pronounced shoulder lugs for off-camber support. Mud will pack tall lugs and turn them into slicks; a mid tread sheds better and remains predictable. Pressure is your main tuning tool: go low enough to find grip over roots and embedded rock, yet high enough to avoid rim impacts when puddles hide holes. Start 2–4 PSI lower than your dry setting, then fine-tune a half PSI at a time after a short test loop.

Smooth Inputs, Clean Lines

Traction is a technique as much as equipment. On wet pavement, straighten the bike before you apply strong braking, and lean your body more than the bike in corners to keep the contact patch planted. On wet dirt, look for the crown of the trail or the firm edges, and treat painted trail markings, roots, and wood bridges as if they’re ice. Soft pedaling across slick sections, then resuming power when traction returns, keeps the bike composed.

Visibility Without the Sauna Effect

Being seen is only half of the problem; the other half is staying dry enough to remain warm while avoiding the personal steam room that kills your motivation. The solution is layered, breathable protection that stays bright from every angle.

Layering That Vents While Staying Bright

Start with a wicking base that won’t saturate. Add a mid layer appropriate to temperature: a light thermal for cool rain, or a simple jersey for warm showers. Top it with a waterproof or highly water-resistant shell that has real vents you can operate while riding—pit zips, back yoke vents, or two-way front zips. Prioritize a high-visibility color or large reflective zones front and back so drivers see shape, not just motion. If your shell is dark, add a reflective gilet over it; a bright, removable layer lets you adapt as clouds thin.

Hands and feet need the same logic. Thin, water-resistant gloves with a fleece or merino liner keep dexterity while shedding spray. Neoprene overshoes or water-resistant socks preserve warmth even if some water sneaks in. A brimmed cap under the helmet keeps rain out of your eyes; clear or lightly tinted lenses protect vision when the light goes flat.

Lights for Daytime Rain

Even in daytime, rain dims contrast. Run a steady headlight aimed low enough to avoid dazzling others and a pulsing taillight to cut through spray. Mount a second rear light higher on a bag or seatpost for redundancy; if one is coated in grime, the other still communicates your presence. On road and city miles, a flat-bar disc road bike like the steel Café Strada keeps you upright and visible in traffic while offering confident braking; explore the Motobecane Café Strada 4130 Disc Flatbar.

Drivetrain Protection: Clean, Lube, Repeat

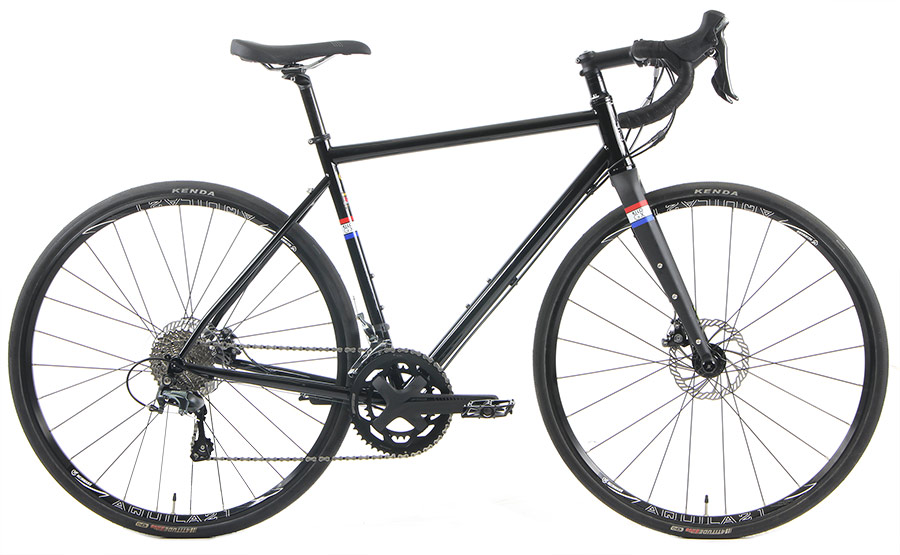
Motobecane Immortal Disc Team Di2 carbon road bike with hydraulic disc brakes.

Rain turns dust into grinding paste. The trick is accepting that a lighter, more frequent ritual beats one big clean every few weeks.

Pre-Ride Prep

Start with a relatively clean chain and a wet-weather lube designed to resist wash-off. Apply a modest amount, backpedal to distribute, then wipe the outer plates thoroughly with a clean rag so you don’t attract extra grit. A thin, even film on the rollers is all you need. If your route includes extended dirt, consider a wax-based wet blend that sheds water yet leaves less sticky residue than classic wet lubes.

Post-Ride Reset

As soon as you’re home, aim a low-pressure hose or a bucket and sponge at the drivetrain and brake calipers. Avoid blasting bearings or directly spraying into calipers. Wipe the chain dry, drip a small refresh of lube on warm metal, and run the gears across the cogs to work it in. Finish with another wipe to remove excess. This five-minute habit transforms how long your cassette and chainrings last, and it keeps shifting crisp for the next storm.

Brakes That Stay Powerful

Disc brakes are your friend when the forecast turns gray, but they still demand attention to stay sharp.

Pads, Rotors, and Technique

Metallic pads tolerate grit and heat, making them ideal for rainy commutes and long descents. Resin pads feel a bit more progressive and quiet but can glaze if contaminated by oil. If you hear a sudden shriek or feel weak bite, inspect pads for glaze or embedded grit and sand lightly if needed.

Keep rotors clean with isopropyl alcohol and lint-free cloth. If you use a bike-mounted lube, shield the rotors during application. In the wet, lightly feather brakes early in a descent or before an intersection to wipe the rotors dry, then increase pressure once bite returns. Practice this on an empty street so the sensation becomes second nature.

Disc-equipped road platforms give you an immediate upgrade in foul-weather control. If you want a fast, racy feel with confident stopping, consider the Motobecane Immortal Disc Team (Di2). For riders who prefer the classic calm of steel with modern discs, the Strada CM Comp Disc delivers steady manners when roads are shiny.

Fenders, Lines, and Little Habits

Full-coverage fenders are the difference between damp and drenched. They keep the rooster tail off your back and, crucially, out of your drivetrain and calipers. Choose sturdy stays and a mudflap that reaches close to the road for maximum effect. On shared paths, fenders also keep the rider behind from wearing your spray.

Pick clean lines through corners and avoid the rainbow sheen after a long dry spell followed by rain; the first hour of precipitation releases the most oil. Cross metal grates and paint upright, not leaned. On dirt, scan for the faint high-traction seams that form where water drains; those slightly darker streaks often hide the best grip.

Three Rain-Ready Bike Personalities

If your rainy miles are mostly city and suburban streets, a flat-bar disc road bike like the Café Strada 4130 Disc Flatbar gives upright vision, space for fenders, and steel’s calm over rough patches. If you chase spirited group rides regardless of forecast, the carbon Immortal Disc Team Di2 brings precise shifting and confident braking when the sprint line is soaked. If you love the timeless feel of steel with hydraulic discs and all-weather manners, the Strada CM Comp Disc is a reliable partner for twelve-month riding.

A Simple Ten-Minute Post-Ride Routine

Hang the bike and do quick triage: rinse, spin the wheels to watch for wobble or embedded flints, wipe the chain and lube, squeeze the brakes to feel for consistent engagement, and check the pads for grit. Shake out your jacket and gloves, open vents to dry, and charge your lights. The next time you reach for the bike, you’ll start fresh rather than fixing problems on the sidewalk.

Make Rain Days Good Days

The first drops on your top tube don’t have to mean a slog. With the right tire choices and pressures, layers that vent and stay bright, and a simple maintenance loop, cycling in the rain feels controlled and satisfying. And with modern disc-brake road and city platforms, stopping power stays strong long after the asphalt turns glossy.

We ride year-round and design our lineup to make that easy. If you want help matching a rain-friendly bike to your routes, or you’re deciding between steel calm and carbon zip, we’re here to help. Tell us your roads, your weather, and your goals, and we’ll suggest the build, fenders, and small parts that turn gray forecasts into green lights. When you’re ready, contact our team and we’ll get you set up for confident miles in any weather.

Frame Materials Face-Off: Aluminum, Steel, Carbon, and Titanium

If you’ve ever shopped for a new bike, you’ve probably noticed how much emphasis goes into what your frame is made of. And no wonder — your bike frame isn’t just the backbone of your ride; it is your ride. It affects weight, comfort, handling, durability, and even how much joy you feel pedaling down your favorite stretch of road.

But with so many frame materials, like aluminum, steel, carbon, and titanium, how do you choose the one that truly fits your riding style? Let’s dive into this friendly face-off and see what each bike frame material brings to the road (or trail).

1. Aluminum: The Lightweight Workhorse

Ah, aluminum — the crowd favorite and perhaps the most common material you’ll find on bikes today. It’s affordable, light, and gives you plenty of speed for your dollar.

Weight: Aluminum bikes are generally on the lighter side, making them great for quick commutes or zippy rides through the city. You’ll feel that instant responsiveness when you push down on the pedals.

Comfort: Now, let’s bust one of the biggest myths out there: “Aluminum rides harsh.” Nope, not anymore. Modern frame engineering and better tubing designs have made today’s aluminum bikes smoother and more forgiving than ever. Many even rival steel in ride comfort, especially when paired with the right tires and seatpost.

Repairability & Longevity: Aluminum isn’t as easy to repair as steel, but it’s incredibly durable for everyday use. You might not pass it on to your grandkids, but it’ll faithfully get you to work, the café, and weekend rides for years.

Best For: Commuters and budget-conscious riders who want performance without breaking the bank.

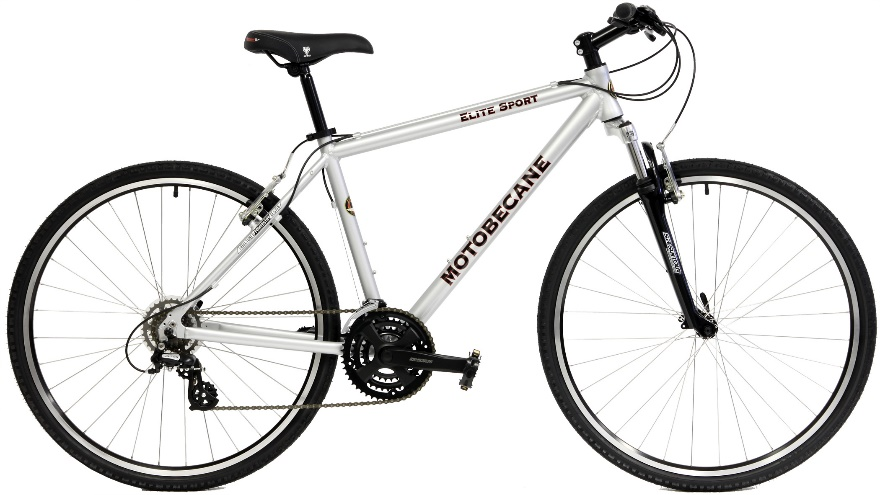
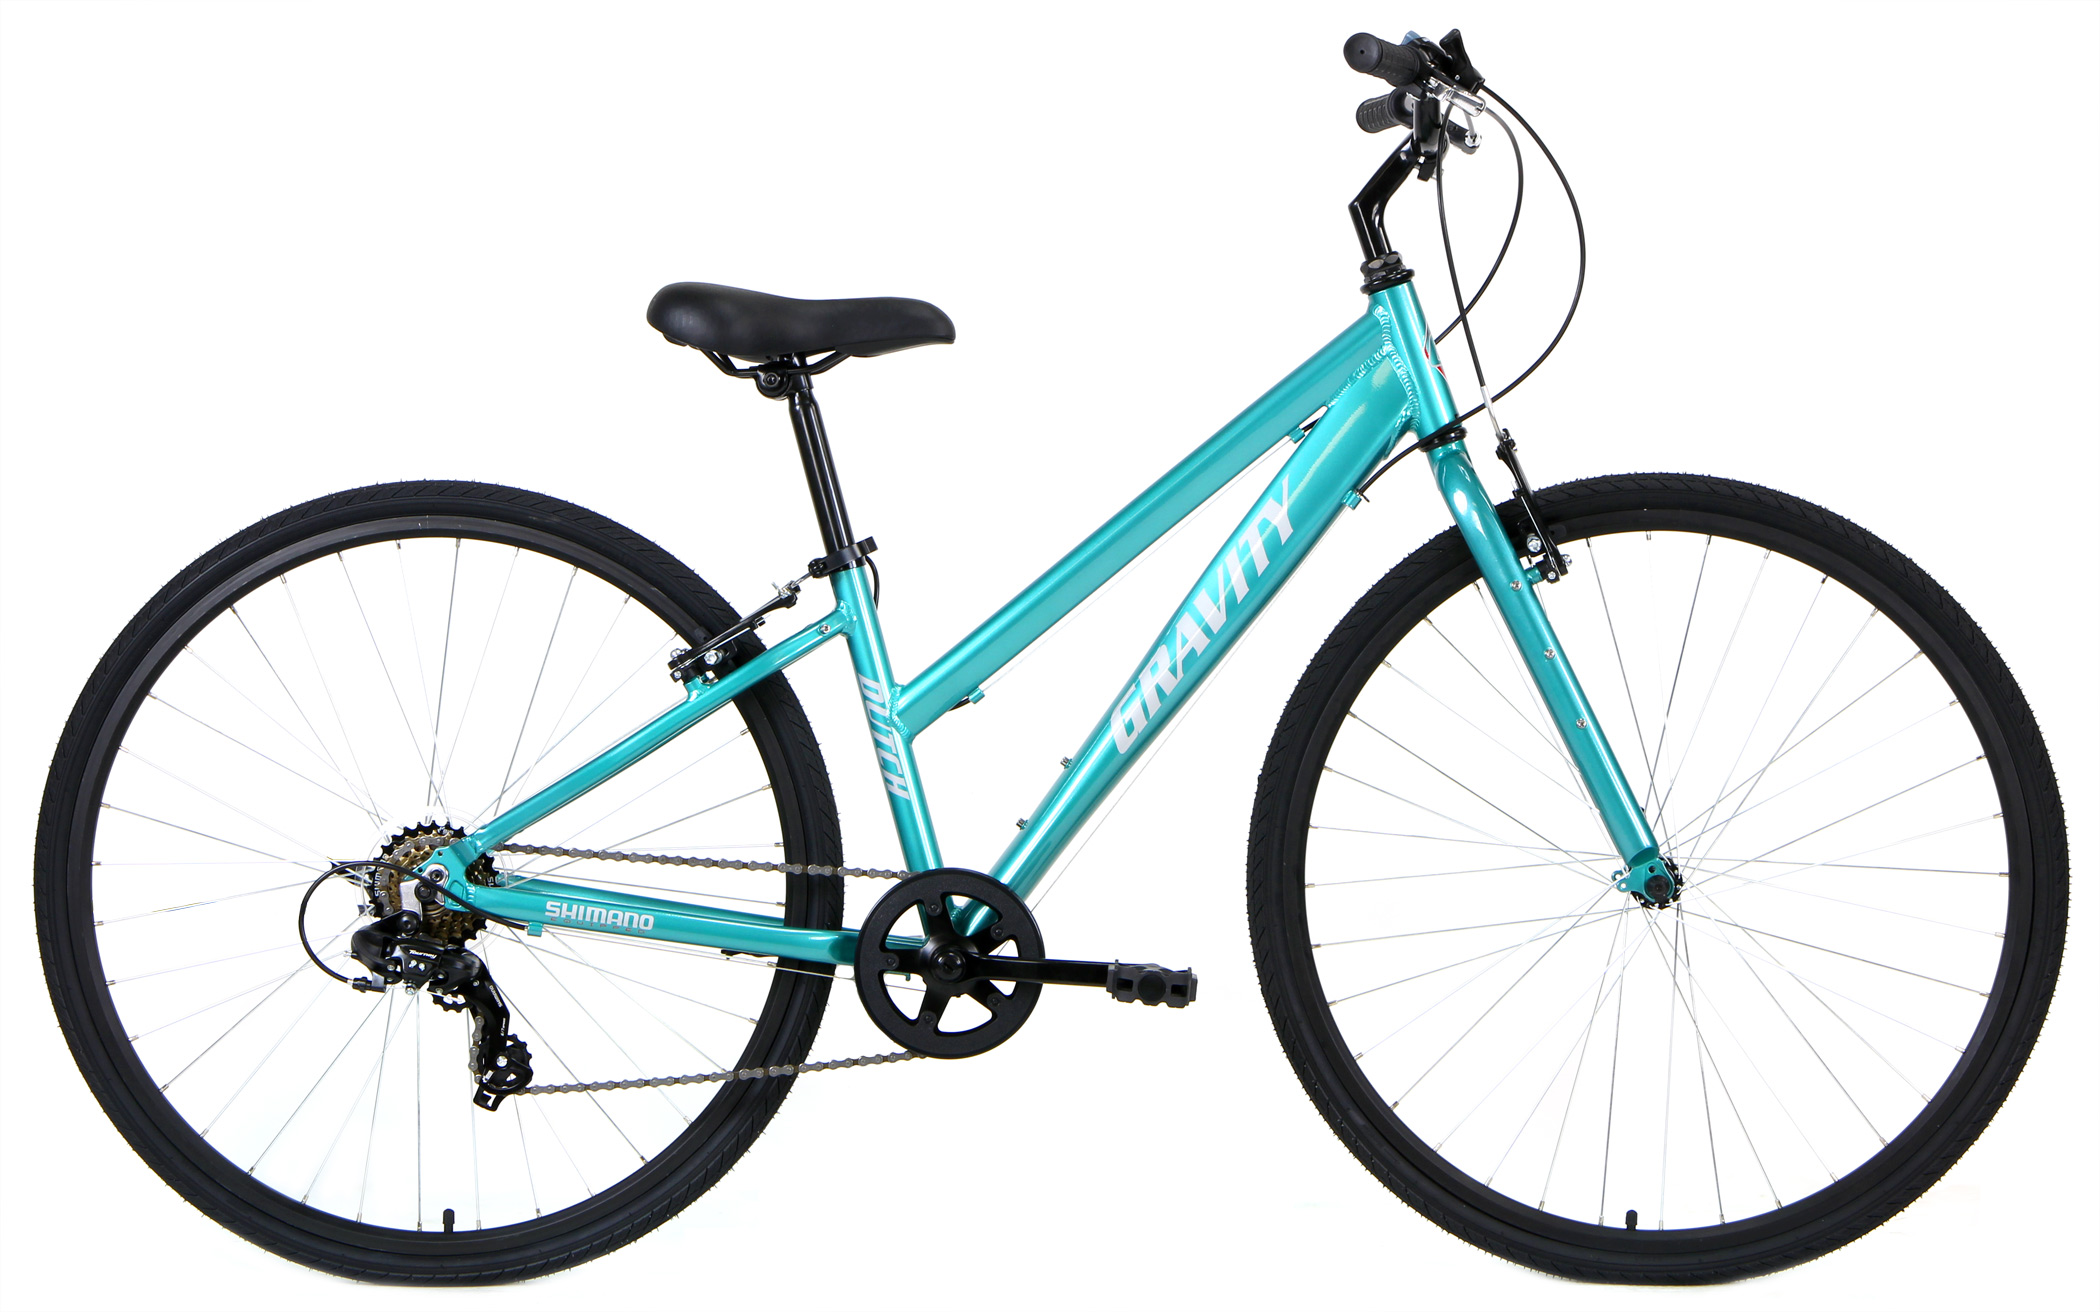
An image of a hybrid bike

2. Steel: The Classic That Keeps on Rolling

There’s a reason people get poetic about steel bikes. They have that unmistakable feel — smooth, solid, and connected to the road. It’s a material that has stood the test of time (and then some).

Weight: Steel bikes are typically heavier than aluminum or carbon, but that added heft translates into stability. You won’t be flying up hills quite as fast, but you’ll glide down them with confidence.

Comfort: Steel has a natural springiness that absorbs vibrations beautifully. That’s why touring cyclists and gravel grinders love it—it smooths out the bumps and keeps you comfortable hour after hour.

Repairability & Longevity: Steel wins hands down in repairability. Got a dent or crack? A skilled welder can bring it back to life. And with proper care, a steel frame can last decades. Think of it as the “forever bike” material.

Best For: Gravel grinders, touring enthusiasts, and anyone who values durability and comfort over shaving a few seconds off their Strava time.

3. Carbon Fiber: The Speed Demon

If aluminum is practical and steel is soulful, carbon fiber is the overachiever. It’s the go-to choice for racers and performance-driven riders for a reason—it’s light, strong, and sleek.

Weight: Carbon frames are often the lightest of the bunch, which makes them ideal for climbing, sprinting, or anyone who simply wants to feel like they’re flying.

Comfort: Another myth alert: “Carbon is fragile.” Nope! High-quality carbon frames are actually tougher than many people realize. And when it comes to comfort, carbon shines because engineers can precisely tune the material to dampen road chatter in specific areas. That means you get stiffness where you need power and softness where you need comfort.

Repairability & Longevity: While carbon can’t be welded like steel, minor cracks can be repaired by specialists. And when properly maintained, a carbon bike can last a very long time—it doesn’t rust or corrode like metal frames.

Best For: Racers, serious cyclists, and anyone who wants the perfect blend of speed, stiffness, and technology-driven comfort.

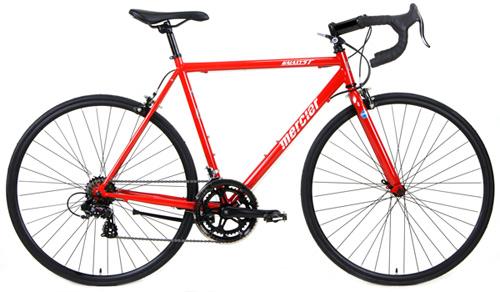
An image of a road bike

4. Titanium: The Dream Ride

If there were a “luxury class” in the world of frame materials, titanium would be it. It’s strong, corrosion-resistant, and offers a ride quality many describe as “magic.”

Weight: Titanium splits the difference between steel and aluminum. It’s lighter than steel but not as featherweight as carbon. What you gain, though, is incredible strength-to-weight efficiency and better performance.

Comfort: Titanium frames deliver buttery-smooth rides with excellent vibration damping. They have the smoothness of steel with a hint of liveliness that makes long rides feel effortless.

Repairability & Longevity: Titanium is nearly indestructible—it won’t rust, corrode, or fatigue easily. Though repairs require specialized tools, you’ll rarely need them. Many titanium bikes last a lifetime, and look as good on their 20th ride as they did on their first.

Best For: Riders who want a “forever bike,” one that’s equally at home on mountain passes, gravel trails, or century rides.

5. Head-to-Head Comparison

FeatureAluminumSteelCarbonTitanium
WeightLightModerateVery LightMedium-Light
ComfortGood (modern designs)ExcellentExcellentExceptional
RepairabilityDifficultEasyModerate (specialist)Moderate (specialist)
LongevityModerateHighHighVery High
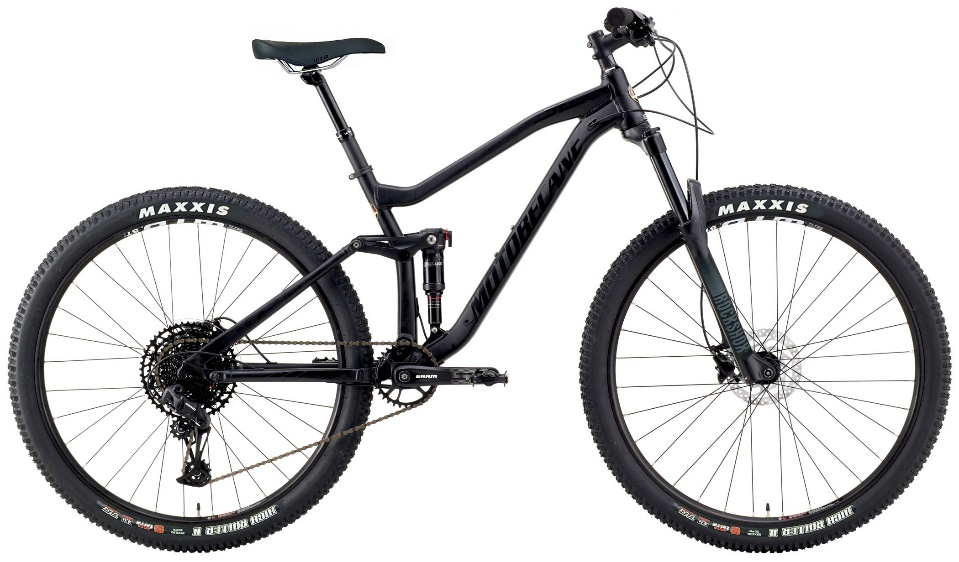
An image of a mountain bike

6. Choosing the Right Frame for You

Your ideal frame material really depends on your lifestyle and priorities:

City Commuter: Aluminum — it’s light, affordable, and efficient for daily rides.

Gravel Grinder or Tourer: Steel — for all-day comfort and durability on rough roads.

Speed Seeker: Carbon — for pure performance and power.

Lifelong Cyclist: Titanium — for that dream bike you’ll never want to sell.

Whatever your choice, the most important part is that the bike feels right when you ride it—balanced, responsive, and fun.

The Frame is Just the Beginning

At BikesDirect, we believe your bike should match your lifestyle. That’s why we offer high-quality aluminum, steel, carbon, and titanium bikes for every rider and every budget.

Explore our full collection of hybrid bikes, mountain bikes, road bikes, gravel bikes, and fat bikes today and experience the freedom, comfort, and excitement that come from riding the right frame for you. Reach out now.

Climb Like a Natural: Cadence, Gearing, and Pacing for Hills

There’s something magical about a hill. It’s both a challenge and a teacher, testing your limits, rewarding your grit, and offering that sweet sense of victory when you crest the top.

Whether you’re grinding up a local climb or taking on mountain passes that stretch for miles, mastering the art of climbing isn’t about brute strength alone. It’s about rhythm, efficiency, and knowing how to work with the hill instead of against it.

Let’s break down how you can climb like a natural, finding your perfect cadence, choosing the right gears, pacing smartly, and breathing your way to the summit without burning out too soon.

1. Understanding Cadence: Finding Your Climbing Rhythm

Cadence, your pedal revolutions per minute, is the secret sauce to smooth, efficient climbing. Think of it as your cycling heartbeat. Too slow, and you’ll fatigue your muscles early; too fast, and you’ll burn energy without gaining speed.

A good climbing cadence usually sits between 70–90 RPM, depending on your fitness level and terrain. The goal? Keep your pedal stroke fluid and consistent, like a smooth circle rather than a stomp.

Try this: next time you hit a moderate hill, shift into an easier gear and focus on steady pedal revolutions. Keep your upper body relaxed, hands light on the bars, and imagine you’re spinning rather than pushing. When you find that steady tempo where you feel both in control and powerful — that’s your magic zone.

An image of a hybrid bike

2. Gearing Smart: Choosing the Right Cassette Range

When it comes to climbing, your gears are your greatest allies. A well-chosen cassette can make the difference between powering up a hill or feeling like you’re towing a car.

For most riders tackling varied terrain, a cassette with a wide range, such as 11–34T or 11–36T, is ideal. These give you enough low-end options to spin up steep grades without grinding your knees into dust. Pair that with a compact or mid-compact crankset (like 50/34T), and you’ll have a setup that’s forgiving yet fast.

If you’re still finding your climbing legs, don’t be afraid of easier gears. Using your gears smartly isn’t a sign of weakness — it’s a sign of wisdom. The goal is to keep a sustainable cadence and conserve energy for when you really need it.

3. Standing vs. Sitting: When to Get Out of the Saddle

Ah, the great climbing debate — should you sit or stand? The truth is, both have their place.

Seated climbing is your go-to for longer ascents. It conserves energy and allows your large muscle groups (glutes and quads) to work efficiently. Keep your core engaged, shoulders relaxed, and hands light.

Standing climbs, on the other hand, are great for short bursts, powering through steep pitches or giving your muscles a change of engagement. When you rise, shift to a slightly harder gear to prevent “spinning out,” and let your bike sway naturally under you.

A good rule of thumb: stay seated 80% of the time and stand strategically when you need extra torque or relief.

4. Pacing for the Long Game: Don’t Blow Up Early

It’s easy to get caught up in the adrenaline of a climb — that urge to attack the hill, legs pumping like pistons, heart racing. But blow up early, and you’ll be crawling before the halfway mark.

Start every climb at a controlled pace, even if it feels too easy. Your heart rate will naturally rise as the grade steepens, so let your effort build gradually. The best climbers don’t sprint up; they flow up.

If you use a power meter, aim for 80–90% of your FTP (Functional Threshold Power) during longer climbs. Without one, rely on your breathing and perceived exertion. You should be able to talk in short sentences — if you’re gasping, you’re going too hard too soon.

An image of a road bike

5. Breathing: Your Built-In Performance Booster

Breathing might sound like the simplest part of riding, but when you’re pushing uphill, it becomes a powerful performance tool.

Instead of shallow chest breathing, focus on deep belly breathing, inhaling through your nose, expanding your diaphragm, and exhaling steadily through your mouth. This helps maximize oxygen intake, calm your heart rate, and keep your mind focused.

Here’s a cue: as you climb, imagine breathing down into your pedals. Each deep inhale fuels your legs; each exhale releases tension. Stay in rhythm — your breath, cadence, and effort should all flow together.

6. A Repeatable Climbing Workout to Build Strength and Endurance

Want to make climbing second nature? Here’s a simple, repeatable workout to train your body and mind for hills. You can do it indoors on a trainer or outdoors on your favorite local climb.

Workout: “The Hill Repeater”

  • Warm-Up (10 minutes): Easy spin, gradually increasing cadence.
  • Climb Set (4–6 rounds):
    • 5 minutes climbing at moderate effort (75–80% effort, 75–85 RPM)
    • 1 minute of standing climbing at harder effort (85–90%)
    • 3 minutes easy recovery spin between rounds
  • Cool Down (10 minutes): Gentle pedaling, light breathing, full relaxation.

This workout builds muscular endurance, improves pacing awareness, and teaches your body how to shift gears smoothly under load — all essentials for real-world climbs.

An image of a mountain bike

The Mental Game: Turning Hills Into Opportunities

At BikesDirect, we believe every rider deserves the tools to climb higher, ride farther, and enjoy every pedal stroke along the way. Whether you’re looking for hybrid bikes, mountain bikes, road bikes, gravel bikes, or fat bikes, we’ve got you covered with unbeatable prices.

Don’t just dream about conquering climbs — ride them with confidence, power, and style. Reach out now.

Shimano vs SRAM: Which Drivetrain Delivers the Best Performance for Your Money?

If you’re shopping drivetrains, you’re really asking two questions: how does it shift when the ride gets messy, and how much performance do I buy for each dollar? This shimano vs sram comparison answers both by looking at real-world tiers—from value builds to weekend-race machines—and weighing shifting feel, durability, serviceability, and upgrade paths. You’ll also see how those tradeoffs show up on actual Bikes Direct models, such as an affordable hardtail that’s often equipped with Shimano value groups, an alloy full-suspension bike that commonly ships with SRAM’s Eagle ecosystem, and a light 27.5 trail bike with a simple, fast single-ring setup.

Our goal isn’t to crown one brand for every rider. It’s to show where each wins on price-to-performance so you can spend smart and smile more.

How to Read This Comparison

Every brand stacks features from entry level to premium. Shimano’s family names run from Tourney/Altus/Acera/Alivio into Deore, SLX, XT, and XTR on the mountain side; on road and gravel, think Claris/Sora/Tiagra into 105, Ultegra, and Dura-Ace. SRAM’s mountain progression goes SX/NX → GX → X01/XX (with T-type Transmission at the top), and its drop-bar line moves Apex → Rival → Force → Red. Rather than list them all, we’ll translate typical price brackets into riding experience and value. Exact pricing changes, but the patterns below hold steady.

Entry Value (Everyday Fitness and New-to-Trails)

If your budget lands in the true “starter bike” zone, the best drivetrain is the one that shifts dependably in the grit, survives knocks, and is cheap to replace when you inevitably wear out a chain and cassette. Shimano has long dominated this space with sensibly geared 2x or 3x setups and, increasingly, wide-range 1x options. The shifting feel at this level is pleasantly light and consistent; you give up some crispness under heavy load compared to mid-tier, but you gain easy parts availability and low running costs.

SRAM’s answer in this bracket is usually 1x with SX or NX Eagle. The upside is intuitive shifting and a very large 12-speed range that flattens hills. The tradeoff is a bit more sensitivity to perfect setup and hanger alignment; keep cables fresh and limit screws dialed and it’s great.

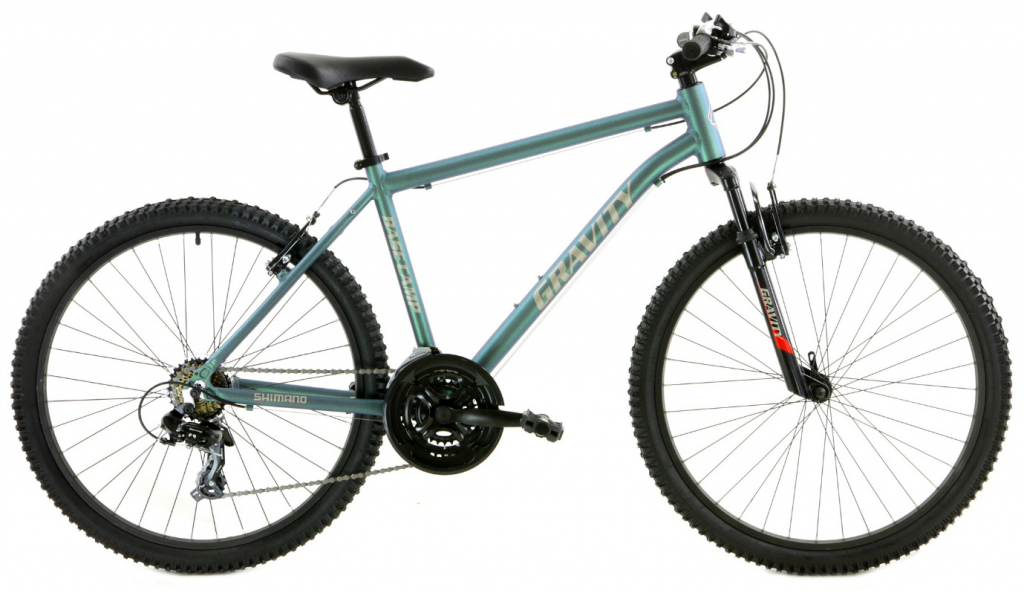
Where this shows up in our lineup: a value hardtail like the Gravity BaseCamp V7 is frequently spec’d with reliable Shimano components that are easy to live with and cheap to service—exactly what new riders need. If you prefer the simplicity of 1×12 from day one, an alloy trail bike with SRAM SX or NX is a smart place to start; our full-suspension example below shows why.

Value verdict: At the true entry point, Shimano often wins cost of ownership with low-priced cassettes and chains, while SRAM wins simplicity via 1x 12-speed range. If you ride in all weather and want “set and forget,” Shimano’s value tiers are hard to beat. If you want a single ring and massive range for steep trails, SRAM SX/NX offers real performance per dollar—just be a bit more attentive to setup.

Mid-Tier Sweet Spot (Enthusiast Trail and Fast Fitness)

This is where most riders get the best “wow per dollar.” For Shimano, Deore and SLX bring crisp, forgiving shifts, clutched derailleurs that tame chain slap, and cassettes that last. For SRAM, GX Eagle is the everyday hero—lighter, snappier than NX/SX, and still well-priced. Both brands deliver wide-range 1x, strong clutches, and lever ergonomics that encourage frequent, confident shifting.

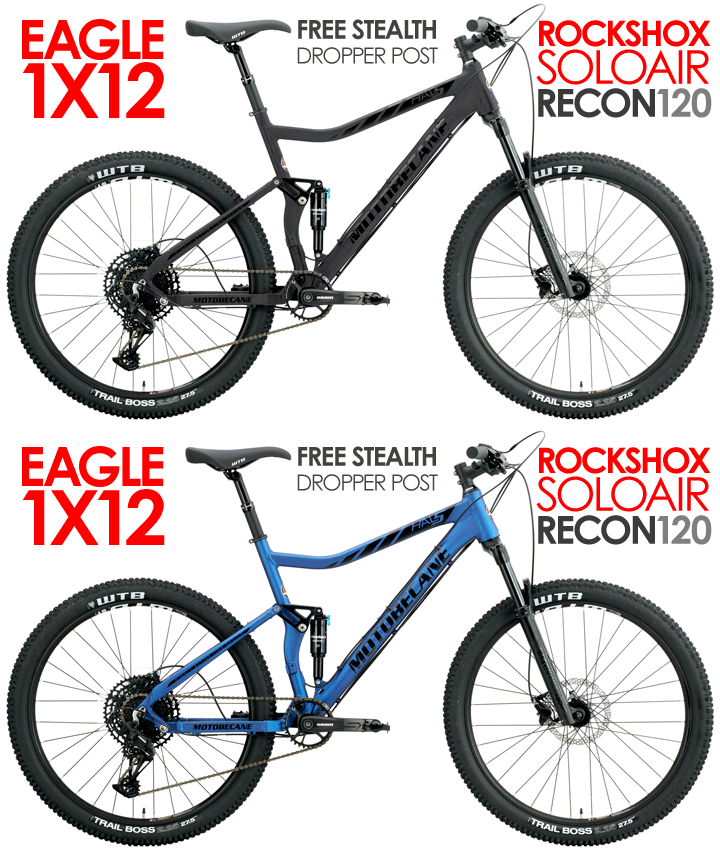
A great real-world example is a value-packed full-suspension mountain bike that commonly ships with SRAM Eagle SX/GX. The Motobecane HAL5 Eagle SX 27.5 shows why this tier is so popular: big 12-speed range for climbs, chain management that stays quiet on descents, and upgrade paths that don’t force a full drivetrain swap. On the Shimano side, Deore/SLX builds on alloy hardtails and short-travel bikes deliver buttery, predictable shifts under load with parts that feel nearly bombproof for the price.

Value verdict: In the mid tier, it’s effectively a tie on ride quality. Your decision tilts with priorities: Shimano mid-tiers excel in shift feel under load and long wear life; SRAM GX wins with broad ecosystem support and upgrade flexibility (mix-and-match cassettes/derailleurs/chainrings). If you want to keep spares cheap, Shimano has the edge. If you dream of incremental upgrades toward premium 12-speed (or Transmission later), SRAM’s path is smooth.

Upper-Mid and Race-Curious (Lighter, Crisper, Still Sensible)

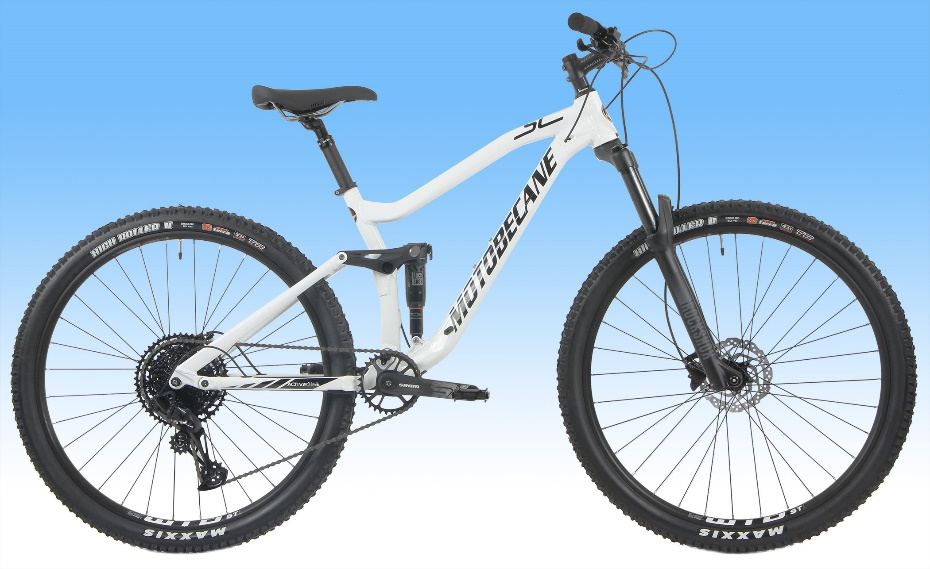
Motobecane HAL5 Eagle SX 27.5 full-suspension mountain bike with SRAM Eagle drivetrain.

Move one tier up and you’re paying for less weight, snappier engagement, and extra polish. Shimano SLX/XT and SRAM GX/X01 are the classic pairings. Shift quality under power tightens, clutch behavior quiets the bike, and cassettes often jump to lighter carriers. You’ll feel the difference on punchy climbs and in tight, technical shifting where precision saves dabs.

This is also where 1x drivetrains truly shine for everyday riders. A simple, light front end with a wide 10-50/52T cassette makes the bike feel modern and fast. If you want to keep that same simplicity with a quick, light platform, the Fantom 2.5 SS12 27.5 is a great illustration of the “less is more” mindset—light wheels, agile handling, and a single-ring drivetrain keep focus on the ride, not the wrench.

Value verdict: If your budget can stretch here, both brands return a lot on investment. Shimano XT is legendary for durability and buttery shifts; SRAM X01 (and even well-specced GX) feels taut and racy. The best “money well spent” choice is whichever shows up on the frame you love at the better total price—because the differences in this band are subtle and all good.

Shifting Feel, in Plain English

Shimano’s signature at any tier is silky engagement that remains smooth when you’re still pedaling hard. The lever stroke is light and the chain tends to climb cogs gracefully even if your timing isn’t perfect. SRAM’s hallmark is positive, mechanical snap—you feel the click, and the shift completes decisively. On rough trails with lots of on-off power, SRAM’s tactile feedback can be confidence-building; on long climbs and steady road or gravel miles, Shimano’s fluidity feels effortless. Neither is “better”; they’re different flavors of good. If you’re unsure, your best-value choice is the one attached to the best-priced complete bike that fits you well.

Durability and Running Costs

Cassettes and chains are your recurring costs. Shimano’s steel cassettes at value and mid tiers typically undercut SRAM on price while wearing very well with frequent chain swaps. SRAM’s GX cassettes are durable and shift beautifully but can cost more than a comparable Deore/SLX unit. Derailleur clutches are excellent from both companies; service intervals and feel are similar in real life. If you ride lots of wet grit or commute year-round, budget for chains more than anything else, and replace early to protect the cassette—whichever brand you choose.

Upgrades and Ecosystems

SRAM’s Eagle ecosystem makes mixing tiers straightforward: you can start SX/NX and move to a lighter GX derailleur and cassette later, or go all the way to X01. Shimano offers similar compatibility within 12-speed Deore/SLX/XT/XTR, with the added perk that replacement parts are easy to find worldwide. If you plan to upgrade piece-by-piece, SRAM’s ladder is particularly friendly; if you plan to ride a bike “as-is” for years with low fuss, Shimano’s parts availability and pricing are compelling.

Road and Gravel Sidebar

While this comparison leans MTB, the value logic mirrors on drop-bar bikes. Shimano 105 and Ultegra deliver astonishing performance per dollar for pavement and endurance gravel; SRAM Rival and Force bring intuitive eTap AXS wireless shifting that many riders love. The calculus is similar: Shimano = excellent price/performance with long wear; SRAM = cutting-edge ergonomics and simple upgrades within the same family.

Real Bikes, Real Budgets: How to Decide

Motobecane Fantom 2.5 27.5 mountain bike built for performance and durability.

Image Filename: motobecane-fantom2p5-ss12-mountain-bike.jpg

Alt Text: Motobecane Fantom 2.5 27.5 mountain bike built for performance and durability.

Caption: The Fantom 2.5 demonstrates how both Shimano and SRAM groupsets deliver great value across varying budgets and terrains.

Image Link: https://www.bikesdirect.com/products/motobecane/275-650b-bikes/fantom2p5-ss12-mtb-275.htm 

Start by choosing the frame and suspension platform that match your trails and fitness. Then look at the total bike price for the drivetrain tier you want. For example, if your heart says “playful full-suspension,” and you find a sharp deal on a SRAM-equipped build like the HAL5 Eagle SX 27.5, you’re buying a complete experience—geometry, tires, brakes, and a 12-speed range that climbs anything. If your plan is “learn, explore, upgrade slowly,” a Shimano-equipped value hardtail such as the BaseCamp V7 keeps costs low while delivering dependable shifting on day one. If you crave nimble and minimal, a light 27.5 single-ring trail bike like the Fantom 2.5 SS12 maximizes speed-per-dollar by spending money on the parts you feel every second: wheels, tires, cockpit—and one good derailleur.

Bottom Line: Best Performance for Your Money

  • Tightest budgets and all-weather utility: Shimano value and Deore tiers usually win total cost of ownership without sacrificing shift quality.
  • Mid-tier trail riders who love simple 1x range and clear, tactile shifts: SRAM GX (and well-set-up NX/SX) delivers huge capability per dollar.
  • Upper-mid budgets chasing durability and polish: Shimano XT vs SRAM X01/GX is a rider-preference tie; choose the better-priced complete bike you love.

We ride what we sell, and we’re happy to steer you toward the best value for how and where you ride your mountain bike. Tell us your budget, terrain, and upgrade appetite, and we’ll point you to the exact build—Shimano or SRAM—that turns money into miles the smartest way. When you’re ready, contact our team and we’ll help you pick the drivetrain and the bike that make the most sense for you right now—and for the rides you’ll be doing six months from now.

Tubeless Tires Made Easy: From First Sealant Pour to First PR

This Tubeless Tire guide breaks down everything a Road Bike rider needs for an easy setup, from required tools to sealant amounts, pressure tips, and performance benefits. It highlights how tubeless systems boost speed, grip, and puncture protection, helping cyclists enjoy smoother, safer rides on any terrain.

Tubeless Tires Made Easy: From First Sealant Pour to First PR

Cycling Recovery: Why Rest Days Are Just as Important as Training


Ask any rider what their training routine looks like, and you’ll likely hear about long climbs, intervals, or weekend centuries. What often goes unmentioned? Rest. Many cyclists—whether they’re pushing their limits on a road bike or tackling trails on a mountain bike—fall into the trap of thinking progress comes only from piling on more miles. In reality, your body grows stronger not during the ride itself but in the hours and days after, when recovery kicks in.

The Science Behind Recovery

At its core, training is controlled stress. Each ride creates micro-tears in your muscles and taxes your cardiovascular system. Without recovery, those systems can’t repair or adapt. That’s why ignoring rest days often leads to fatigue, poor performance, and even overtraining syndrome.

Research consistently shows that cycling recovery tips—like proper sleep, nutrition, and active recovery rides—are as important as structured workouts. Sleep in particular triggers the release of growth hormones that rebuild muscle. Meanwhile, glycogen stores need time and fuel to replenish. When you skip this stage, you’re essentially riding on an empty tank.

Active vs. Passive Recovery

Recovery doesn’t always mean lounging on the couch, though sometimes that’s exactly what your body needs. Passive recovery is total rest—no rides, no gym, just letting your system recharge. Active recovery, on the other hand, involves light activity, such as a 30-minute spin on a hybrid bike or an easy cruise on a beach cruiser. These low-intensity sessions boost circulation, helping deliver nutrients to muscles and flush out waste products.

A common rule of thumb: after a high-intensity ride, follow with an active recovery day, then a full rest day if needed. The key is listening to your body. If your legs feel heavy, your heart rate spikes unusually high on easy rides, or motivation is low, it’s time to prioritize rest.

Fat bike with wide tires designed for stability and comfort on trails.

Nutrition: Fuel for Repair

Another overlooked aspect of recovery is nutrition. What you eat in the hours after a ride can determine how quickly you bounce back. Aim for a mix of carbohydrates to restore glycogen and protein to rebuild muscle. Hydration is just as vital. Even mild dehydration can slow down recovery significantly.

Think of your body like a finely tuned machine. You wouldn’t neglect oiling the chain of your gravel bike before a long ride. Similarly, skipping recovery nutrition leaves your “engine” less efficient for the next outing.

The Role of Equipment in Recovery

Believe it or not, your gear also plays a role in how well you recover. For example, tire choice affects fatigue. Wider tires on a fat bike or gravel setup can reduce road vibration, sparing your joints on long rides. Properly fitted saddles, ergonomic handlebars, and quality pedals reduce strain, making it easier for your body to rebound.

Even something as simple as switching to clipless pedals on a road bike can distribute power more evenly, minimizing hotspots that take longer to recover from. When your equipment supports efficiency, recovery starts the moment you pedal.

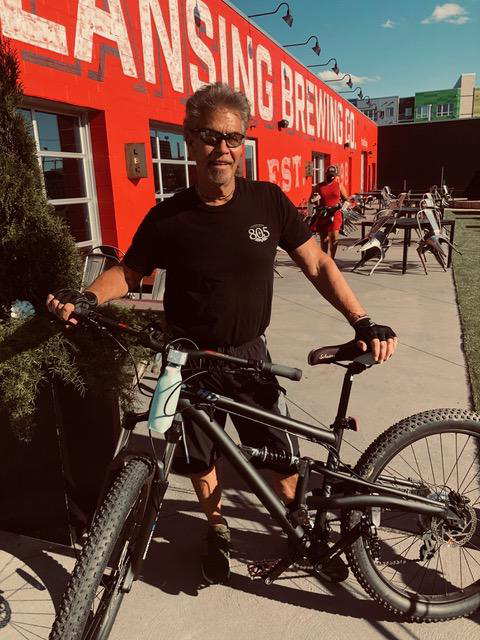
Cyclist standing with a mountain bike outside a brewery, ready for a training ride.

Mental Recovery: The Overlooked Element

Physical rest is only half the equation. Cycling is mentally demanding, too. Structured training blocks, data tracking, and performance goals can weigh heavily on riders. Taking intentional mental recovery days helps prevent burnout.

This might look like leaving the power meter at home for a relaxed spin along the coast on a beach cruiser, or joining a social ride with no pace goals. These shifts remind us why we started cycling in the first place: joy, freedom, and connection.

Recovery Techniques That Work

Experienced riders often swear by small but powerful recovery habits. Foam rolling eases tight muscles, compression gear supports circulation, and stretching maintains mobility. Cold showers or contrast baths can reduce inflammation, while yoga adds flexibility. None of these replaces the need for rest, but together they accelerate it.

Another tried-and-true method? Sleep. While training apps and gadgets provide endless data, the simplest of all cycling recovery tips remains consistent: high-quality rest. Aim for seven to nine hours of sleep, with consistency being the real game changer.

Two cyclists smiling while riding hybrid bikes on a beachside path.

Rest Days Don’t Mean Regression

Many cyclists fear that taking a day off will undo their progress. The opposite is true. When done strategically, recovery is the bridge between where you are and where you want to be.

Imagine training for a long off-road event. If you’re hammering daily sessions on a mountain bike, fatigue eventually builds faster than fitness. Incorporating recovery rides or off days allows adaptations to catch up, meaning you arrive at the start line strong, not burned out.

In fact, most training plans for endurance events—whether it’s a 100-mile road race or a gravel grinder—intentionally schedule rest. Elite cyclists don’t consider rest optional, and neither should everyday riders.

Conclusion: Rest as Part of the Ride

Cycling culture often glorifies the grind, celebrating riders who log endless hours. But true progress happens in the balance between effort and recovery. Whether you’re training on a road bike, exploring gravel trails, or cruising along the beach, your performance tomorrow depends on how well you rest today.

So embrace recovery not as an interruption to training but as an essential part of it. Prioritize sleep, fuel wisely, and don’t hesitate to take a full day off when needed. You’ll return stronger, fresher, and ready to enjoy the ride.

Ready to take your cycling further with smarter training and recovery? Find the perfect ride for your next adventure at Bikesdirect.com—whether it’s a road, gravel, mountain, or cruiser bike, we’ve got the bike that fits your journey.

Tubeless vs Tubed Tires: Which Setup Makes Sense for You?

Choosing between tubeless and traditional (tubed) tires is one of those classic cycling debates that never seems to settle. Some riders swear by the sealing magic of tubeless, others by the simplicity and reliability of tubes. But the real question is: which setup makes sense for you? That depends on your terrain, riding frequency, comfort threshold, and how much tinkering you’re willing to do.

In this post, we’ll take you through the nitty-gritty: puncture resistance, weight, ride quality, and practical trade-offs so you can make a choice that feels right for your riding style. And yes—we looked far and wide to make sure this is grounded in real-world facts and recent tests.

Also, if you want a deeper technical read, check out this piece at Forbes on innovations in bike tech, or this breakdown at Business Insider on how cycling gear evolution matters in everyday riding.

The Basics: What Do “Tubeless” and “Tubed (clincher)” Mean?

Before we dive deeper, a quick refresher:

  • Tubed (Clincher with inner tube): The classic setup. A tire sits on the rim, and an inner tube holds the air. If a sharp object slices the tube, you typically get a flat.
  • Tubeless (or “tubeless-ready” clincher): No inner tube. Instead, the tire + rim interface seals airtight. You generally add a bit of liquid sealant inside, which can automatically seal small punctures.

Tubeless technology is borrowed heavily from tires in the auto industry (and mountain biking), but to work well on bicycle rims it requires good rim/tire compatibility, strong bead walls, and reliable sealing surfaces.

Nowadays, many performance tires sold via sites like ours are “tubeless-ready” (meaning they can run tubeless if your rims support it). For example, we list the Panaracer GravelKing SK TLC as tubeless-compatible on our site.

One caveat: not every rim is tubeless-compatible, and converting older rims can require special tape, sealant, or rim strips. So your wheelset is a key constraint.

Puncture Resistance: Who Stands Taller?

If you ride through thorn-strewn paths, rough roads, or gravel, puncture resistance will likely be one of your top concerns.

Tubed Systems – Pros & Weaknesses

  • Pros:
    • If you get a puncture, it’s typically easier to fix on the roadside: pull the tire, patch or replace the tube, reinstall.
    • Spare inner tubes are cheap, light, and ubiquitous.
    • In many parts of the world, tubes and patches are the fallback—no need to worry about sealant or rim tape.
  • Weaknesses:
    • The classic “pinch flat” (tube gets pinched between rim and obstacle) is a common issue, especially if you hit sharp edges or potholes at low pressures.
    • The friction between tube and tire can contribute to rolling resistance losses.
    • Tubes don’t self-seal; a puncture means flat unless patched or replaced.

Tubeless Systems – Pros & Weaknesses

  • Pros:
    • Self-sealing: One of the biggest advantages. The sealant inside can automatically close many small punctures (nails, glass shards, etc.).
    • No pinch flats: Because there’s no tube to pinch, running lower pressures is safer against rim-tube pinch incidents.
    • More forgiving in rough terrain: Especially advantageous in gravel, mixed-surface, or less-than-perfect roads, where sealing ability and lower pressure capability help.
  • Weaknesses:
    • Sealant can dry out over time, requiring periodic topping up (say every few months or based on use).
    • Larger punctures, big cuts, or sidewall rips may defeat the sealant; you’ll need a plug or fallback tube option.
    • Setting up tubeless (mounting, sealing, getting initial “pop” of bead) can be finicky, especially on older rims.
    • Adds complexity if you’re not mechanically inclined.
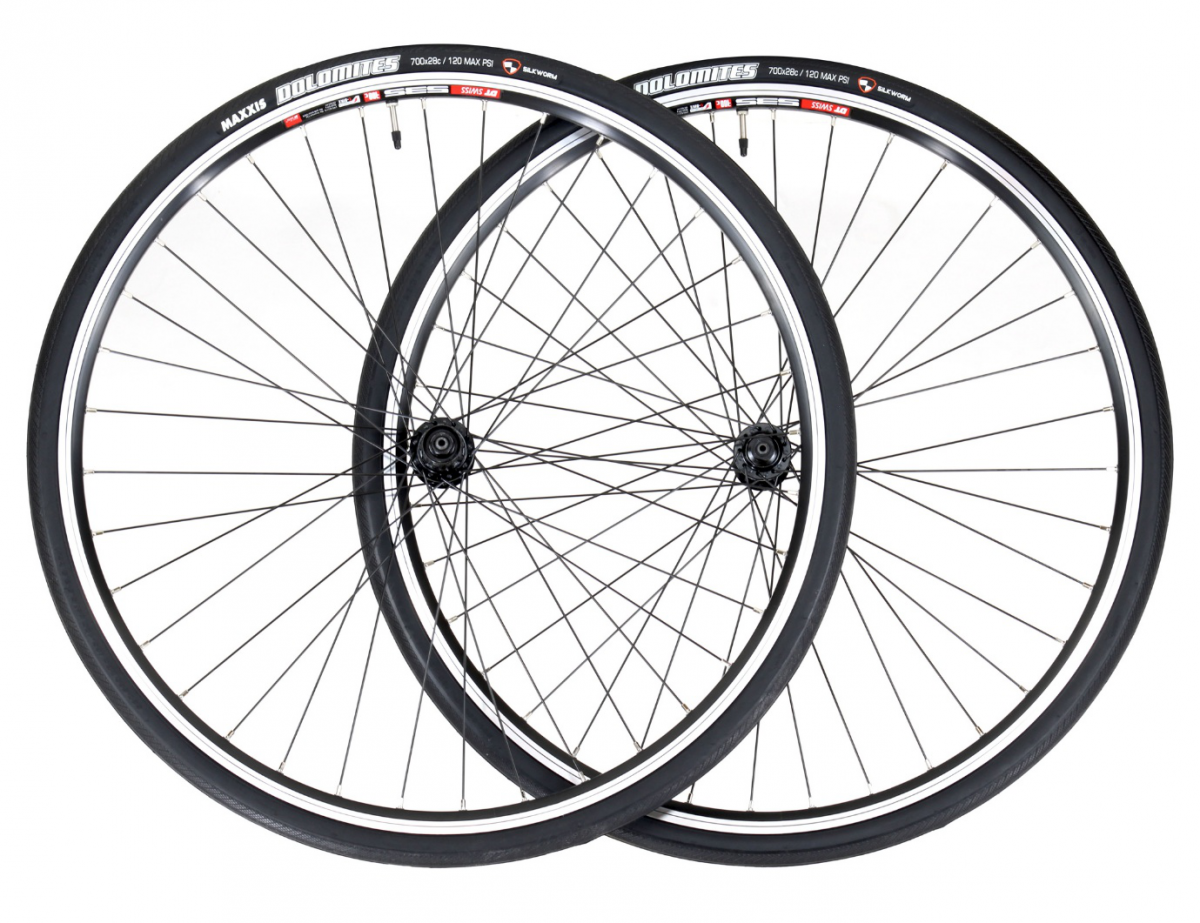
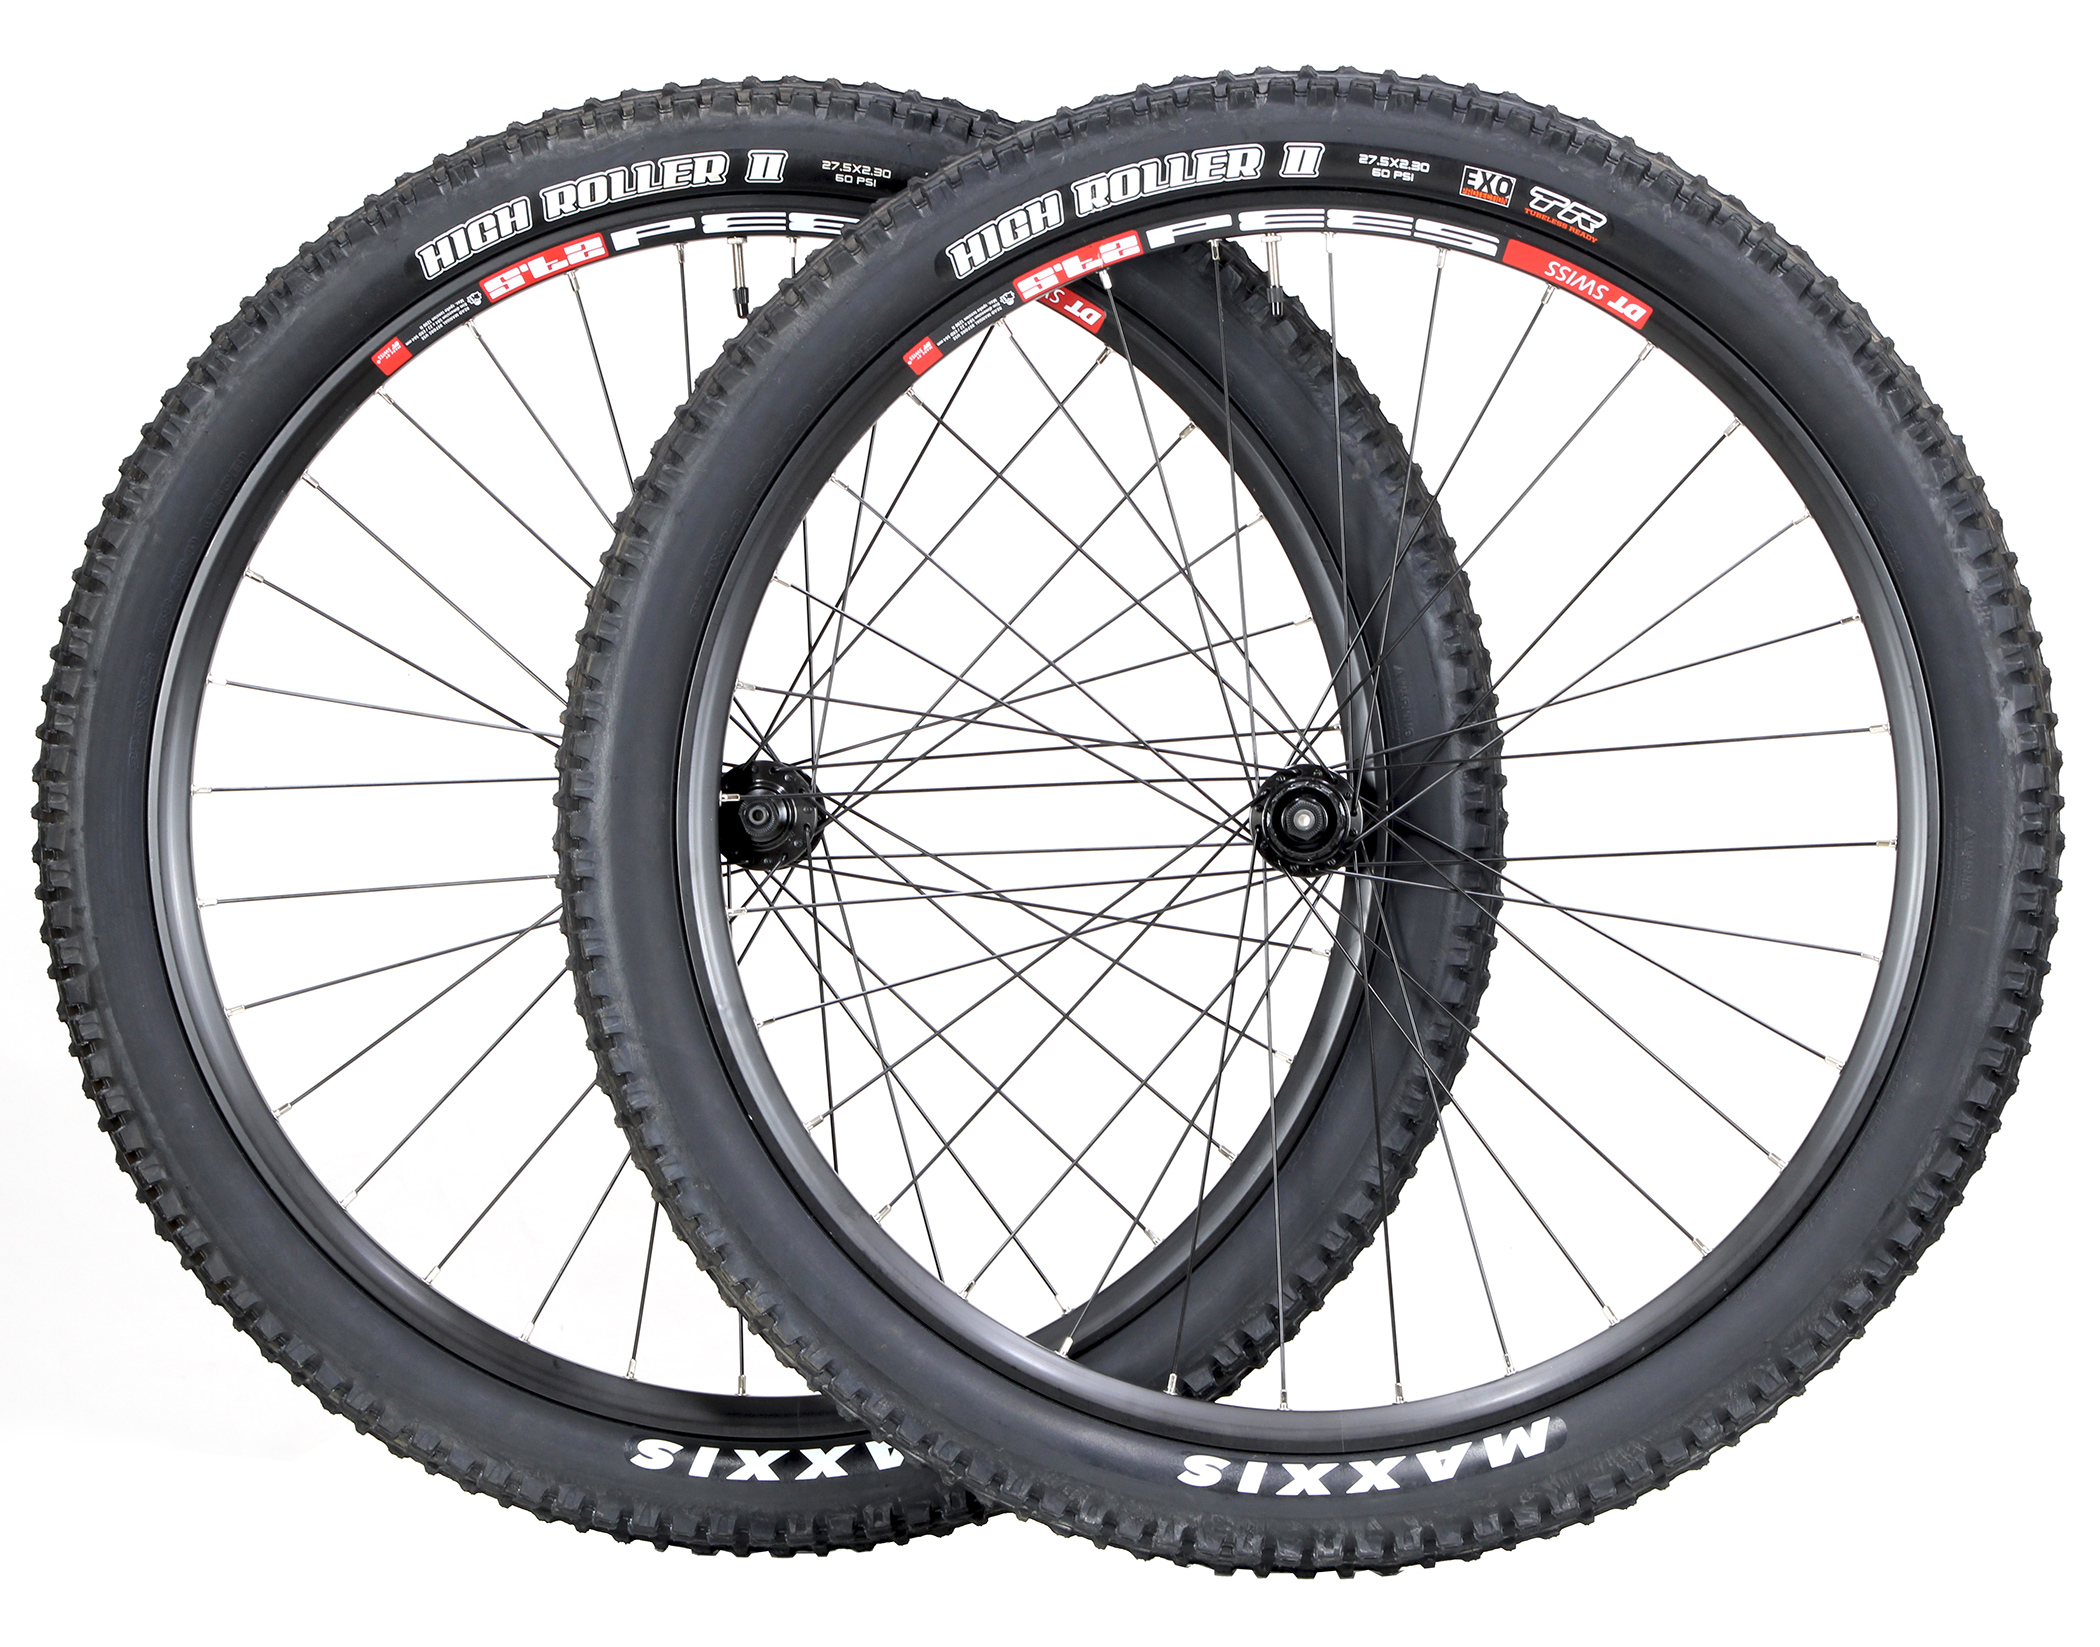
a wheelset by Bikesdirect.com

The Bottom Line on Puncture Resistance: If you ride regularly in rough terrain, debris, gravel, or you want peace of mind, tubeless gives a real edge. But if your way is smooth pavement, and you’d rather rely on the simplicity of patches or spare tubes, tubed is still a solid fallback.

Weight & Rolling Resistance: Which Setup Is Lighter or Faster?

Weight and efficiency are often the first things performance-focused riders harp on.

Weight Considerations

  • On face value, a tube + standard clincher setup might look lighter (no sealant, no special beads).
  • But in practice, you often add sealant (~20–60 ml depending on tire size), tubeless valves, rim tape, etc. Those bits add weight.
  • Also, many tubeless-ready tires are built sturdier (stronger casings, reinforced beads), potentially offsetting weight gains.

Rolling Resistance & Efficiency

This is where the data can get interesting—and sometimes surprising.

  • No tube = less hysteresis loss: Because there’s no tube being stretched/compressed inside, some of the energy losses (especially in real-world roughness) are reduced.
  • Lab tests: Some sources assert that a tubeless setup can save 2–5 watts per tire when compared to a clincher + butyl tube.
  • Gravel and larger tires: The advantage of tubeless grows in lower pressure, larger-volume setups (gravel, cyclocross) where tubes are heavier and less efficient. For example, Bicycle Rolling Resistance finds tubeless has better rolling resistance in those contexts.
  • Latex tubes are tricky competition: If you use a latex inner tube (rather than butyl), the gap narrows (latex is quite efficient).
  • The sealant swirl penalty: Some riders note that the moving sealant inside can slightly reduce efficiency. Others say it’s negligible in most setups.

In real-world riding, the differences might be subtle—but over long distances or racing, those watts count.

Ride Quality & Comfort: Feel the Difference

One of the biggest subjective benefits many riders report switching to tubeless is improved ride comfort. Why?

  • Lower pressure without pinching risk: You can run a lower PSI and absorb bumps, grit, and small irregularities more smoothly without risking pinch flats.
  • The tire can conform more to road texture, improving grip and reducing harshness.
  • Many riders note a “silkier,” more forgiving feel.
  • If your routes include chipseal, cobbles, farm tracks, or imperfect roads, that comfort edge might be the tiebreaker.

Setup, Maintenance & Practical Realities

We’d be kidding ourselves if we ignored the real-world frustrations (and joys) of setup and upkeep.

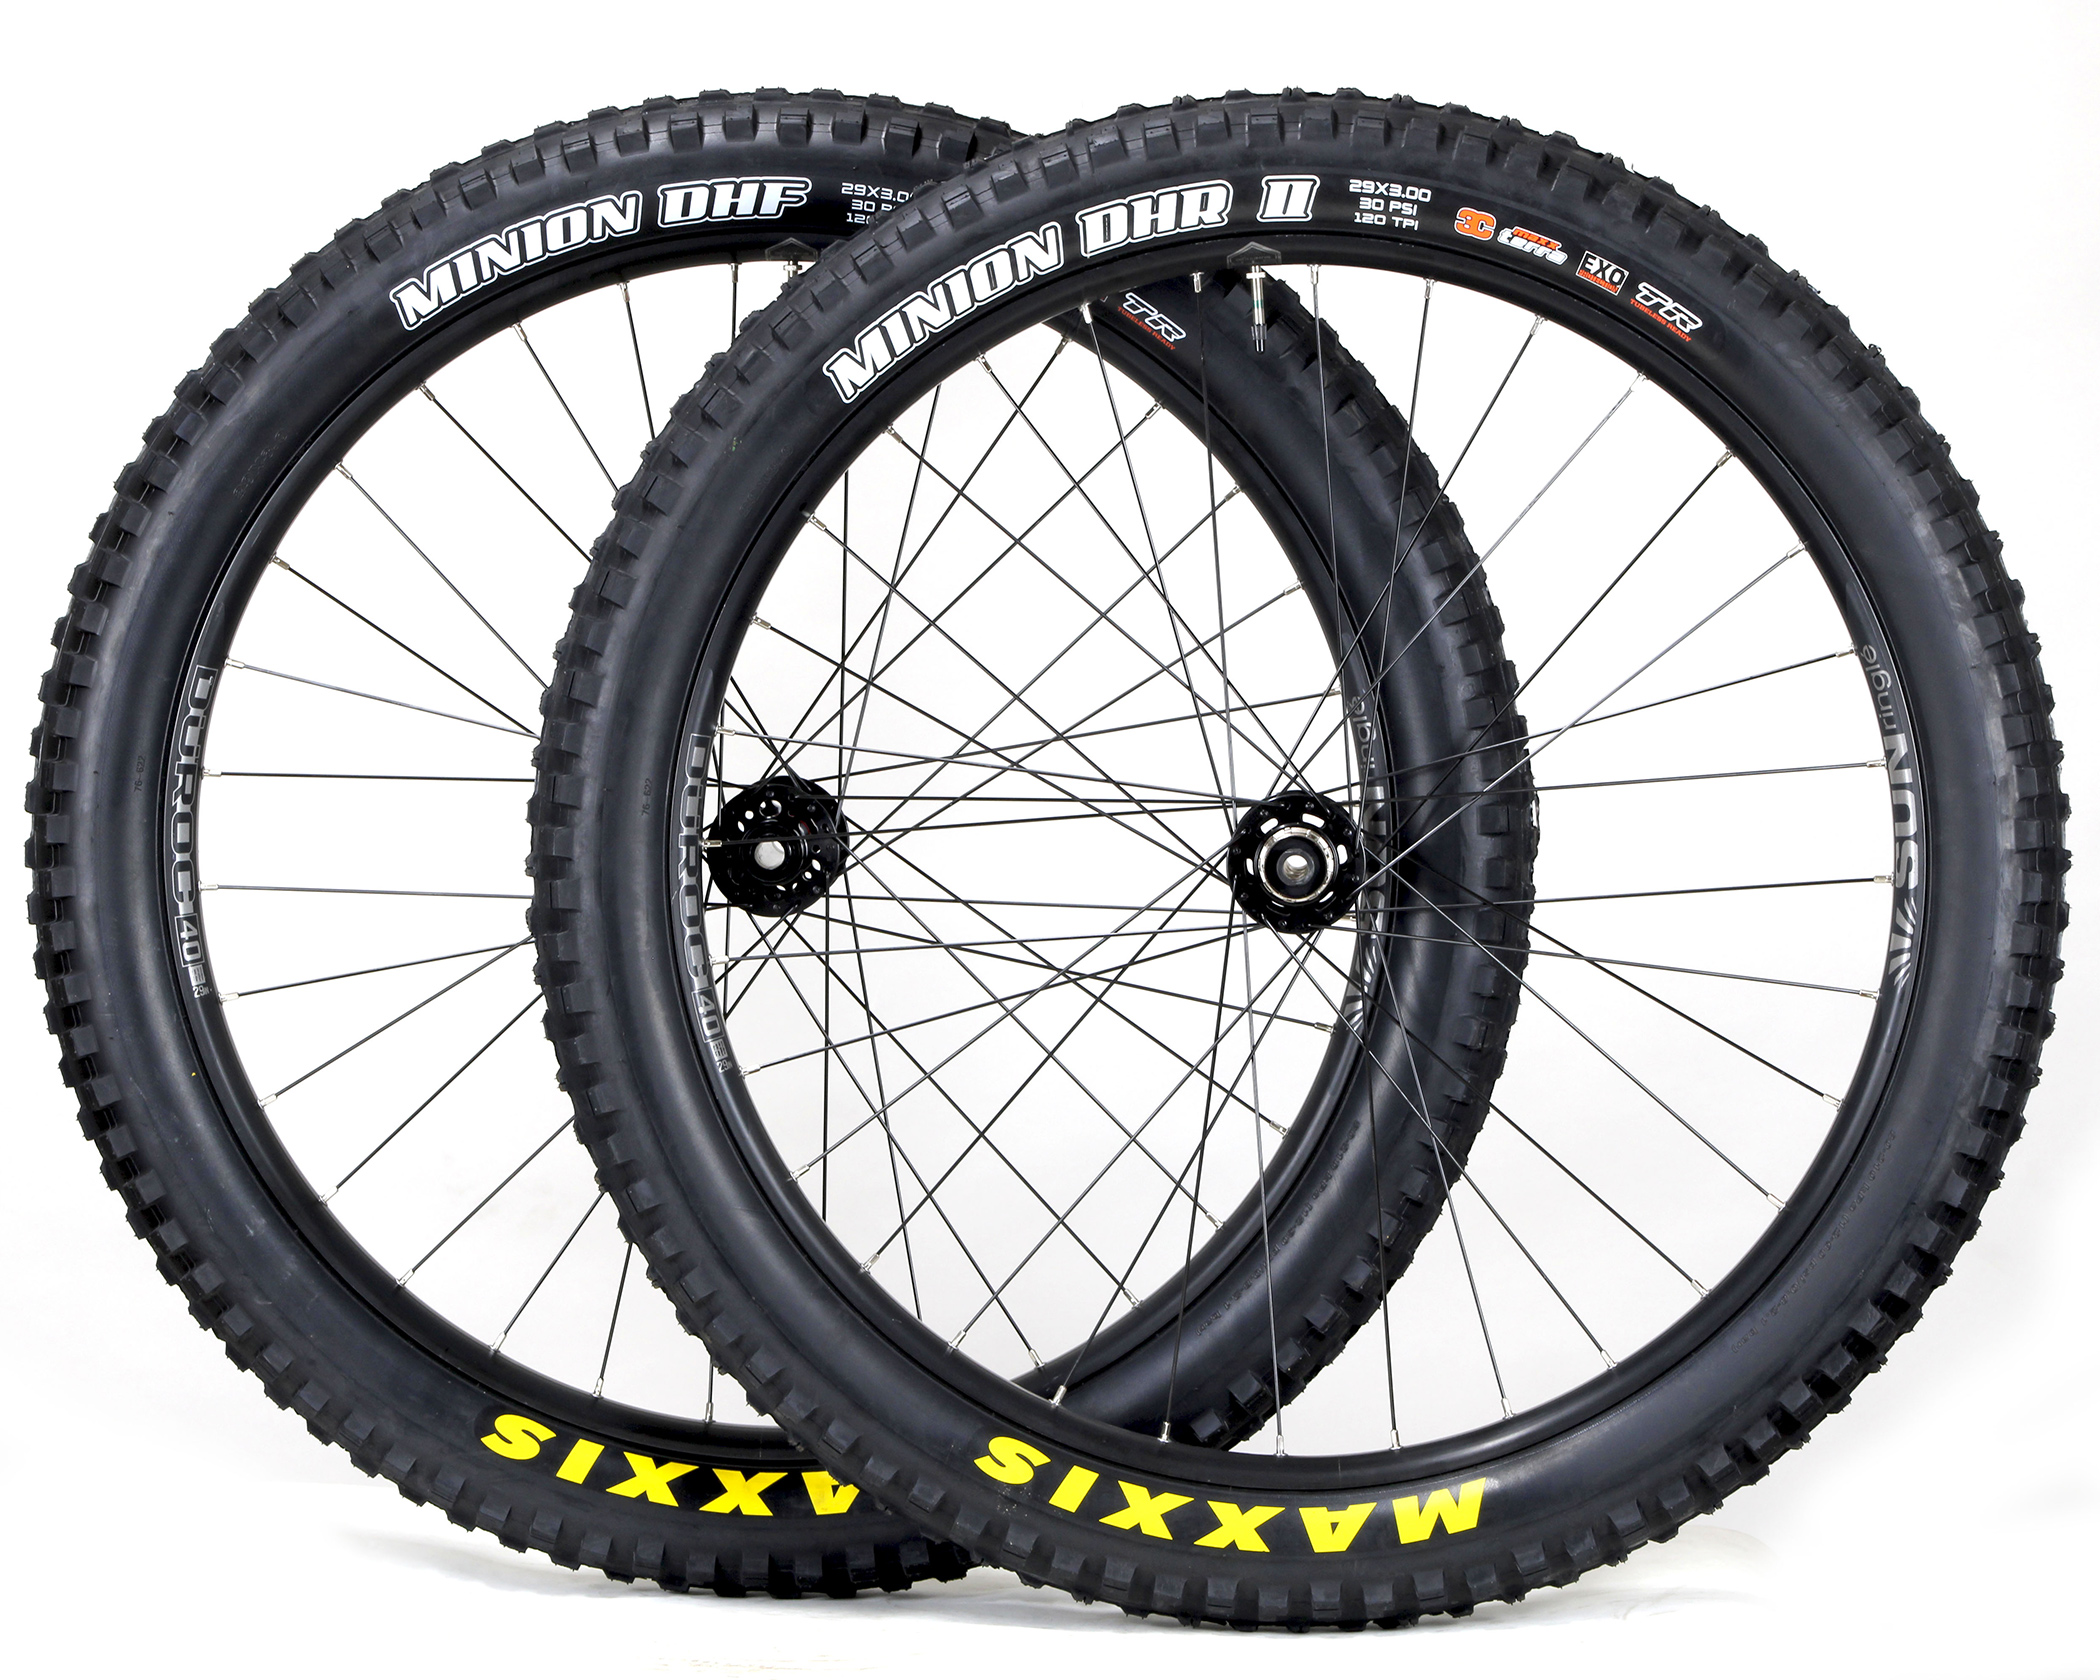
a wheelset by Bikesdirect.com

Tubed Setup

  • Very simple: mount tire, insert tube, inflate.
  • If flat, remove, patch or replace tube, remount.
  • Spare tubes are cheap; patch kits are small.
  • Virtually no sealant or tape issues.

Tubeless Setup & Maintenance

  • Mounting / initial inflation: Getting the bead to “pop” and seal can be fiddly. Some rims/tires need an air blast or compressor.
  • Sealant upkeep: The sealant dries over time; you’ll need to replenish periodically (every few months, depending on temperature/use).
  • Plug kits / sealant in the field: Carrying a plug kit helps if the sealant doesn’t fully seal a cut.
  • Fallback tubes: Many tubeless riders still carry a tube in case of a catastrophic cut or failure.
  • Rim tape and valve care: You need high-quality rim tape (to cover spoke holes), secure tubeless valves, and ensure everything stays airtight.

In short: tubeless demands more occasional love—but many argue it’s worth the effort for the long-term gains.

Terrain & Riding Frequency: Which Setup for Which Use?

Let’s get scenario-specific so you can match setup to your reality.

Smooth Pavement & Commuting (Road, City, Tarmac)

  • Tubed systems are still totally valid. Reliability and ease of repair tend to matter more than every last watt.
  • But if your roads are imperfect (e.g. potholed, gravel patches) and you ride often, the comfort and puncture resilience of tubeless make sense.
  • On road bikes, many of the latest tubeless road tires now approach the classic clincher feel and speed.

Gravel, Mixed Surface, Bikepacking, Cyclocross

  • This is where tubeless shines. The ability to run lower pressure, self-seal small punctures, and reduce flats is a game-changer.
  • Many gravel and cross tires (including ones sold via us) support tubeless setups. For instance, we list the Challenge Chicane TLR33 as a tubeless-ready tire.
  • The rolling resistance benefit increases in this domain.

Mountain & Off-road

  • Tubeless is already dominant in mountain biking for good reason: higher risk of punctures, rough terrain, and the need for lower pressures all favor tubeless setups.
  • But tubed setups still exist (e.g., in certain trail or lower-cost builds), especially if the rider wants simpler maintenance.

Occasional / Low-Mileage Riders

  • If your bike sits a lot or sees occasional use (commuter, weekend rides), tubes can be lower-maintenance overall (no dried sealant worries).
  • Tubed setups also tolerate periods of low pressure better without sealant drying issues.

Performance / Racing Riders

  • Marginal gains matter: every watt counts. Tubeless efficiency, lower rolling resistance, and fewer flats can tilt things in its favor.
  • But ease and confidence under pressure matter, and some racers still prefer tube systems for consistency and predictability.

Pros & Cons Summary

Here’s a side-by-side to help you see the trade-offs clearly:

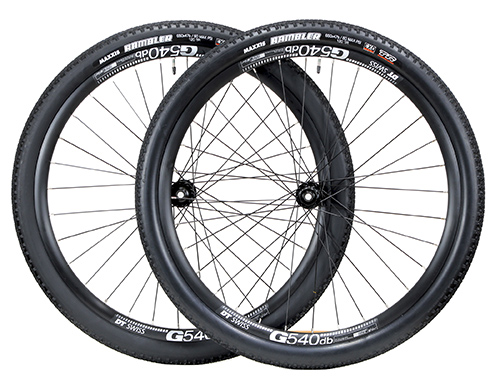
a wheelset by Bikesdirect.com
Feature / MetricTubed (Inner Tube)Tubeless
Ease of setup / repairVery simple, few partsMore fiddly, requires sealant & tape
Puncture casesTube puncture → flatMany small punctures auto-seal
Pinch flats riskHigh at low pressureEssentially eliminated
Rolling resistanceHigher, especially with butyl tubesLower; especially at low pressure / high volume setups
Weight (practical)Lightweight spare tubes, no sealantValve + sealant + stronger casings offset weight gain
Ride comfortGood (depends on tire)Usually better due to lower pressures
Maintenance demandsMinimal (patch + tube changes)Moderate (sealant, tape, plugs)
Best forCasual riders, commuters, simplicity loversGravel, mixed surfaces, frequent riders, performance-focused

How to Decide What Fits You

Pulling all of this together, here’s how you can decide what works best for you:

  1. Ask your terrain
    1. Mostly smooth roads and commuting? Tubed is safe, simple, and proven.
    1. Mix of rough roads, gravel segments, or remote routes? Tubeless gives more margin.
  2. Check your rims & tires
    1. If your rims are tubeless-ready (or adaptable), the barrier to entry is lower.
    1. If your tires (or your preferred models) don’t support tubeless, you’d need to replace them.
  3. Consider riding frequency & maintenance comfort
    1. If you ride often and don’t mind tinkering, tubeless is attractive.
    1. If you want minimal fuss, a tubed system wins for low overhead.
  4. Weigh benefits against trade-offs
    1. Do you value every watt saved? Then tubeless may justify the effort.
    1. Do you value reliability and ease in the field more than marginal gains? Tubed is still reliable.
  5. Be ready to hybridize
    1. Many riders run tubeless but still carry a spare tube (just in case).
    1. Some use tubeless on rear wheel and tube on front, or vice versa, depending on conditions.

Tips for Transitioning to Tubeless (If You Choose That Route)

If you decide to go tubeless, here are a few helpful pointers:

  • Use good quality rim tape to prevent leaks from spoke holes.
  • Choose sealant rated for your temperature range.
  • Use a high-volume pump or compressor to get the bead to snap into place.
  • After mounting, spin and shake the wheel to distribute sealant evenly.
  • Check for leaks (listen or spray soapy water).
  • Keep a plug kit or slim spare tube in your saddlebag.
  • Replenish sealant periodically (often every 2–6 months, depending on climate and use).
  • If a cut is too big, sometimes you can “fault-tube” it: insert a tube anyway as a backup.

Final Thoughts

There’s no one-size-fits-all answer between tubeless and tubed. If you want simplicity, easy repairs, and low overhead, tubed systems remain valid—even today. But if you ride frequently, crave fewer flats, and want that smoother, more confident ride across mixed surfaces, tubeless often delivers meaningful advantages.

At BikesDirect.com, we’re proud to carry a broad selection of tubeless-ready tires (like the GravelKing SK) as well as classic clinchers, so whatever your path, you can build a setup that reflects how you ride.

Your optimal choice depends on your roads, your patience for maintenance, and how much you value ride feel vs. ease. Take your time, test things out, and don’t be afraid to swap or tweak as your riding evolves.

Let’s Ride Smarter Together

Ready to Choose Your Setup?

Whether you’re eyeing a Hybrid Bike or pushing limits on a Road Bike, dreaming of adventures on a Gravel Bike or carving trails with a Mountain Bike, we’ve got your back. Browse our lineup at BikesDirect.com, check out our warranty policy, and learn our story.
Need help picking the right tire or setup? Call now—we’re ready to help.

Beginner to Pro: How to Train Smarter with Your Bike

Picture this: you buy your first bike, excited to hit the road, and within weeks you’re racking up miles, feeling the wind, and discovering new routes. But soon, you hit a plateau. No matter how far or fast you go, progress stalls. This is where cycling training tips matter most. Riding smarter—not just harder—can transform your experience from casual spins to professional-level performance.

The beauty of cycling is that it’s a sport for every stage. Whether you’re pedaling a road bike to increase endurance, a mountain bike to build power on trails, or even a hybrid bike for balanced fitness, structured training can elevate your rides.

Building the Foundation: Consistency Over Distance

One of the biggest mistakes new riders make is chasing miles. Logging long rides feels rewarding, but real growth comes from consistent effort. The best cycling training tips emphasize routine—shorter, regular rides often outperform occasional endurance slogs.

If you ride three to four times a week, even for 30–60 minutes, you’ll develop stronger cardiovascular fitness and muscular endurance. Beginners often see results faster by mixing flat spins with small hills, allowing their body to adapt gradually. Once that base is set, the longer weekend rides become both more enjoyable and more effective.

Technique Matters More Than Speed

Ask any seasoned rider, and they’ll tell you: efficiency is everything. Smooth pedaling technique can save energy on climbs and give you power when sprinting. Beginners often “mash” pedals with brute force, while pros focus on circular motion—pushing and pulling evenly throughout the stroke.

On a road bike, cadence training (keeping a steady pedal rhythm) helps reduce fatigue. On a mountain bike, learning to shift gears early before steep terrain can prevent wasted energy. Even a casual spin on a beach cruiser feels smoother when you adopt these pro habits.

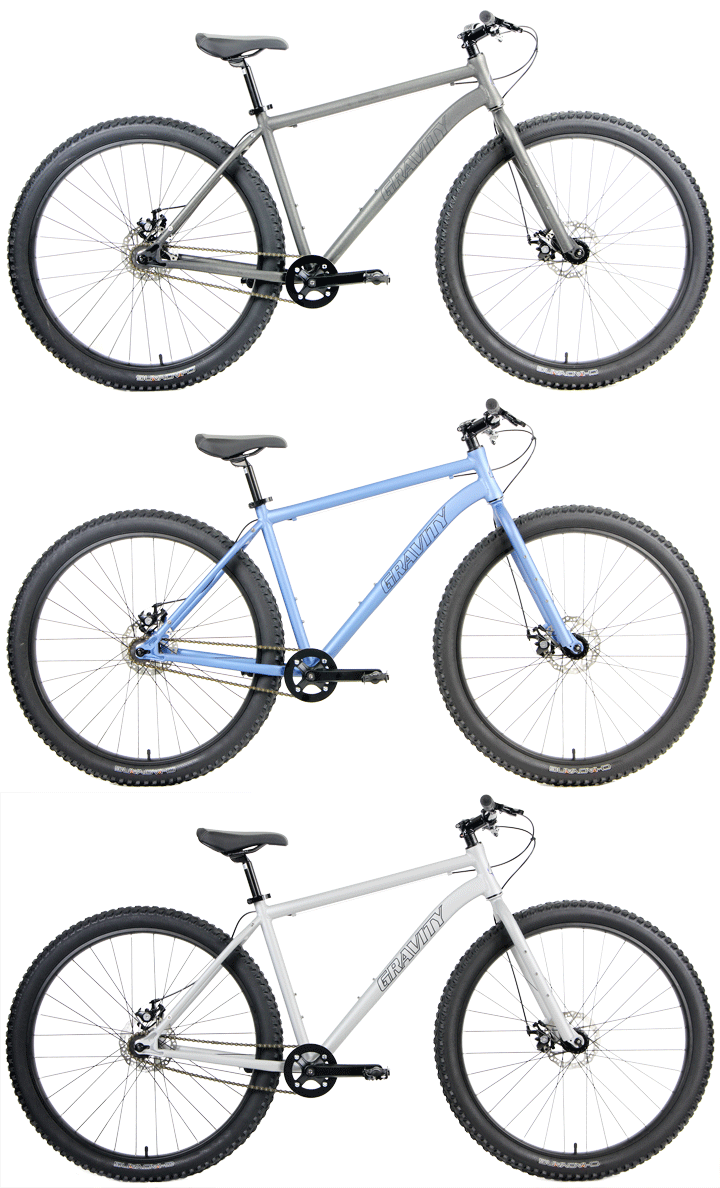
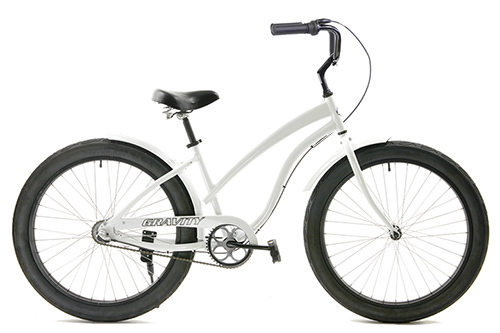
White Gravity beach cruiser with wide tires for casual rides.

Nutrition: Fuel for Smarter Training

Cycling burns serious calories, but training isn’t just about output—it’s about fuel. Many new riders skip meals or rely on quick sugar fixes. Instead, think like a pro: balance carbohydrates for energy, protein for recovery, and hydration for performance.

On longer rides, small snacks like bananas, energy gels, or trail mix can keep your energy consistent. Even casual riders on a gravel bike will notice how proper nutrition reduces fatigue. After training, recovery meals rich in lean protein and complex carbs help muscles repair, making your next ride stronger.

Training with Intensity, Not Just Volume

Progress in cycling doesn’t come from endless miles but from intentional training. Interval sessions—alternating between high effort and recovery—boost cardiovascular performance and power output. Hill repeats, where you climb the same slope several times, can build incredible leg strength.

For example, a rider training on a fat bike in sand or snow naturally works in resistance intervals, strengthening muscles and improving balance. Meanwhile, urban riders using a hybrid bike can replicate interval training with stoplight sprints on city streets.

The key is variety. Mixing endurance rides, interval days, and recovery spins keeps training balanced and prevents burnout.

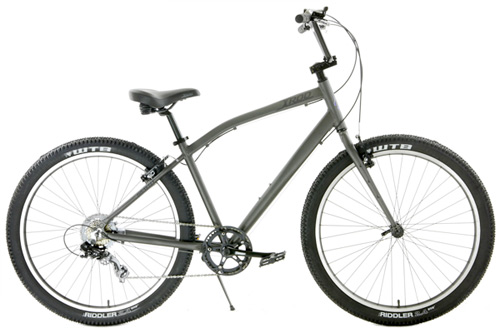
Silver Gravity mountain bike with oversized tires for rugged terrain

The Role of Recovery in Smart Training

Rest is not laziness—it’s strategy. Muscles grow stronger when they repair, not while you’re pushing them to the limit. Pros schedule rest days with as much discipline as training rides.

Yoga, stretching, and even gentle spins on a beach cruiser can aid recovery. Without rest, riders risk overtraining, which leads to injury, fatigue, and mental burnout. Beginners often overlook this, but adopting a pro’s recovery mindset is one of the smartest cycling training tips you can apply.

Equipment: Choosing the Right Bike for Your Training Goals

Your bike is not just a tool—it’s your training partner. Choosing the right model can accelerate progress. A road bike is perfect for endurance and speed. A mountain bike builds strength and technical handling on trails. A gravel bike offers unmatched versatility, making it a favorite for riders who train on both pavement and dirt.

For casual riders focused on comfort, a beach cruiser makes training fun and low-pressure. Even a fat bike can be a powerhouse for endurance when training in extreme conditions. The right equipment not only supports smarter training but also keeps motivation high.

Setting Realistic Goals and Tracking Progress

Every rider dreams of personal milestones—whether it’s a first 50-mile ride, climbing a tough trail, or competing in a local race. The best way to achieve these is by setting measurable goals.

Begin with short-term achievements, like improving your average speed over a 10-mile loop or climbing a local hill without stopping. Then build toward long-term goals, such as completing a charity ride or mastering a century.

Modern apps and bike computers make tracking easier than ever. Seeing weekly or monthly progress not only motivates but also provides valuable feedback on which cycling training tips are paying off.

Blue Gravity hybrid bike blending comfort and speed for versatile rides.

The Mental Side of Training

Cycling is as much a mental game as it is physical. Long climbs test patience, and intense intervals challenge focus. The pros often speak about “mental endurance”—the ability to keep going when your legs want to stop.

Riding with friends or joining group rides can make training more enjoyable and push you further. Even a relaxed cruise on a hybrid bike with neighbors can strengthen discipline and consistency. Learning to embrace discomfort and stay positive through challenges is what transforms a beginner into a seasoned rider.

From Beginner to Pro: A Lifelong Journey

What sets pros apart isn’t just fitness—it’s mindset. They know when to push hard, when to rest, and how to listen to their body. Most importantly, they ride with passion.

Cycling is a sport you can enjoy for life. Whether you’re racing on a road bike, exploring new trails on a mountain bike, or simply enjoying weekend spins on a beach cruiser, the smarter you train, the more rewarding the journey becomes.

Conclusion: Train Smarter, Ride Stronger

Cycling is more than a workout—it’s a pathway to growth, resilience, and discovery. By focusing on consistent training, proper technique, balanced nutrition, and recovery, you can steadily transform from beginner to confident rider.

No matter your bike—whether it’s a sleek road bike, a rugged mountain bike, or a versatile gravel bike—the key is training smarter, not harder.

Now’s the time to take your cycling to the next level. Explore the wide range of bikes available at Bikesdirect.com, find the ride that fits your goals, and start your journey today.

Clipless vs Flat Pedals: Finding the Right Connection for Your Ride

When you hop on a bike, those little platforms under your feet—pedals—are one of the few points of contact to the machine. It’s where you ask your legs to turn effort into forward motion. But not all pedals are created equal. The two major camps in the pedal world are clipless and flat (platform) pedals. Each offers a different kind of “connection” to your bike, and understanding their trade-offs will help you choose what fits your goals, style, and terrain best.

In this article, we’ll dig into how clipless pedals enhance power transfer, how flat pedals offer freedom and versatility, the real-world tradeoffs, and how to match your pedal style to your riding ambitions. And yes—we’ll even peek at what the research says.

What Does “Clipless” Even Mean?

First, a little myth-busting: clipless pedals don’t mean “no clip.” The name is a throwback to older systems that used toe clips (the cage-and-strap system). Clipless systems let your cycling shoes clip in via a cleat that locks into the pedal’s mechanism.

When you’re clipped in, your foot is more securely connected to the pedal, meaning less slipping and more efficient transmission of force. But, as with most things in cycling, it’s not a magic bullet. There are tradeoffs.

How Clipless Pedals Improve Power Transfer

If you’re chasing speed, efficiency, or performance, clipless pedals often come up in the conversation—and for good reason. Let’s break down how they can help you squeeze more out of your legs.

1. A More Direct Connection: Less Wasted Movement

One of the biggest advantages of clipless systems is that you eliminate much of the micro-slippage or foot shifting that can happen on flat pedals, especially under high load or in rough terrain. When your foot is latched in, your energy is less “leaky.” That means more of your muscle power goes straight into driving the cranks.

2. Compression of the Pedal Stroke

In high-performance riding—sprints, steep climbs, fast accelerations—being clipped in lets you “draft” a little more force onto that upstroke or help carry the pedal over the “dead spot” near top-dead-center. In practice, elite riders often press hard on the downstroke and minimize upward pulling, but the security of being clipped in allows for more aggressive pedaling styles without fear of losing contact.

For example: in one racing or sprint context, clipped-in cyclists produced ~16.6% more maximum power compared to flat-pedal setups. Also, in a master’s thesis comparing flats, toe-strap, and clipless pedals, average power for short maximal intervals was significantly higher with clipless systems.

3. Better Performance Under High Load

When your speed is up, cadence is high, or you’re climbing hard, small inefficiencies or foot slips matter more. Clipless systems shine in those conditions. One field test showed that clipless setups cut climbing time by ~26 to 41 seconds over flat-pedal setups on comparable climbs. In controlled outdoor sprint tests, clipped-in riders also outperformed flat users in peak wattage scenarios.

Also, a recent study found that the combo of stiff-soled cycling shoes and clipless pedals boosted sprint metrics by ~7–9 % over flexible, non-cycling shoe setups. That suggests that for short bursts or all-out efforts, clipless systems give you a tangible edge.

4. Consistency and Confidence in Pedal Strokes

In high-performance settings—riding fast descents, navigating technical terrain, or shifting your pedal mechanics mid-race—knowing your foot won’t shift helps your brain focus more on line choice, cadence, and strategy. That reliability is one intangible benefit that advanced riders often cite.

a mountain bike by Bikesdirect.com

Why Flat Pedals (Platform Pedals) Still Rule for Many

Clipless systems tend to hog the spotlight, but flat pedals remain relevant—and for good reason. In many riding styles, their advantages outweigh the marginal gains of clipless systems.

1. Unlimited Foot Position Freedom

On flat pedals, you can shift your foot placement instantly—move forward, back, angle inward, angle outward—to adapt to terrain, jumps, obstacles, or balance demands. That freedom is especially valuable for mountain biking, technical descents, or when you want to dab quickly on loose surfaces.

2. Easy Entry/Exit and No Learning Curve

Flip the bike to a stop, put your foot down instantly—no twisting your heel, no unclip tension settings, no fumbling. For many riders—urban, commuter, casual—this is a massive psychological ease. You don’t have to babysit your pedal technique.

3. Use Whatever Shoes You Want

You’re not bound to cycling shoes. Ride in sneakers, sandals (if brave), or multi-purpose footwear without needing special cleats. That’s big for someone using their bike for errands, commuting, or casual cruising.

4. Fewer Hardware Complications & Maintenance

No cleats, springs, release tension mechanisms, or delicate systems to adjust. Platform pedals tend to be robust, simple, and forgiving. Especially in muddy, gritty, or harsh conditions—flats don’t get clogged with mud the way some clipless designs can.

5. Nearly Comparable Efficiency in Many Cases

Here’s where things get interesting. Several studies and real-world tests suggest that for steady-state, moderate-intensity riding, the efficiency difference between clipped-in and platform setups is negligible. In those scenarios, the difference in overall power output is minimal. Cycling UK notes that outside of maximum-effort sprints or climbs, a clipped-in advantage is often minimal.

Some GCN tests even showed flat pedals holding their own on time trials, hill climbs, and casual sprint segments when matched with good shoes and pedal setups. That doesn’t mean flats outperform clipless in every scenario, but it means the gap isn’t always massive for many riders.

Tradeoffs & Real-World Considerations

Because neither system is perfect, your choice boils down to matching tradeoffs to your riding style, goals, and personality.

Learning Curve & Safety

Clipless systems bring a learning period. The classic rookie move is failing to unclip at a stop and tipping over. That’s part of the rite of passage. Many systems allow easy tension adjustment to ease you in. Flat pedals, by contrast, require no adaptation. You just put your foot down.

Terrain & Riding Discipline

  • Mountain bikes / technical trails: Many mountain bikers prefer flat pedals for ease of recovery, ability to reposition, and quick dabs on technical ground.
  • Gravel / mixed terrain: This is a sweet spot. Some gravel riders favor clipless systems to take advantage of efficiency on long stretches, yet want stability for rough terrain, hiking segments, or unexpected walk sections. As a result, dual-sided clipless MTB-style pedals (e.g., SPD) are common.
  • Road / performance / racing: Clipless is nearly ubiquitous because uninterrupted power transfer and foot security matter more.
  • Commuting / urban riding: Frequent stops, traffic lights, errands, and unpredictable conditions push many to stick with flat pedals. But some commuters do adopt clipless systems—especially for longer rides—if they’re comfortable unclipping on demand.

Comfort, Fit & Injury Risk

Clipless systems force more precise foot placement. If your cleats are misaligned, you risk knee pain over time. On the flip side, platform pedals can force more micro-adjustments mid-ride, especially under load, which may strain joints depending on your riding style.

a mountain bike by Bikesdirect.com

Cost & Accessories

Going clipless usually means buying cycling-specific shoes, cleats, possibly multiple pedal systems (e.g., switching pedal styles between bikes). Platforms let you ride with minimal gear. Also, flat pedals tend to be more tolerant of rugged conditions and lower maintenance.

Versatility & Practicality

Flat pedals excel in practical versatility—you can stop anywhere, wear any shoes, run errands, cross terrain without thinking about cleats. If your ride isn’t purely about performance, those everyday conveniences matter.

Which Pedal System Suits Your Riding Style?

At the end of the day, your ideal pedal probably leans on what you ride, where you ride, and what you’re after. Let’s map some scenarios:

Riding Type / GoalLikely Best Pedal StyleWhy
Competitive road, club rides, long distanceClipless (road-style or performance)Every watt counts, foot security, aero gains
Trail riding, downhill, jumps, technical terrainFlat pedals (platform)Flexibility, quick foot placement, safer dabbing
Gravel / mixed terrainClipless MTB / dual-sided or hybridsEfficiency on flow, but flexibility when needed
Commuting / errands / urbanFlat pedals, or easy-release cliplessUrban stops favor flat; but if confident, clipless works
Casual rides, bike paths, socialFlat pedalsNo fuss, no gear, maximum ease

You don’t always have to pick one forever. Some cyclists mix & match: flats on a mountain bike, clipless on road rigs. Or use hybrid pedals (clip on one side, flat on the other) as a compromise.

Tips for Transitioning & Maximizing Your Pedal Setup

  • Ease in the tension on clipless pedals when first starting; crank tension low so you can unclip more easily.
  • Practice unclipping in a safe area before hitting traffic or technical zones.
  • Use dual-release cleats (multi-release) if you’re new—they allow unclip from different angles.
  • Adjust cleat position carefully—even a few millimeters of misalignment can cause discomfort or injury.
  • On flat pedals, choose shoe + pedal combos with aggressive tread or pins for better grip.
  • Don’t expect instant gains—if you just switch to clipless, you might be slower initially until you adapt your pedal stroke and balance.
  • Clean and maintain your pedals/cleats. Mud, grit, and grime reduce performance and life.

Matching Pedals to Bike Types & Goals (via BikesDirect.com’s Lens)

  • Road Bike: Clipless is the norm. You’ll ride long, fast, and want that locked-in efficiency.
  • Gravel Bike: You’ll often want clipless (MTB-style) for long endurance sections, but with tolerance for rough patches or walking segments.
  • Mountain Bike: Flat pedals dominate for many riders due to flexibility, especially in technical terrain. But clipless MTB is also common in cross-country performance.
  • Hybrid / Commuter: Flat pedals shine in this space for ease, versatility, and casual riding. Some opt for clipless if they ride long distances or want performance.
  • Fat Bike / Snow / Adventure: Flat pedals often make sense here because of the unpredictability of terrain and conditions.
  • Beach Cruiser / Casual: You probably won’t want clipless. Flat pedals (or stylized platform pedals) dominate for comfort and style.

So, depending on which bike you ride from BikesDirect.com, your ideal pedal could change.

 a mountain bike

The Final Verdict: Connect How You Ride

If you’re chasing every last watt, racing, or pushing into performance territory, clipless pedals give you a more direct, secure interface and—under load—real gains. But if your riding is about enjoyment, flexibility, casual outings, or mixed terrain, flat pedals might offer more real-world satisfaction with negligible tradeoffs in many situations.

Your decision should hinge on what kind of rider you are, what terrain you ride, and how much fuss (or gear) you’re comfortable managing. There’s no one-size-fits-all. The best system is the one you can ride with confidence, consistency, and joy.

If you’ve been riding flats your whole life and feel curious, try clipless for a season. Or the reverse: if you’ve always clipped in but want more adaptability, ride flats for a while. You might discover a sweet spot you didn’t expect.

Ride what feels right. And thanks to modern pedal systems, you can always change.

Let BikesDirect.com Help You Ride Better

Looking to match your pedal choice to your next bike? Thank you for choosing BikesDirect.com — we’ve been selling high-quality bicycles online for over 20 years. We believe in bringing you the best deals possible—some are almost unbelievable!

If you want to learn more about our business, visit our About Us page. Each bike comes backed by Warranty, giving you confidence in every purchase.

Thinking about your next ride? Explore our range of bikes — from Hybrid Bike and Gravel Bike to Road Bike, Fat Bike, Beach Cruiser, and Mountain Bike.

Questions or custom requests? Call now — our team is always happy to help you ride smarter, stronger, and in style.